A D.I.Y. KITCHEN MADE FROM SCRATCH
KITCHEN
- WOVEN PENDANT
- RUG
- WISHBONE COUNTERSTOOLS
- GOLD ADJUSTABLE STOOLS
- MINIMALIST CEILING LIGHTS
- HONED BLACK MARBLE TILE
- FLUTED DETAIL (OAK POLE WRAP)
- WHITE UNDERMOUNT SINK
- BRASS FAUCET
- SINK DRAIN
- RANGE HOOD
- MICROWAVE
- MARBLE SHELVES
- BRASS BRACKETS
- BRASS GALLERY RAILS
- MARBLE UTENSIL HOLDER
- ANTIQUE BRASS CABINET LATCH
- ANTIQUE BRASS CABINET KNOB
- ANTIQUE BRASS CABINET PULL
- TWO-TONED CURTAIN RODS
- BRASS CURTAIN RINGS
- LINEN-LOOK CURTAINS
- ELECTRIC KETTLE
- 4 OZ. SPICE JARS
- 8 OZ. SPICE JARS
I can hardly believe it, y'all. In just 2 months time, our home has evolved dramatically by improving just one space. It's probably the most important space in a home to be honest. It gets the most use & is truly the heart of the home! The kitchen.

With how open the kitchen is from the living room, I'm honestly surprised I allowed us to go this long (close to 6 years) with such a poor functioning space. In my mind, I avoided any projects in here because I knew it would end up extra pricey considering all that I imagine my dream kitchen to include. I wanted to start on this huge remodel when I could rip everything out .. but sometimes, it's better to just go. for. it. If I don't start this now, when will I ever? We could totally live in a home through different phases until the final design. That's what we've been doing unintentionally anyway, lol.
Let's refresh our minds with the original kitchen:
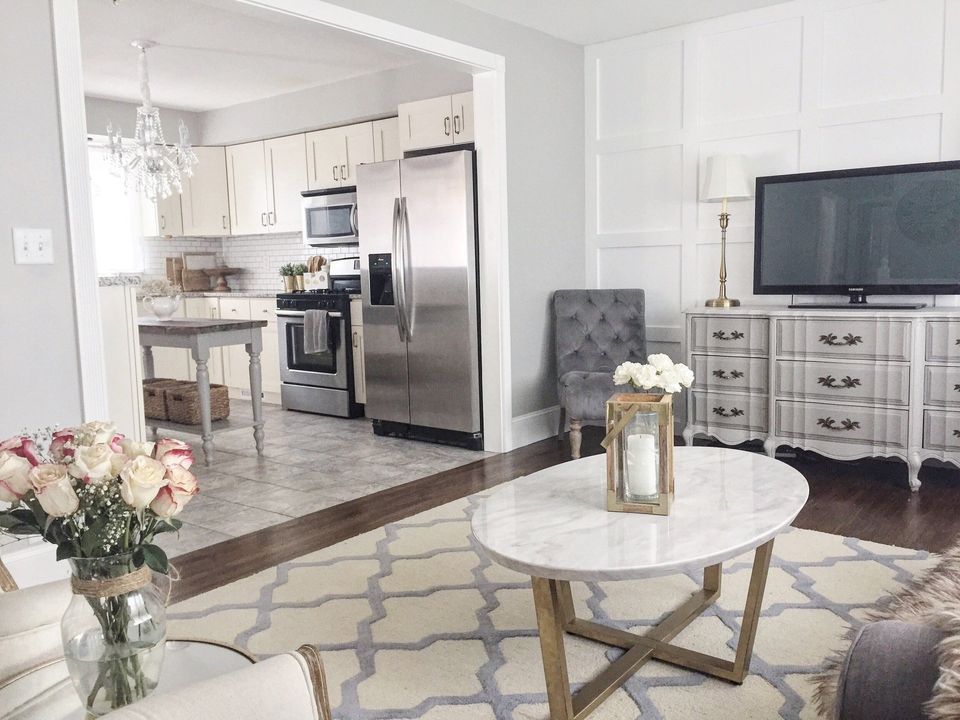
My kitchen - 5 years ago. Original cabinets were cream.
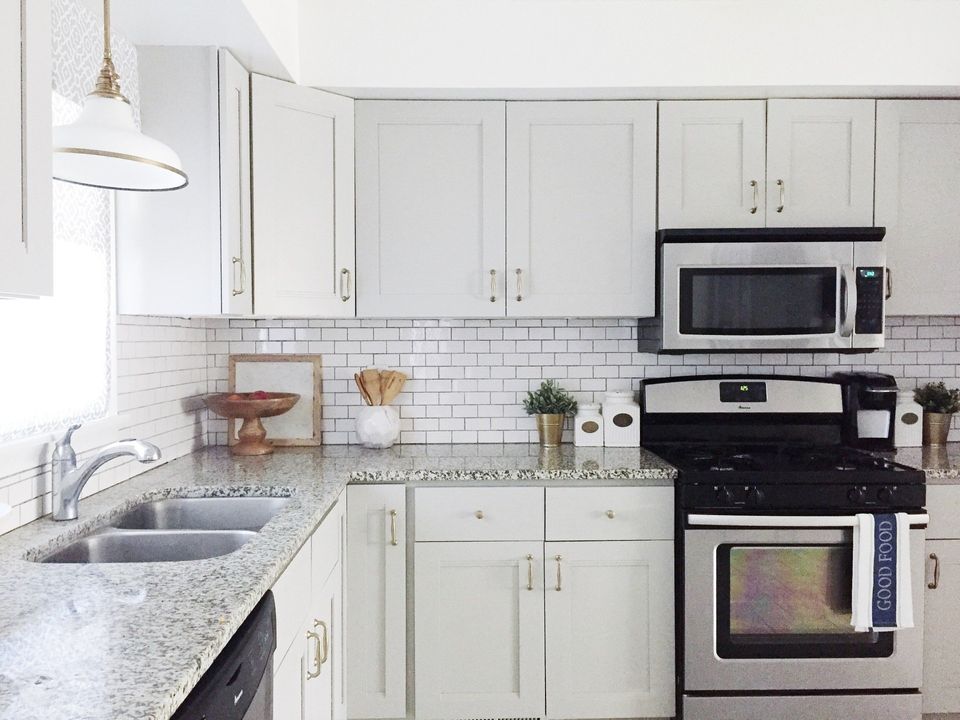
I already know what some of you may be thinking: the before didn't look bad! While that might be true, it's only true from a distance. The cabinets were so wonky. There were lots of crooked doors and they were made out of super cheap material. The paint was all chipped up. Nothing was holding up! I've had doors literally falling off the hinges and face frames falling apart. Most of the cabinets were useless because of the awkward size/placement.
Our original plan was to do a bandaid makeover by fixing up the doors with fresh paint & pulls. However, we've done that already once and it just wasn't good enough. I didn't want to waste time repeating that mistake. That was the moment of realization when I decided it would be best to just D.I.Y. a whole kitchen by rebuilding our own face frames & cabinet doors. In my mind, that seemed easier than sanding/painting cabinets.. (hahah who am I kidding)
Another HUGE reason for this kitchen remodel: the poor microwave vent. That thing did not have the greatest suction, which led to oil build up covering the ceilings, walls, cabinets, etc. I was so excited to say goodbye & have a new range hood installed!
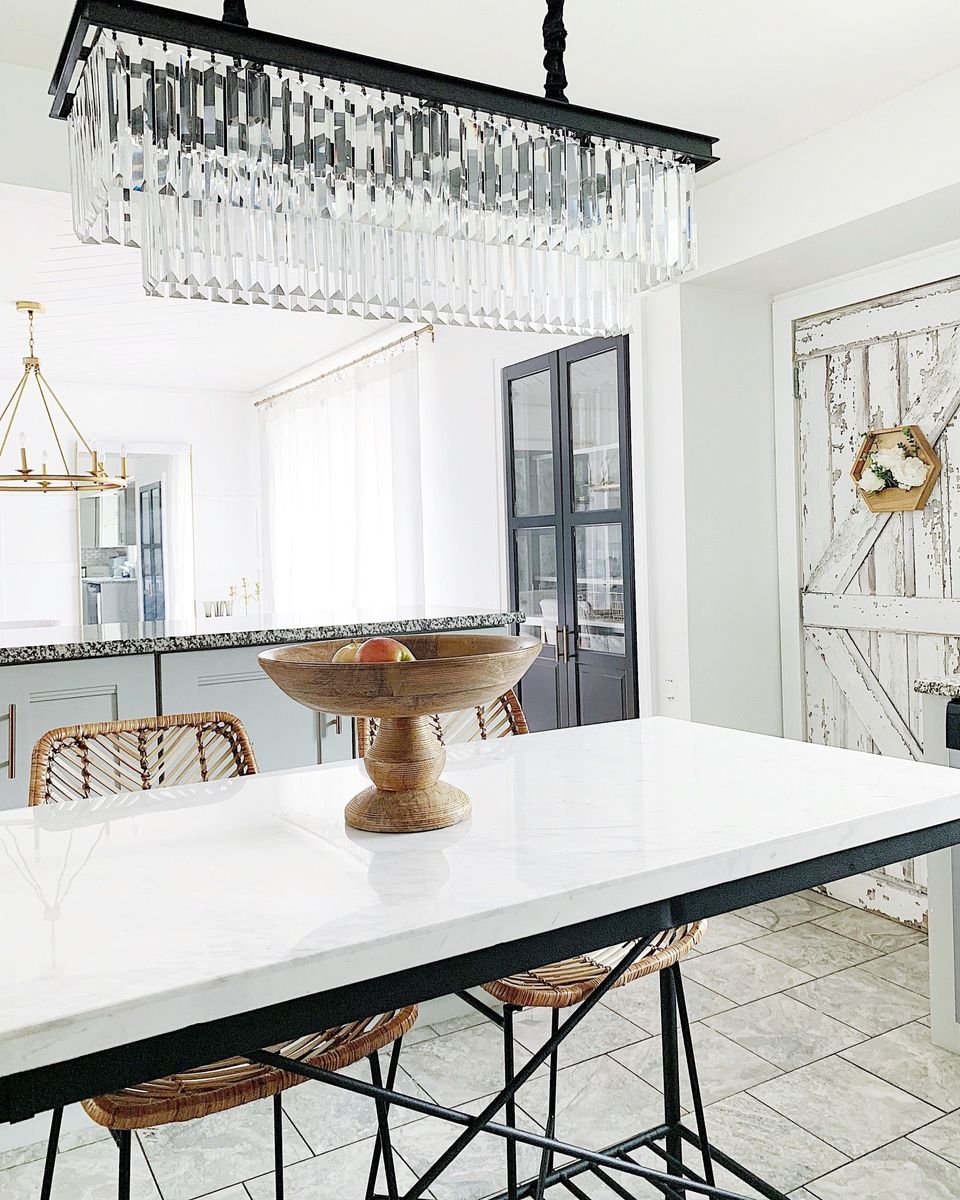
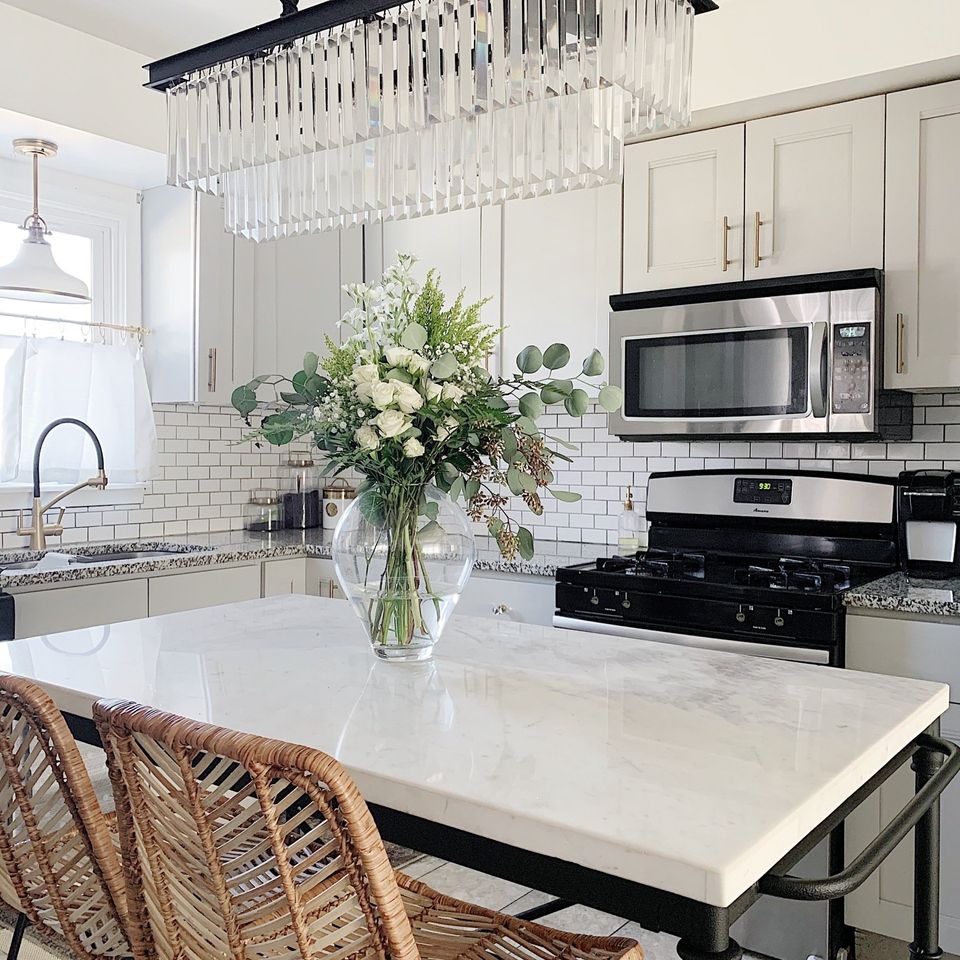
These are super throwback photos - when my dining room/pantry didn't have the pretty makeover that it does now. Who was following along when I designed this barn wood door? Haha, I'm so happy to have it gone! It was cute, just not my current style at all.
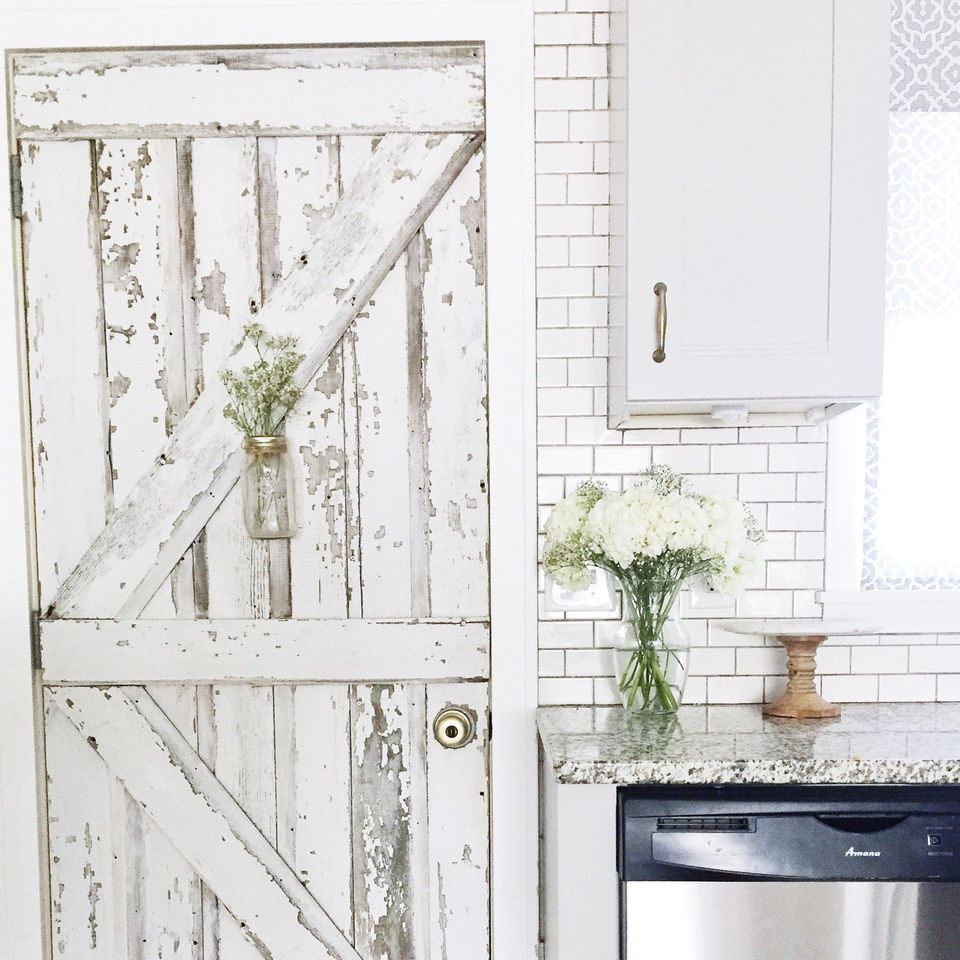
My past style was definitely "light & bright" which I now look back and feel like it did not have enough personality. It was so trendy before. You know, that all white faux farmhouse look. I really did enjoy it and I'm thankful for that phase of my life because it brought me to where I am now. All white interiors will always be classic but for my home - I crave for warmth, a little moody, unique, dimensional, elevated, a touch of fun but still sophisticated.
THE PROCESS
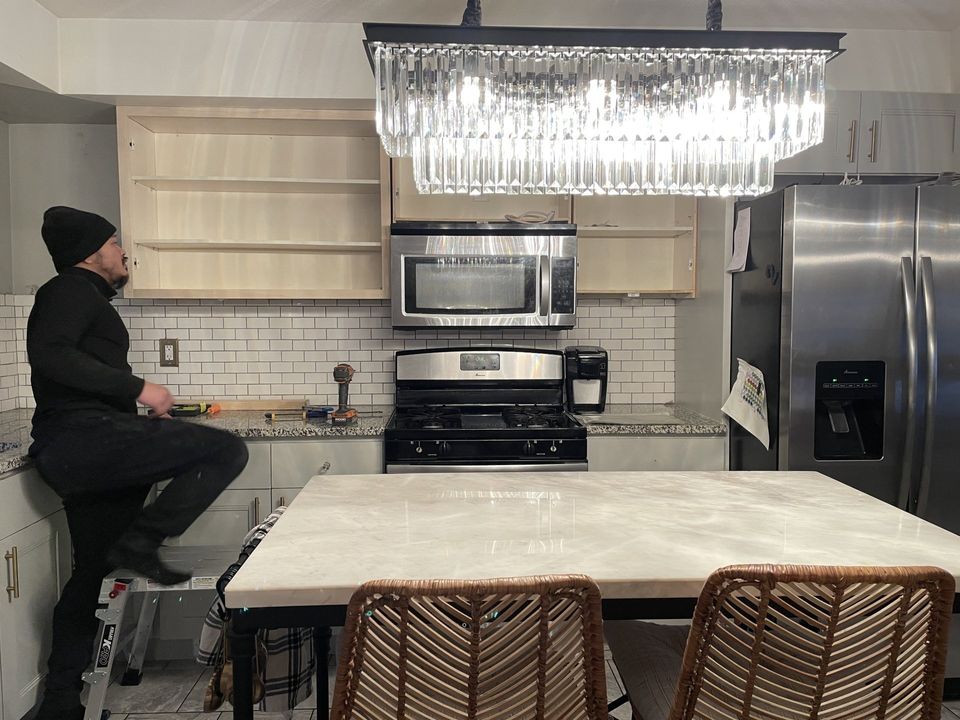
We started off by taking off the cabinet doors. Remember- we were only going to repaint them lol. After I decided we should just rebuild everything, I sketched up a design which included no upper cabinets. Instead, we'd build a hutch that sits on top of the counter to store all of our everyday dishes/cups.

I sketched up this little design to get an idea of what I wanted. All of the details came in at the last moment but I knew I wanted to create a focal point in the kitchen. That meant reworking the bottom cabinets to be symmetrical on each side of the range. The cabinets above the fridge needed to stay so I thought a hutch on the left side would help with symmetry. Plus, it would provide ample storage space considering we'd be losing most of the upper cabinets.
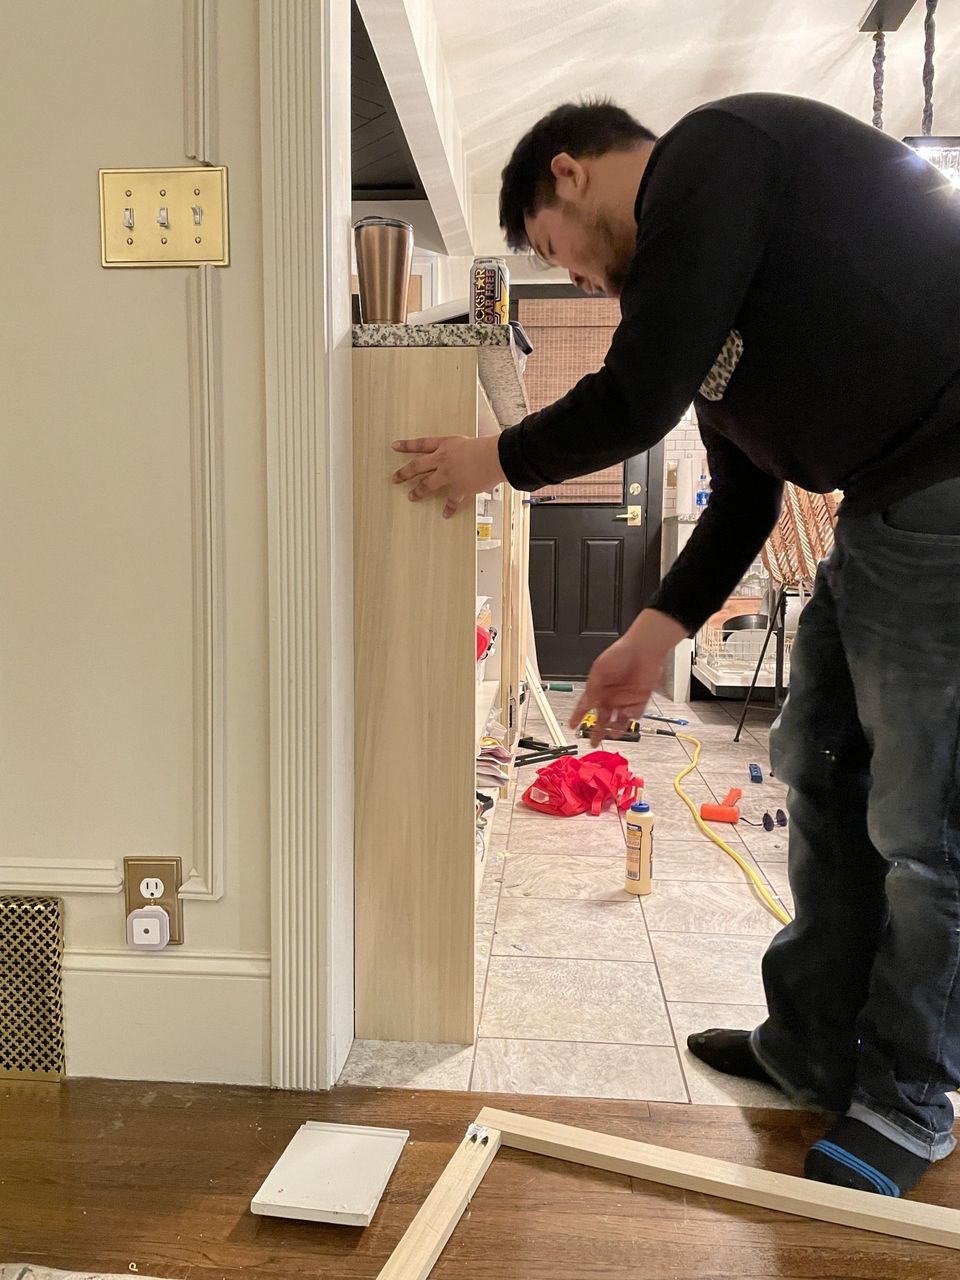
We first started on the tall counter "breakfast bar" area (as we call it). My fiancé covered the sides with new wood panels & ripped out the face frames to install new ones.
Face frames! All of the wood we've been using are Poplar & plywood (for the inside cabinet doors).
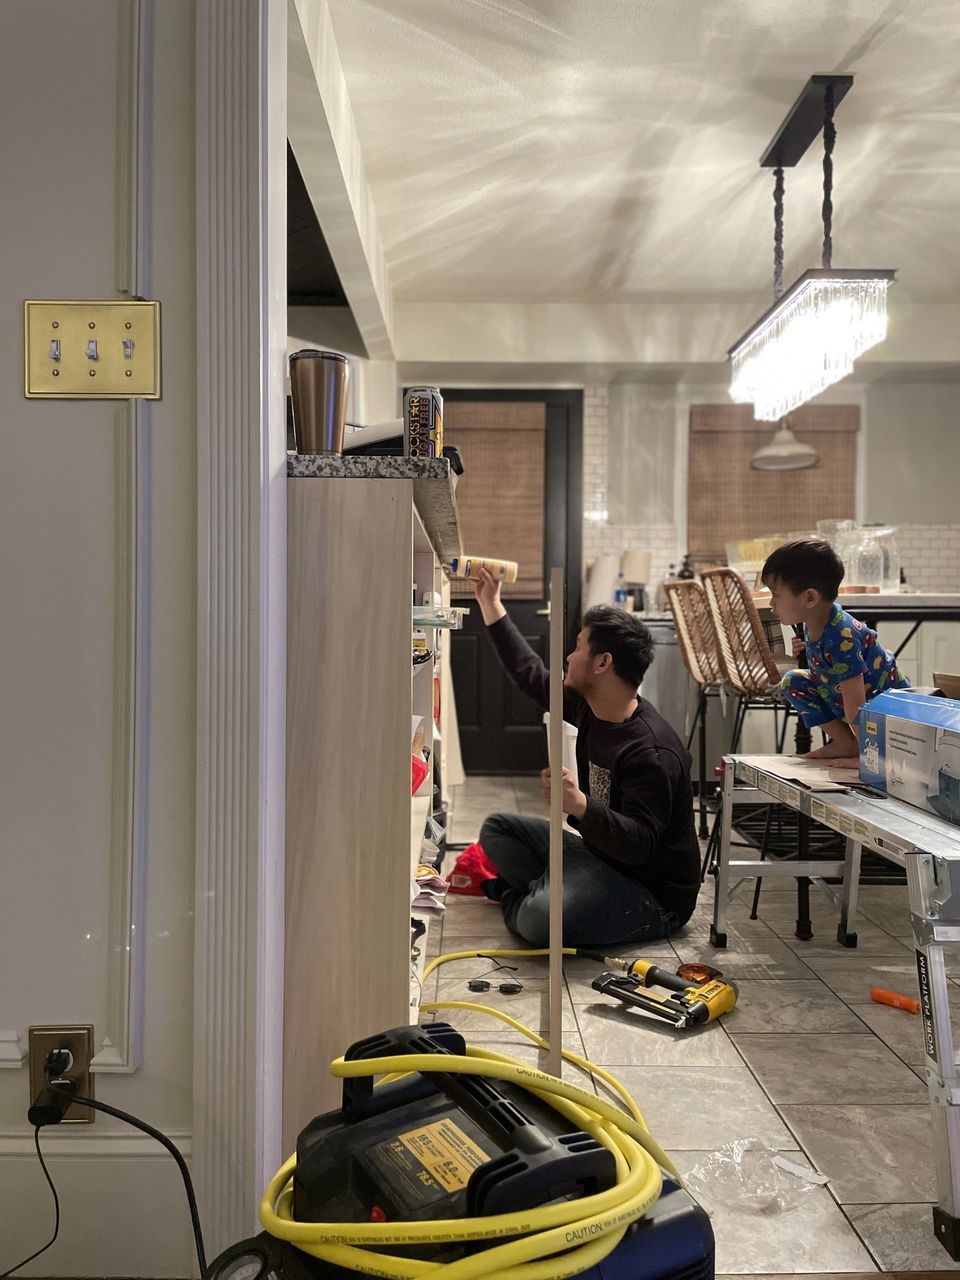
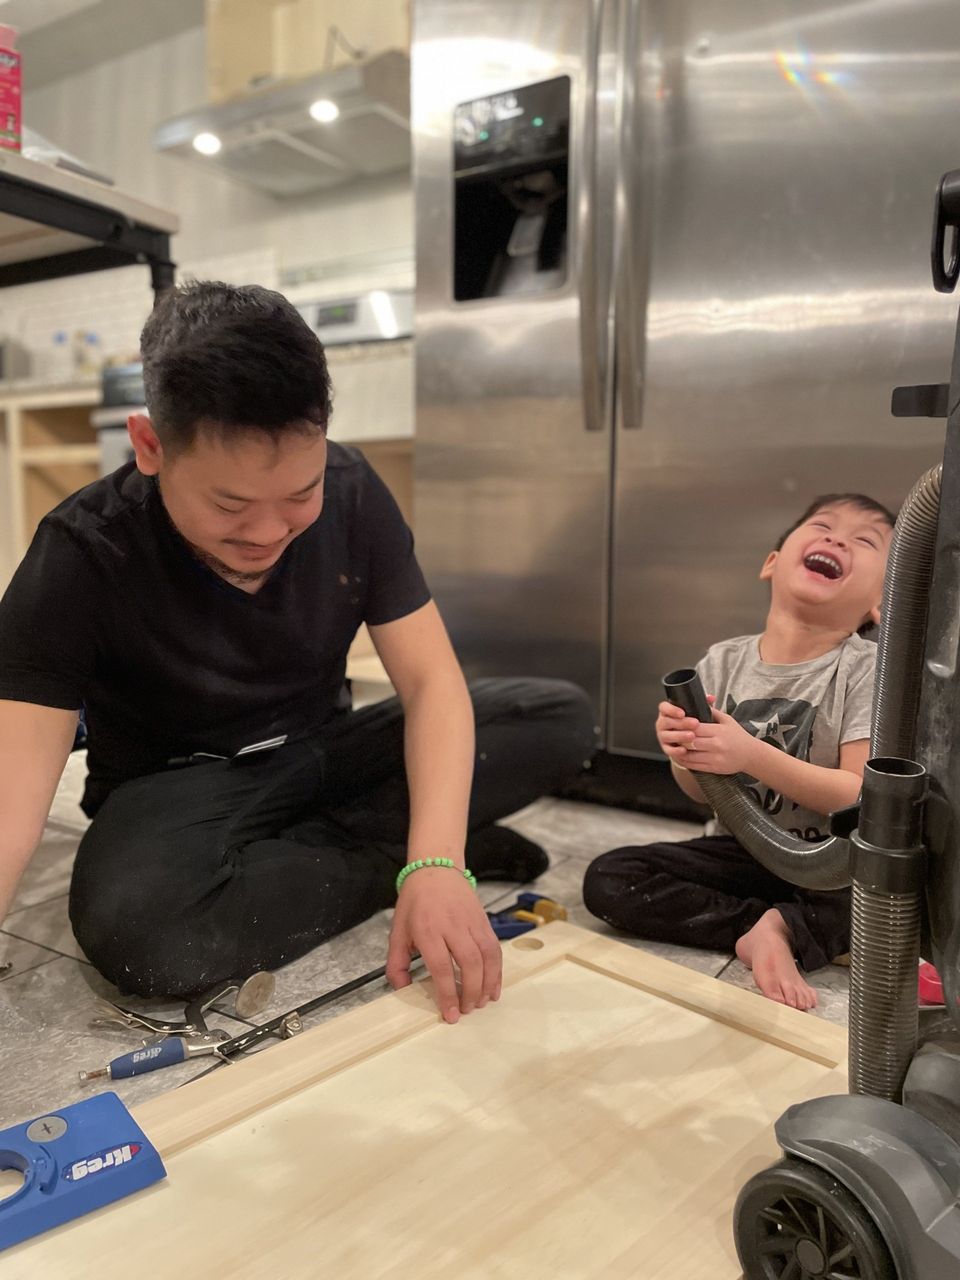
How sweet is my son? He shows so much interest in all of our house projects!
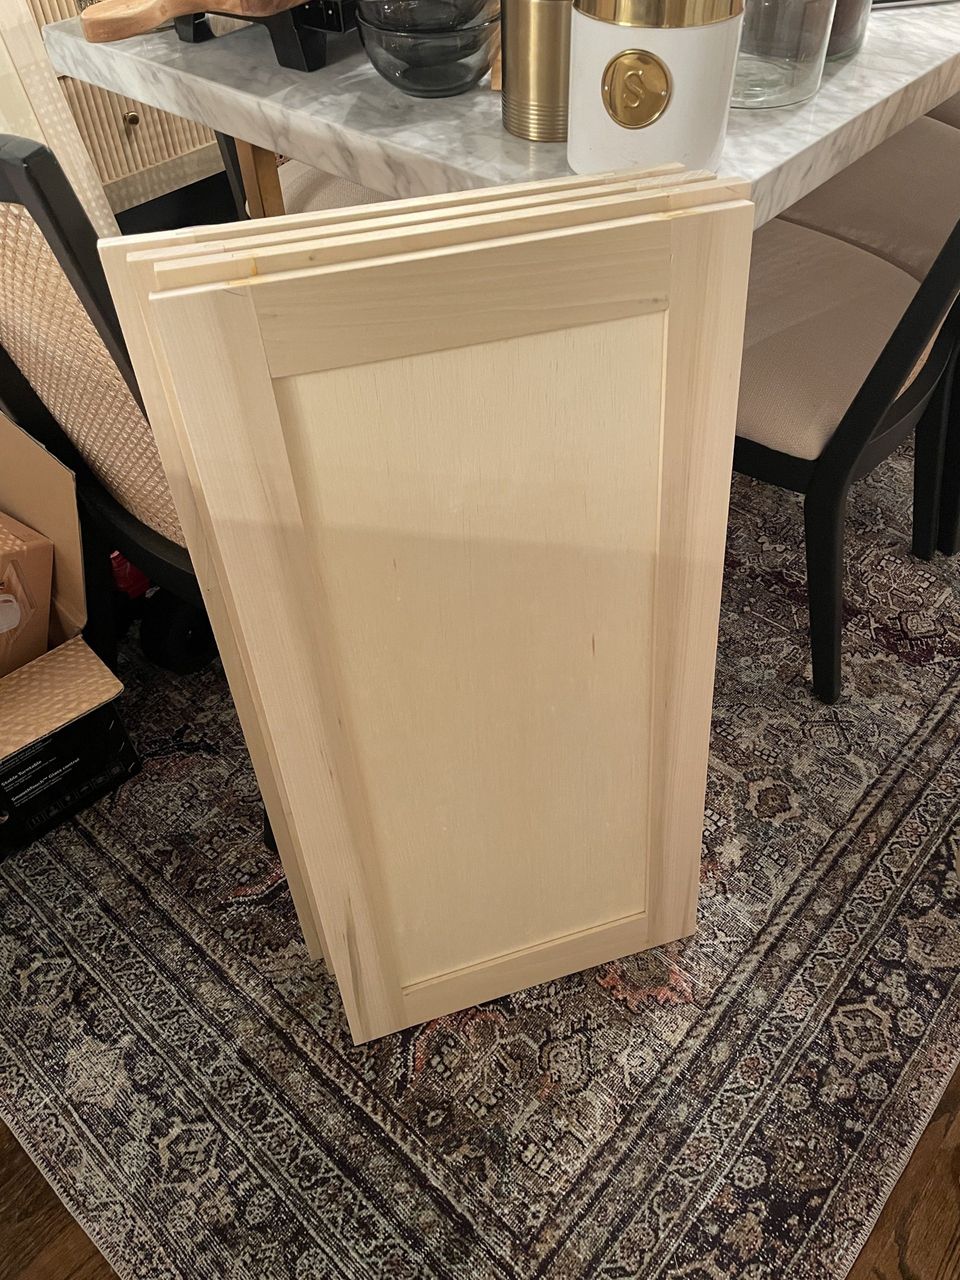
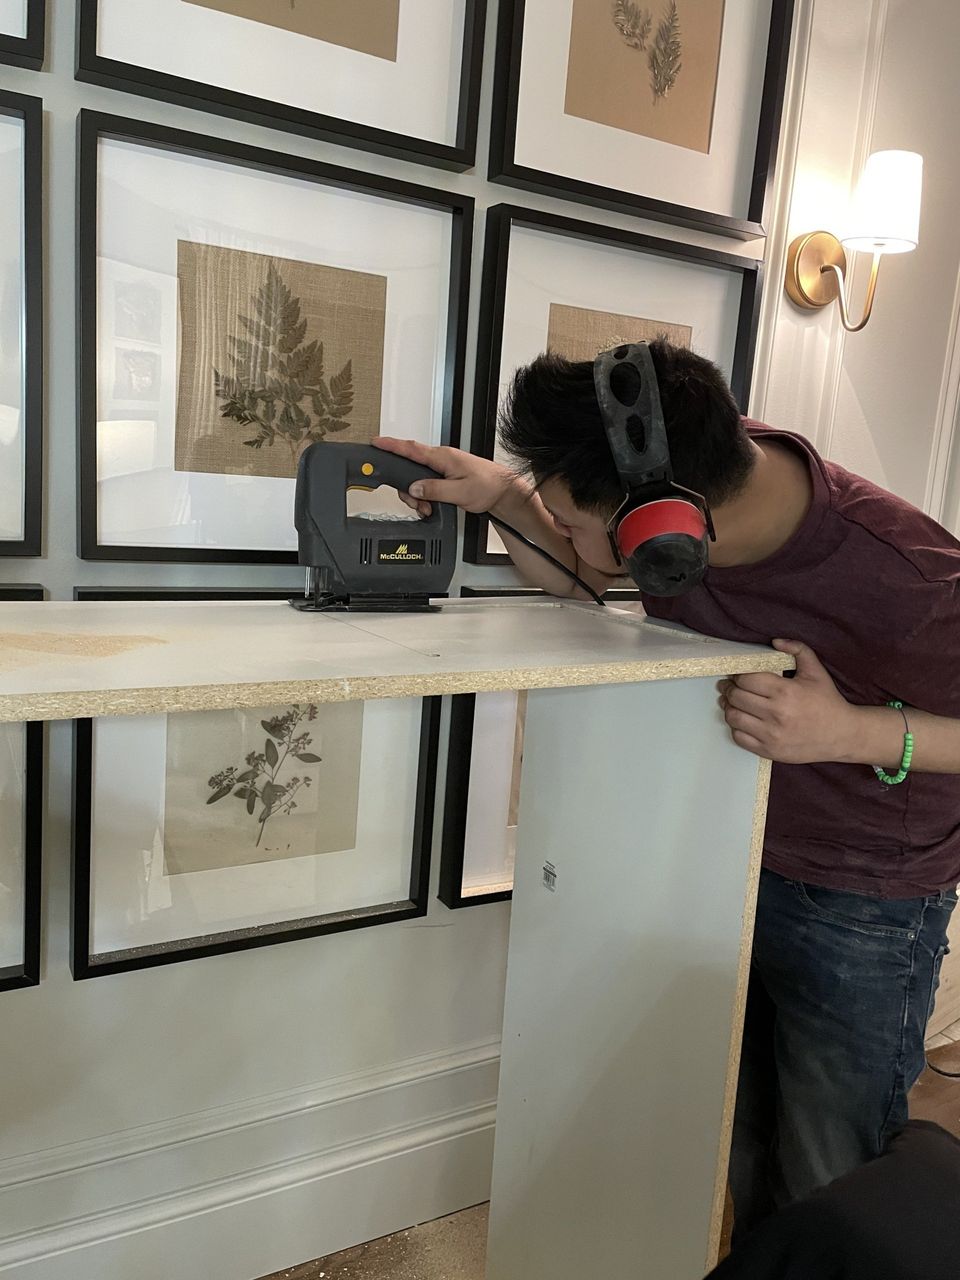
Our first set of doors! I am so proud of my fiancé's mad skills. It isn't easy getting all the measurements right, especially for inset doors. They have to be super precise otherwise they won't align correctly.
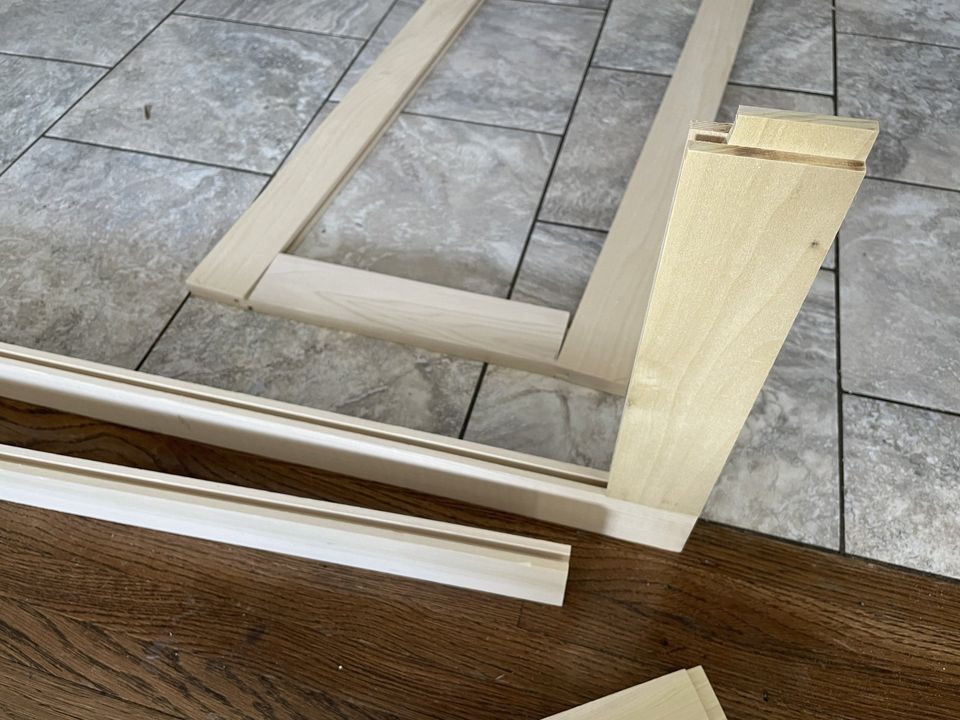
The construction of the doors. The frame is made using a tongue & groove method so there are no screws/nails on either side of the door. All of the sides fit together and the plywood fits into the grooves.
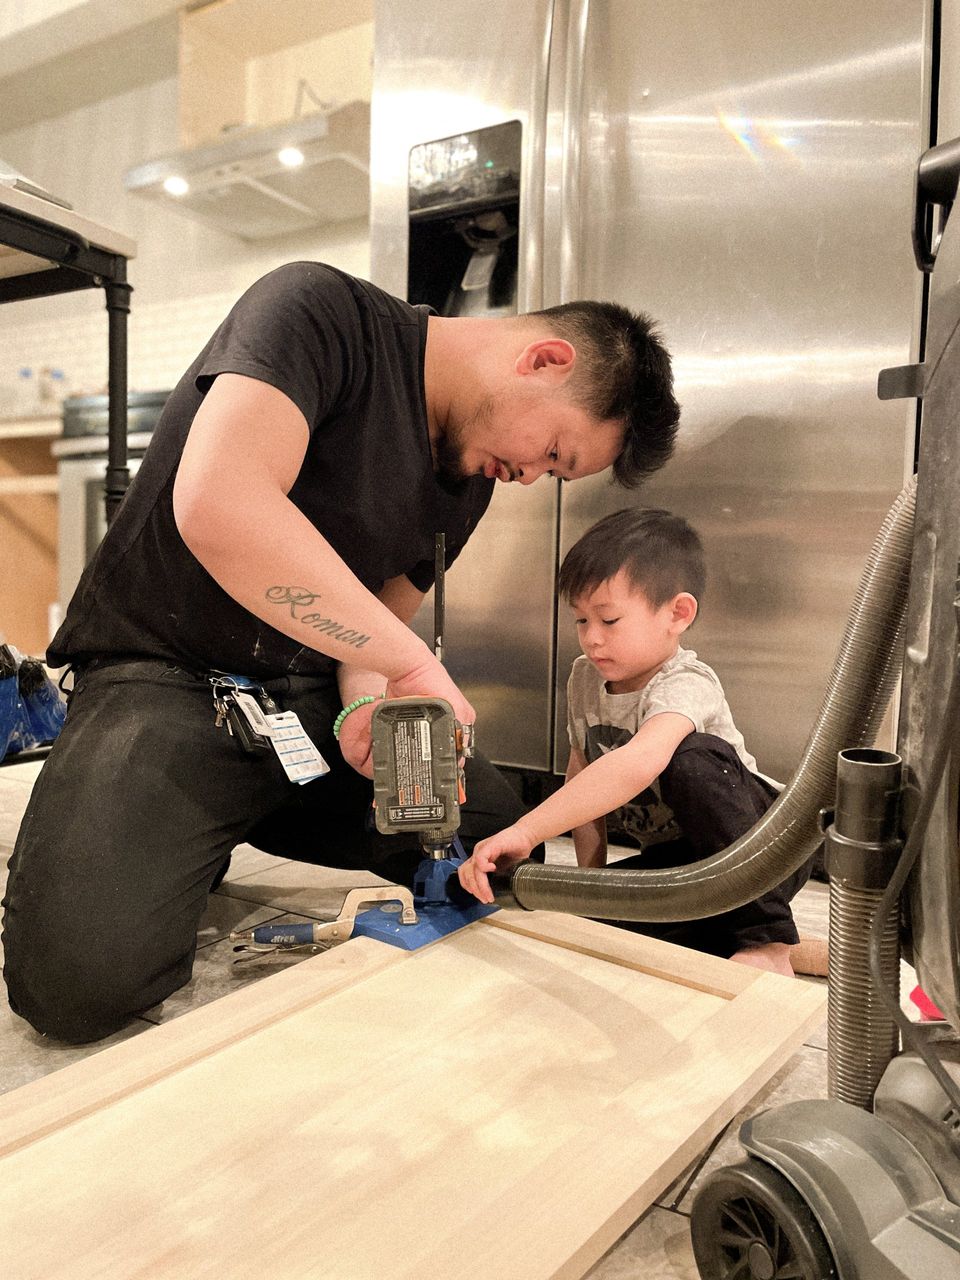
Drilling holes for the hinges. Roman's favorite part because he gets to help dad by vacuuming up all the sawdust!
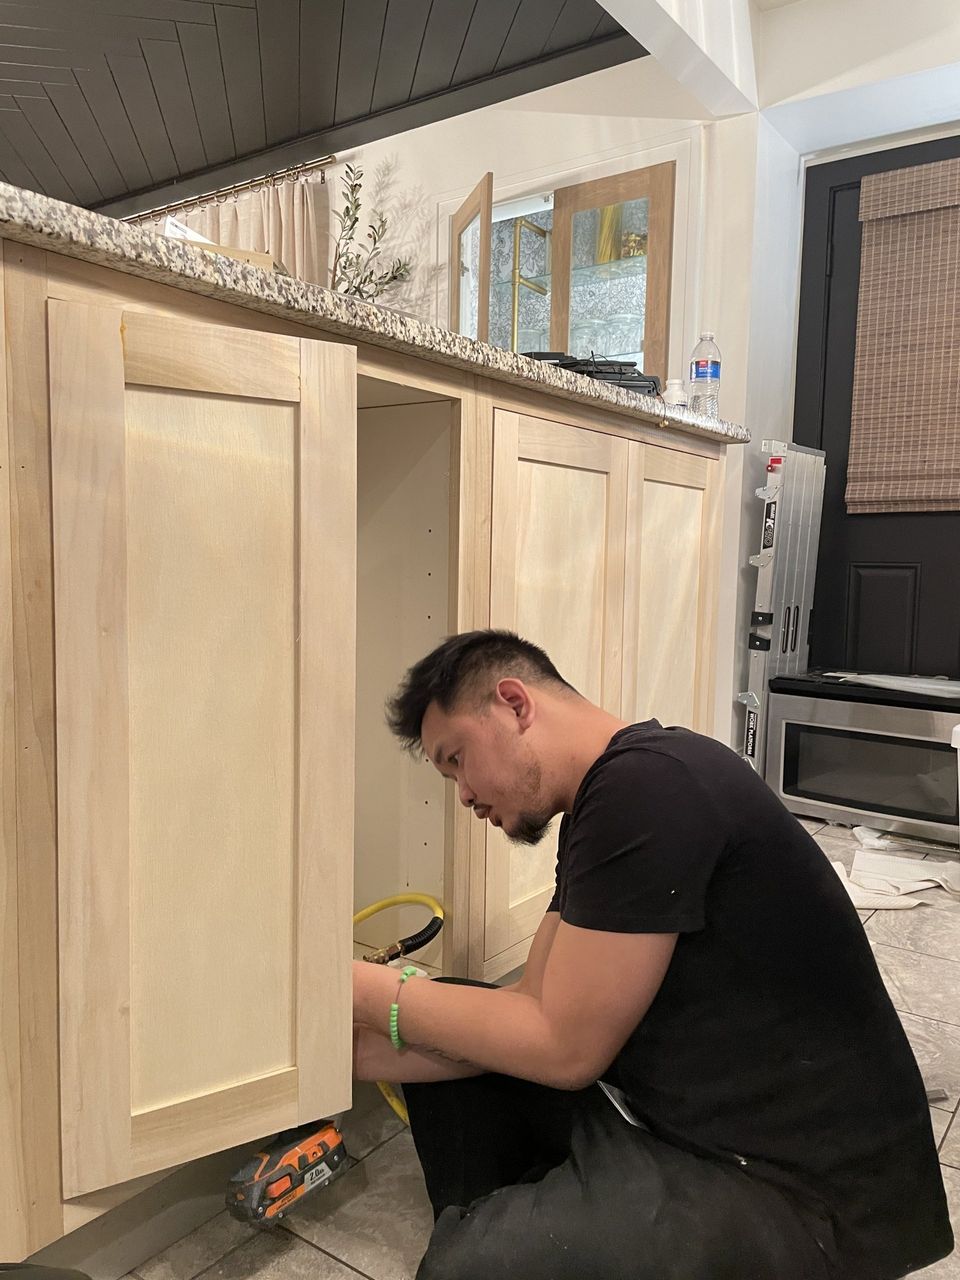
Install time! My fiancé had to dry fit the doors to make sure they were all perfect before we could move on to sanding/staining them. Look how good they look!! Amazing job babe!
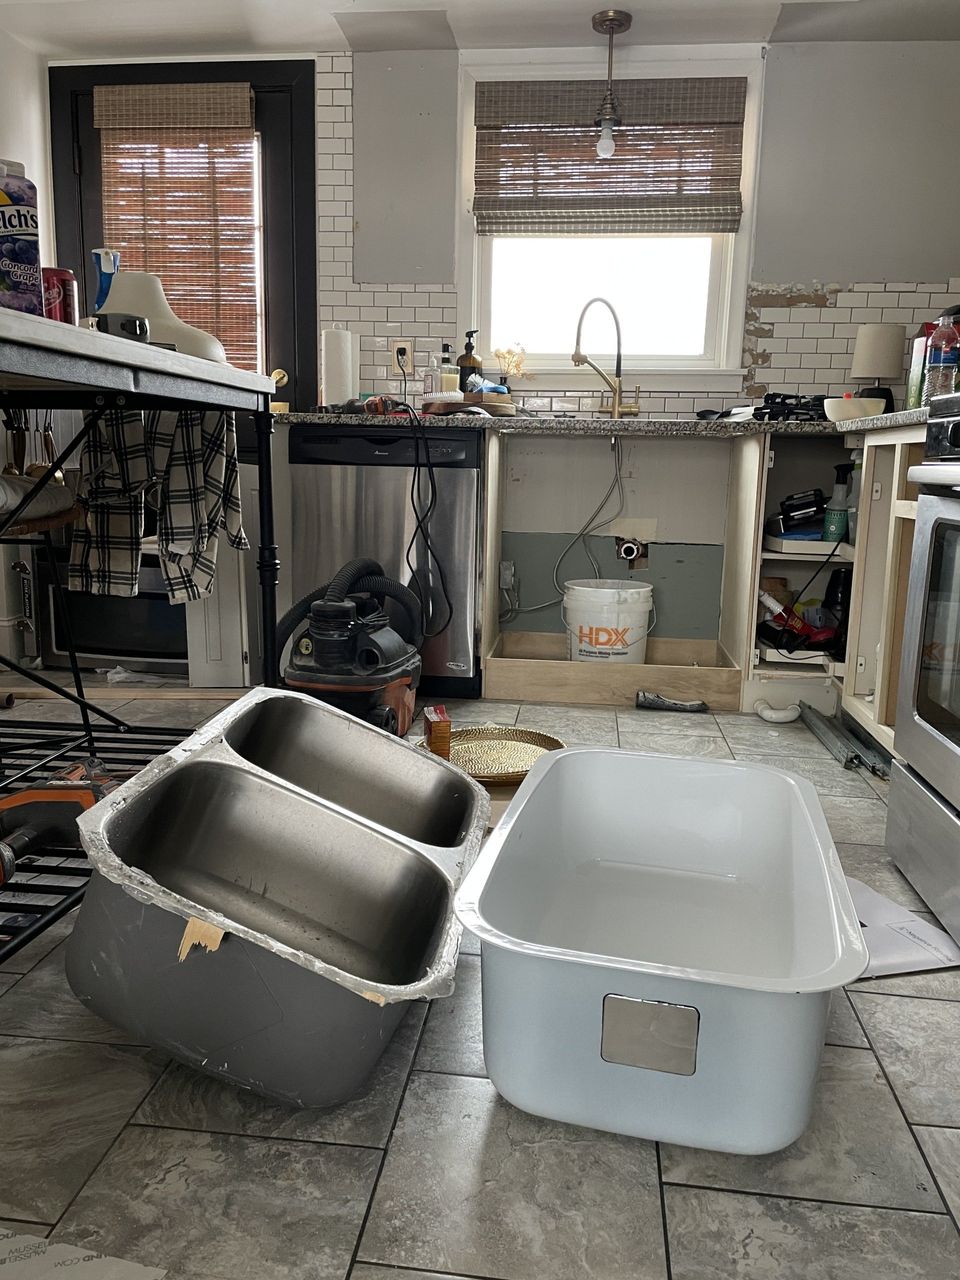
There are a lot of moving parts in a kitchen renovation. We couldn't move onto certain things until finishing other things, such as the sink. We had to replace the sink before finishing the base cabinet and face frames for the bottom cabinets.
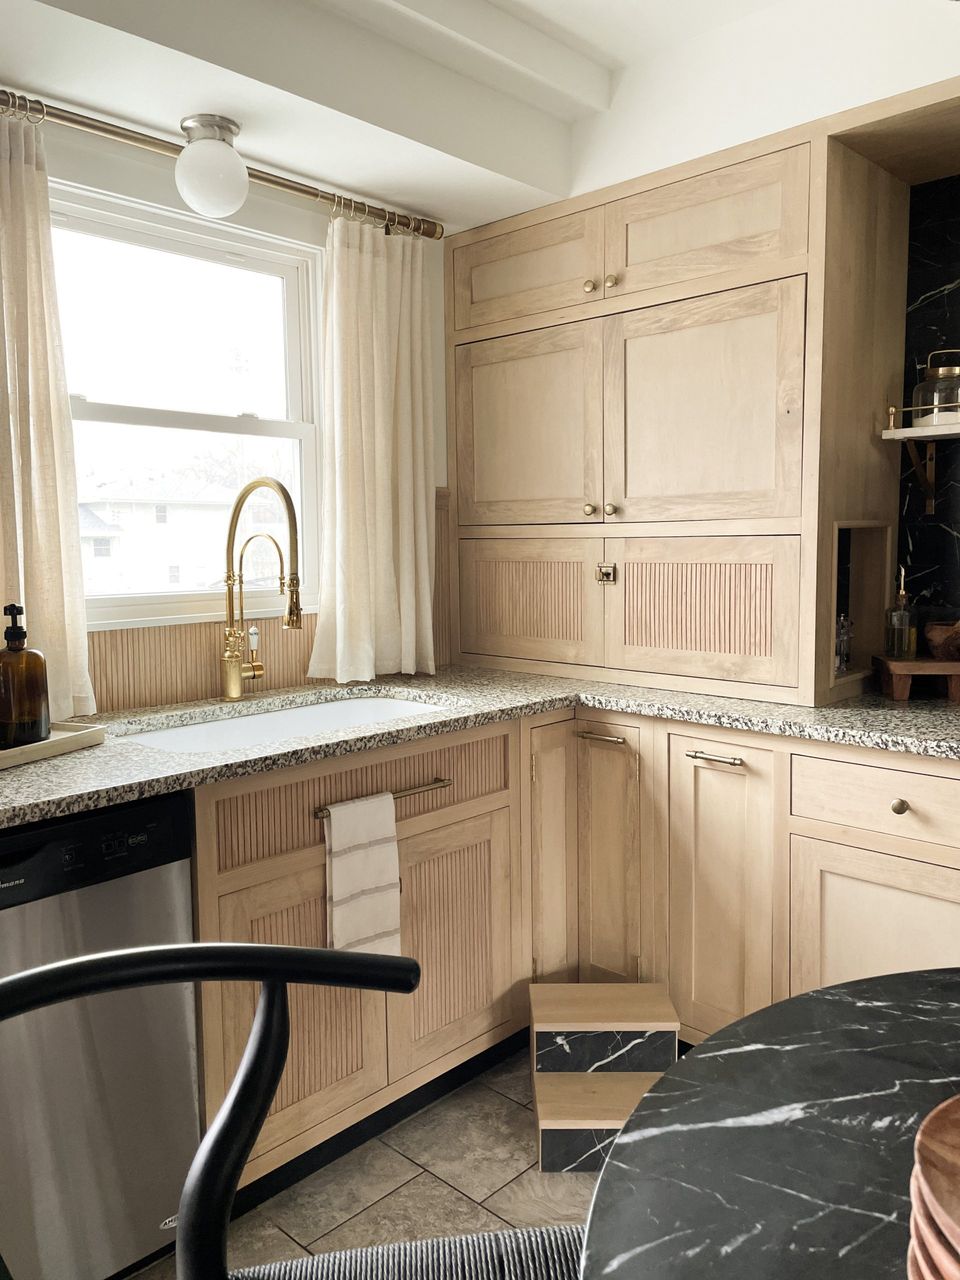
How gorgeous is this deep, white sink?! We had a double basin before and it felt so tight. This one is spacious. Bonus points for this sink because you can't even tell when we have dirty dishes in there, haha. We've lived with this sink long enough now for me to confirm that this was 100% a really great purchase! It's incredibly easy to clean (using bar keepers friend).
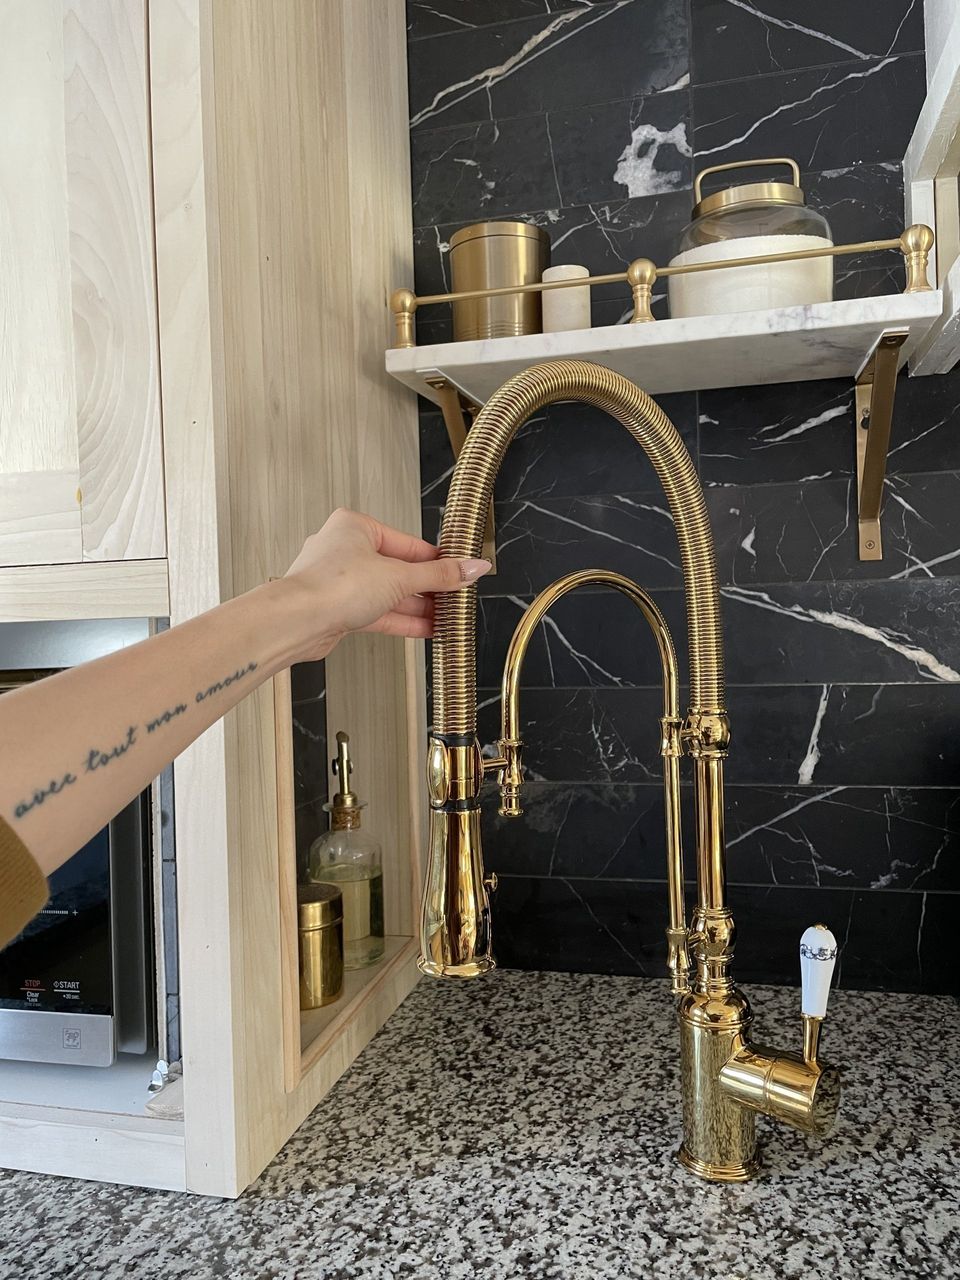
The pretty brass faucet that I fell in love with! I love the polished look here against the honed marble. Mixing different textures like this makes for a very interesting kitchen.
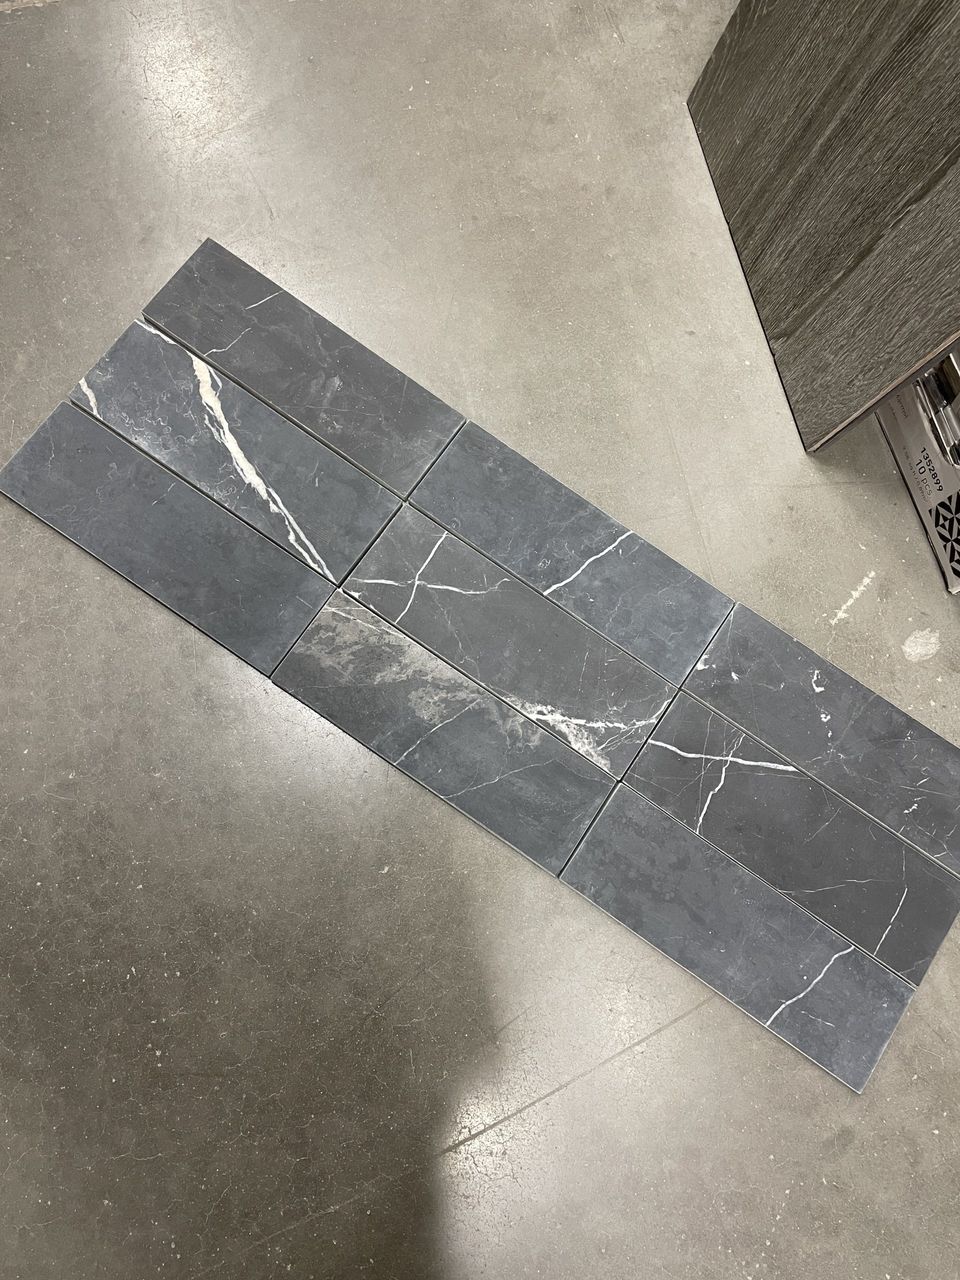
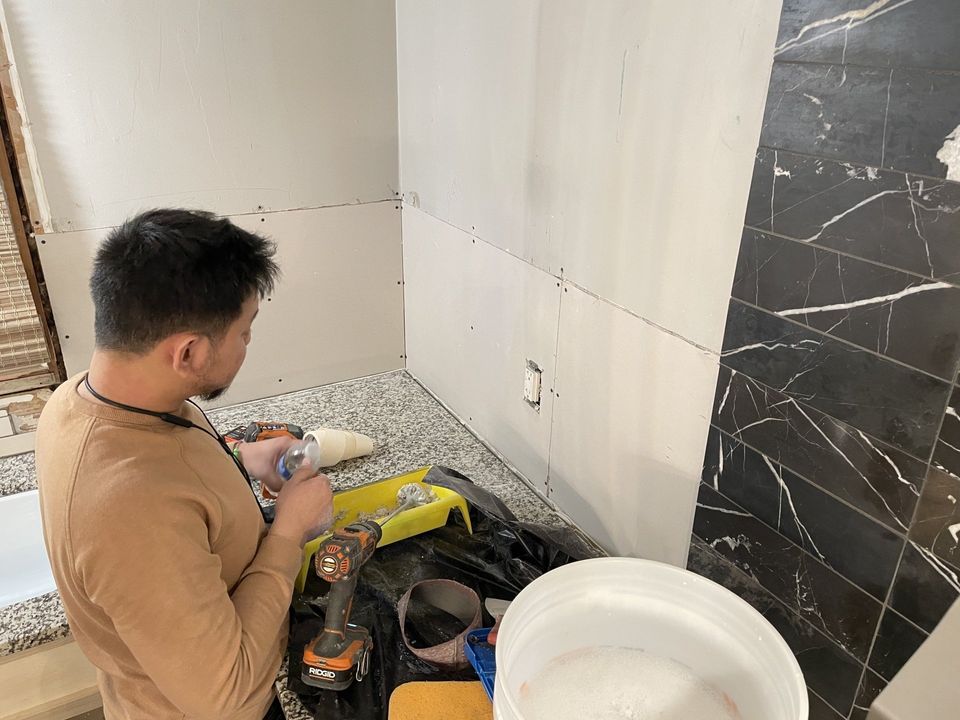
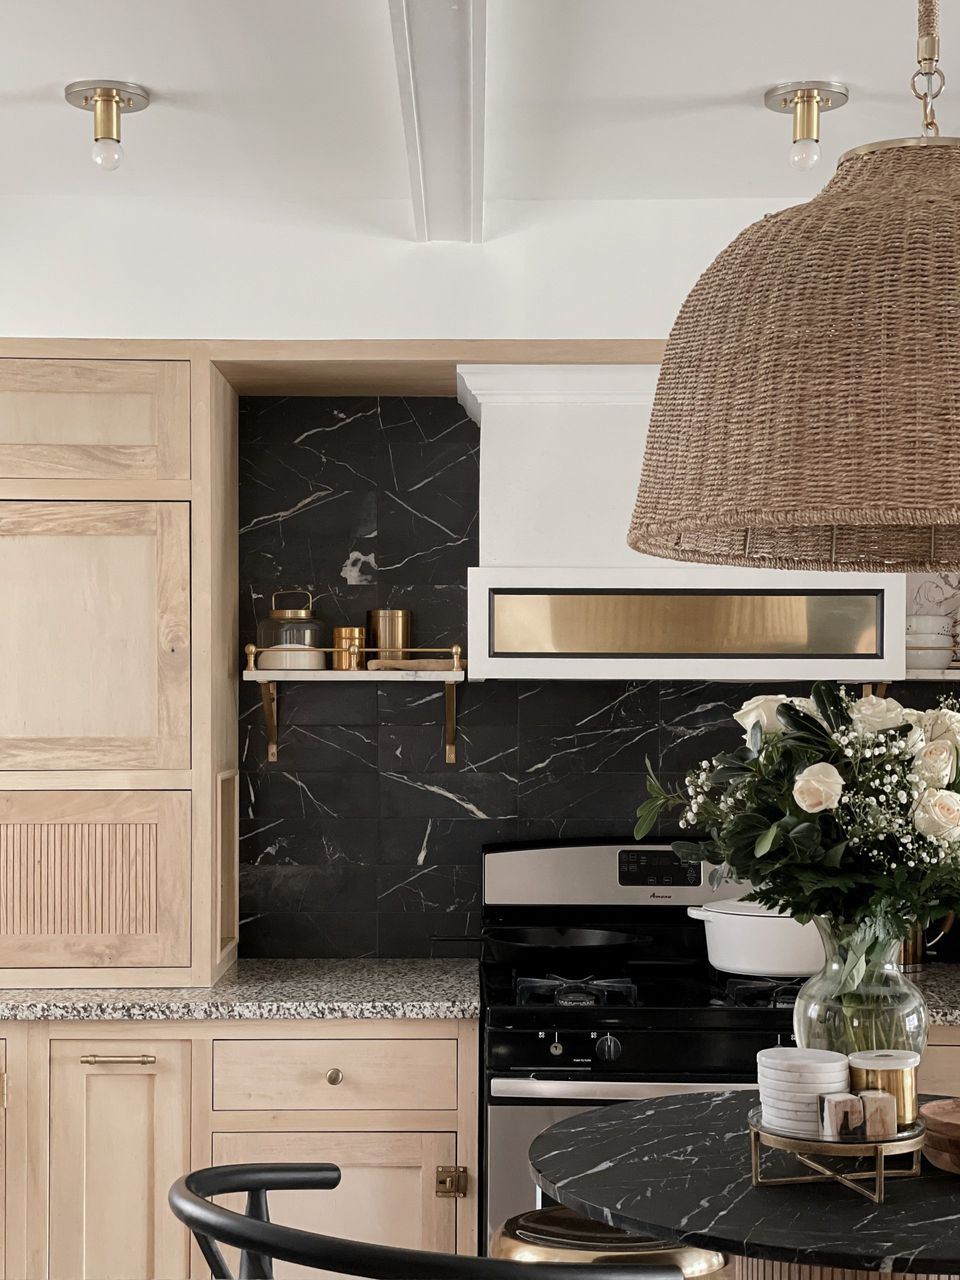
Another detail that I needed to finalize: the backsplash. I honestly had no idea what I was going to go with until I saw this beautiful black honed marble. I knew it was the one the moment I laid my eyes on it! I'm really drawn to the stacked tile pattern for a more streamlined look. After finalizing this decision, so many other details of the kitchen came rushing to me. Sometimes it just takes that one thing to make it all come together in your head.
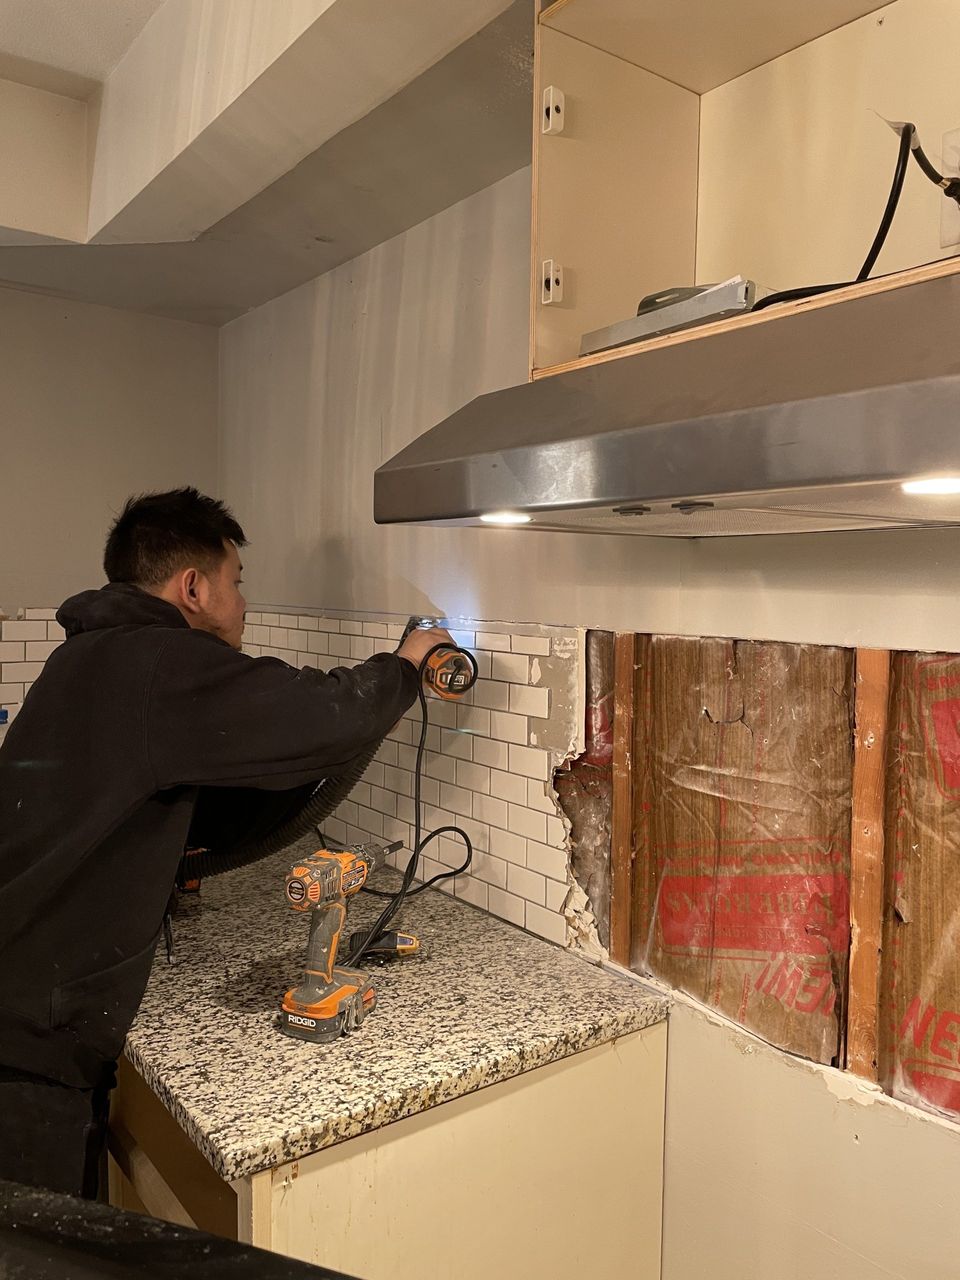
We decided the easiest way to remove our old backsplash was to remove the drywall completely. This is a lot less messy and so much faster than removing just the old subway tile. We used an oscillating tool to cut around the tile to remove in large chunks.
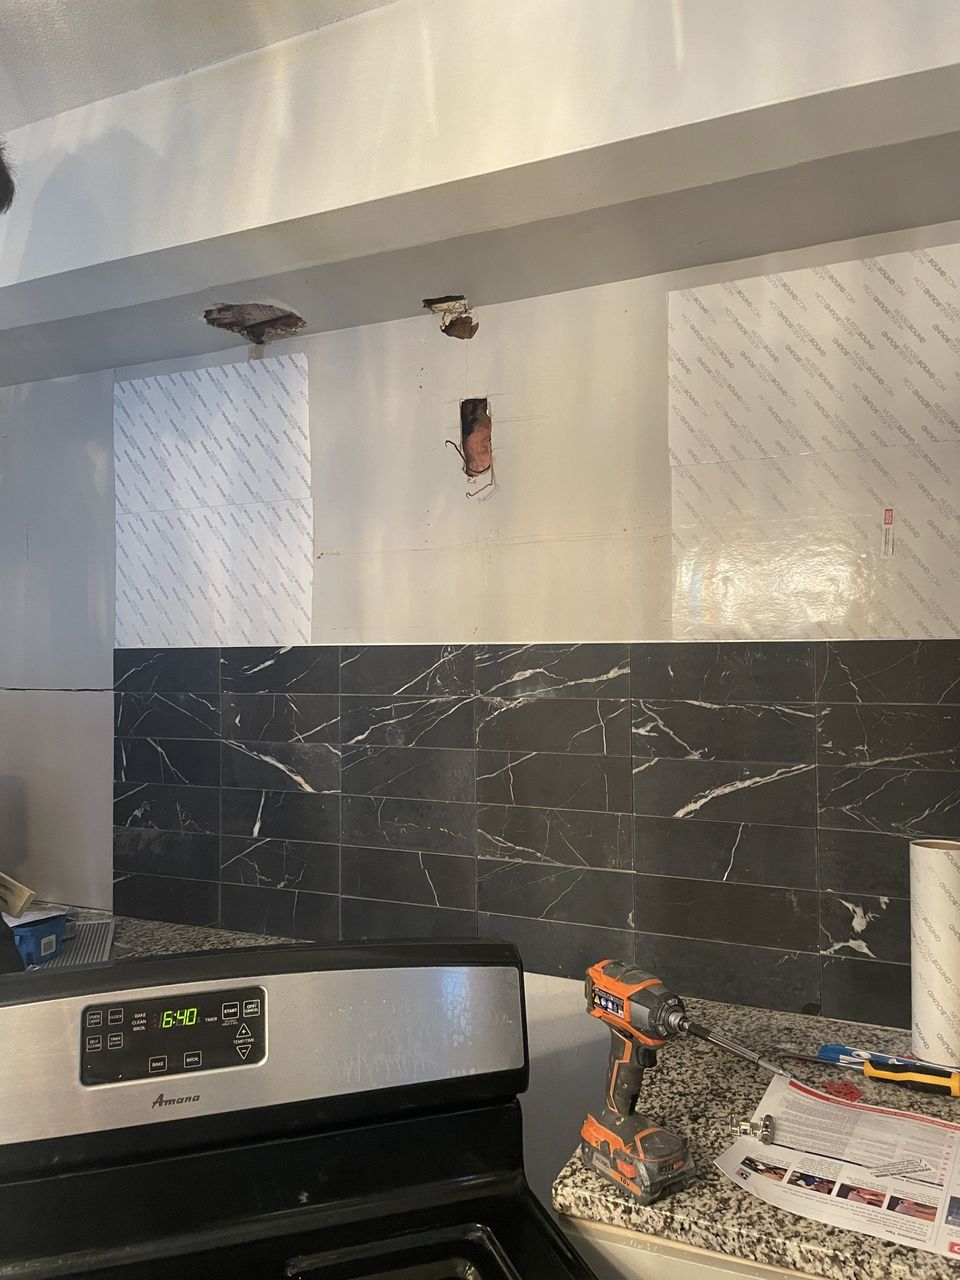
Another way we sped this process up: MUSSEL BOUND! This was my first time ever tiling & using this product. It's basically an incredibly strong adhesive. Once the tile is positioned, any pressure on the tile will make it impossible to remove. I absolutely love this stuff! We used the traditional thinset for our subway tiles and it was messy. However, I don't know if I would recommend using this for any tile that has a more difficult pattern/shape since there is no wiggle room to reposition the tile once it's installed. A simple tile/simple pattern works great, though!
My fiancé replacing the rest of the drywall while I finished tiling and grouting. My first tile job ever!
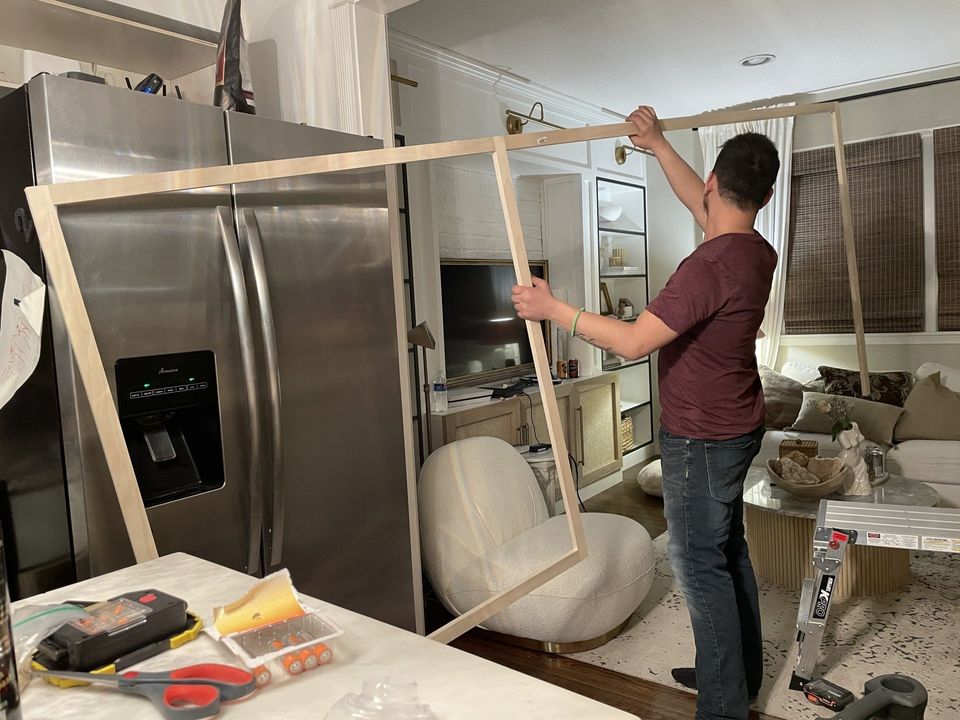
After the backsplash was finished, we started to work on the wood detail that will sit below the soffit. There was no way that we could remove the soffit because of the way our roof sits, so we decided to work with it rather than against it.
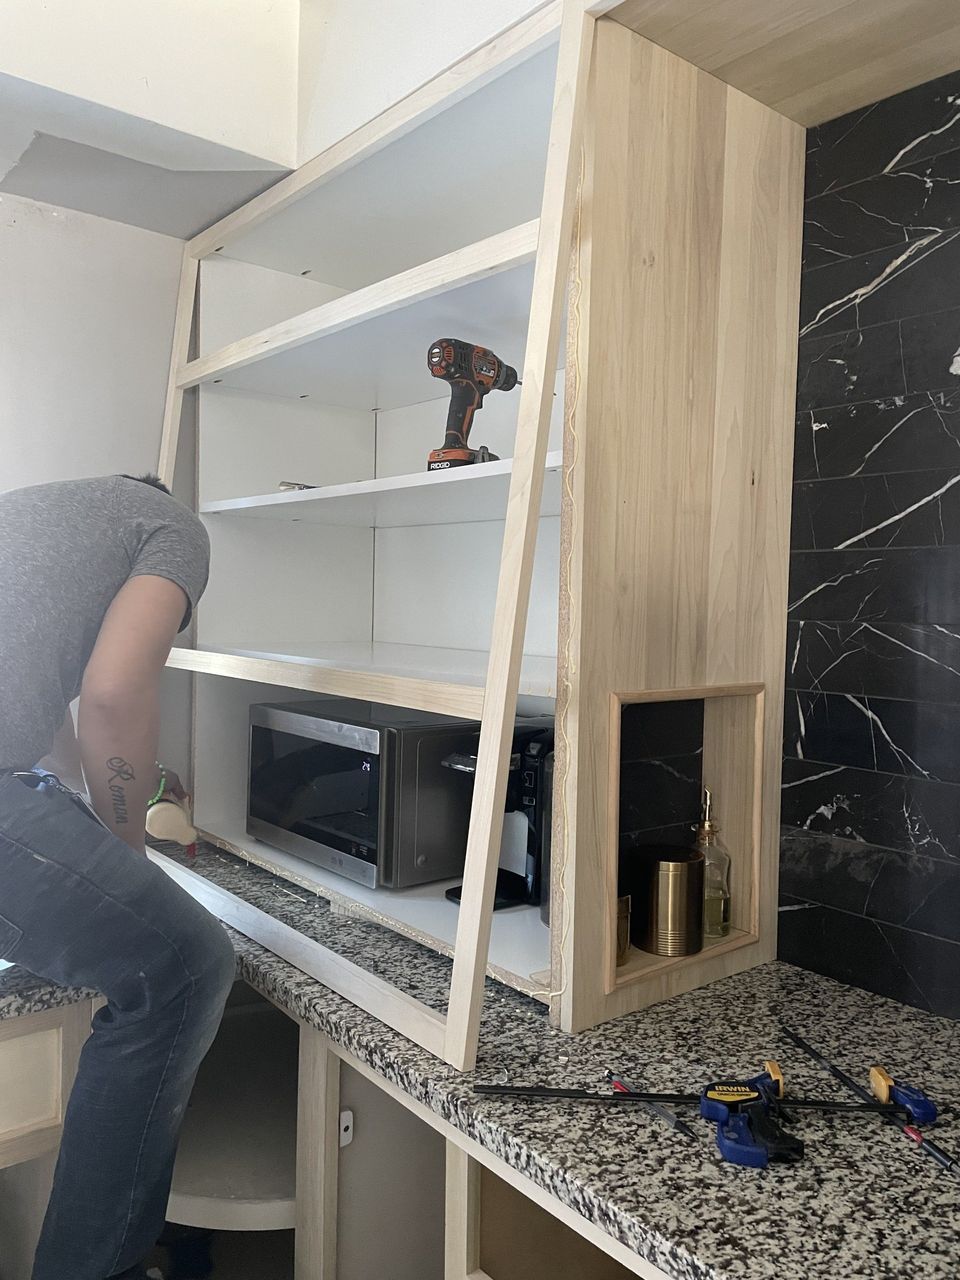
After that, we started to build the hutch. We notched out a hole for a cute little niche for my salt/pepper and oil to sit in.

Putting everything into place.
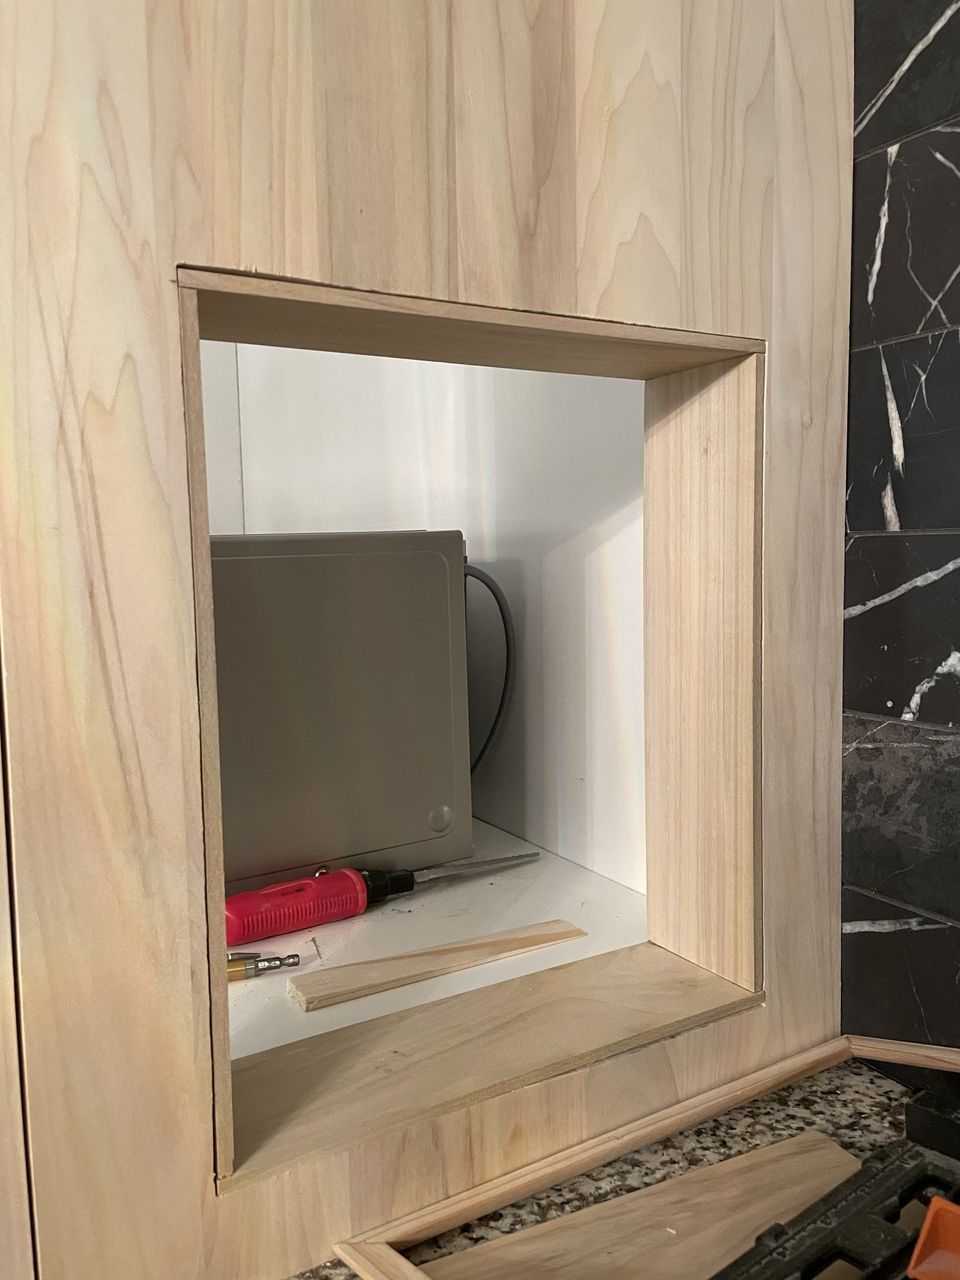
We used thin pieces of wood to frame the niche. I was going to add a shelf but decided to just go simple on it in case I wanted to add taller pieces in there.

For the back of the niche, I wanted to incorporate the marble for it to all tie in together. Using Mussel Bound once more, we attached it to plywood with extra tile.

My attempt at getting a progress shot of my fiancé installing the niche together, but Roman wants to steal the spotlight lol. He's such a cool dude.
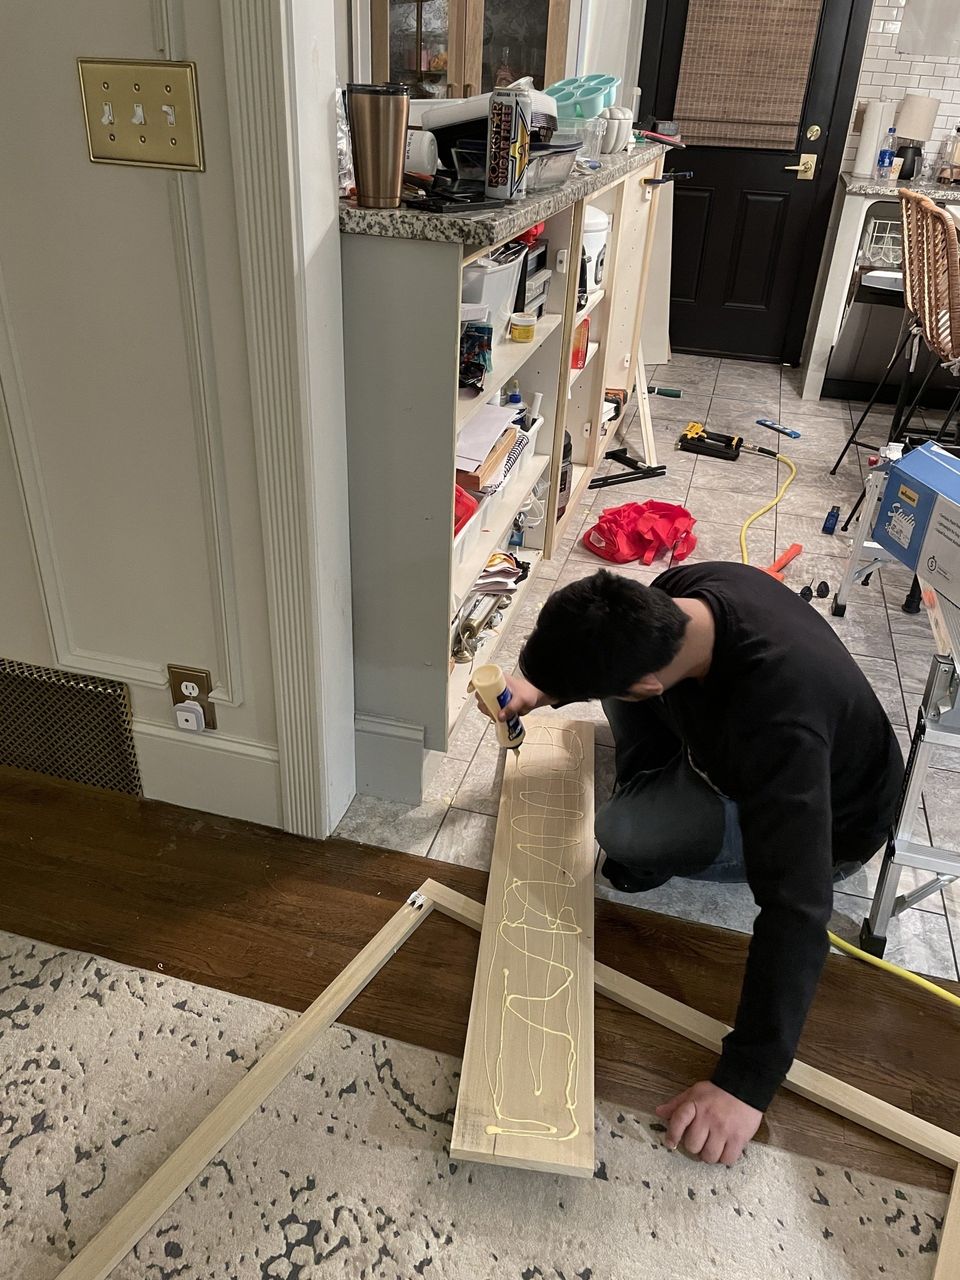
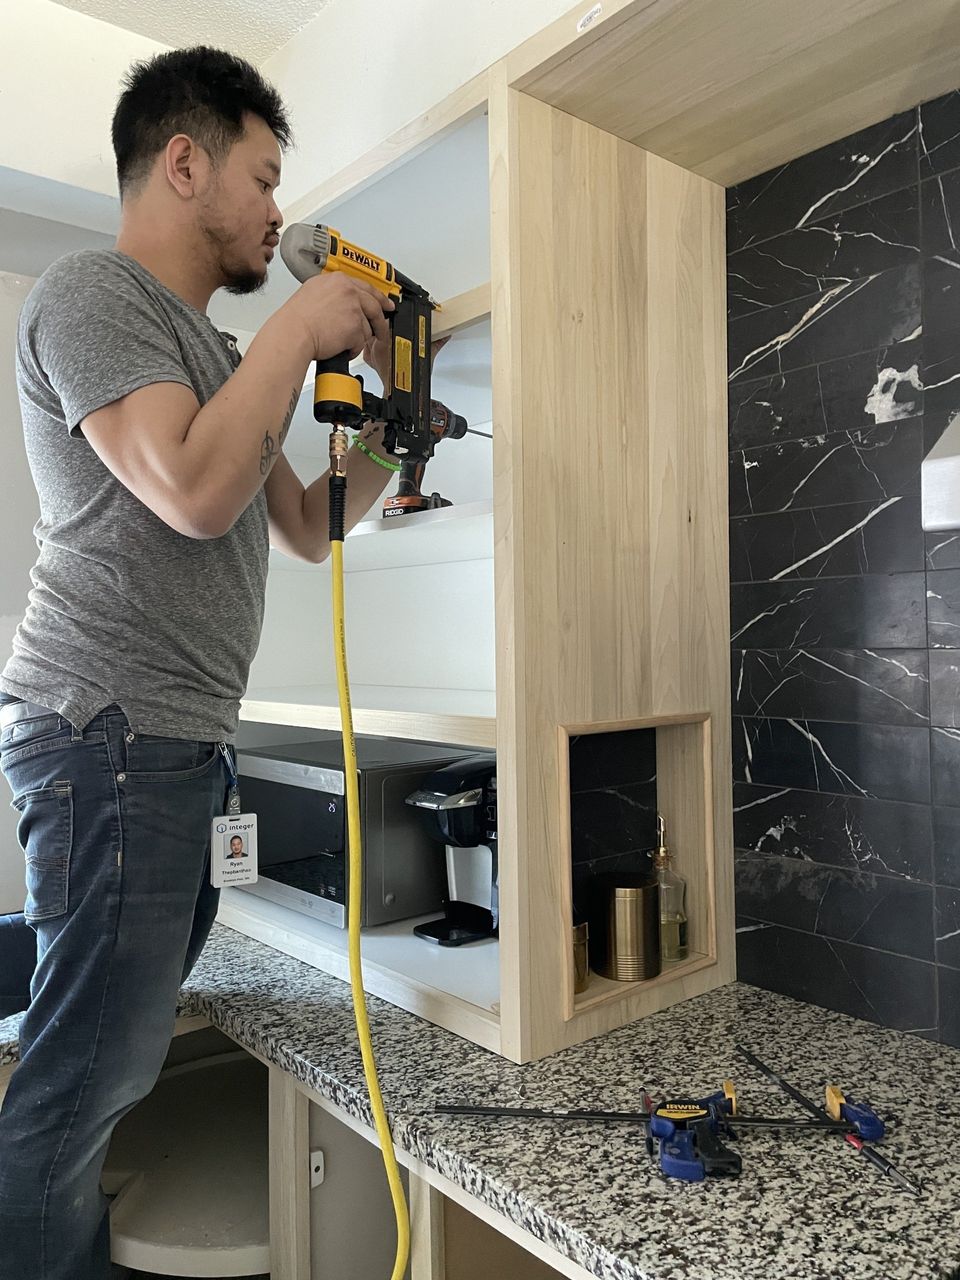
For all of the face frames, my fiancé preassembled them so that the joints are all tight & secure.
We used wood glue & brad nailed the face frames into the cabinet bases. This is the part that really makes the kitchen come alive!
I always get ahead of myself, haha. Even though we weren't anywhere near to putting in finishing touches, I had my fiancé install my marble shelves. Sometimes it's nice to see these little additions when you're in the midst of a huge renovation that feels like it's taking forever. A little instant gratification! Just a little motivation to get to the finish line.
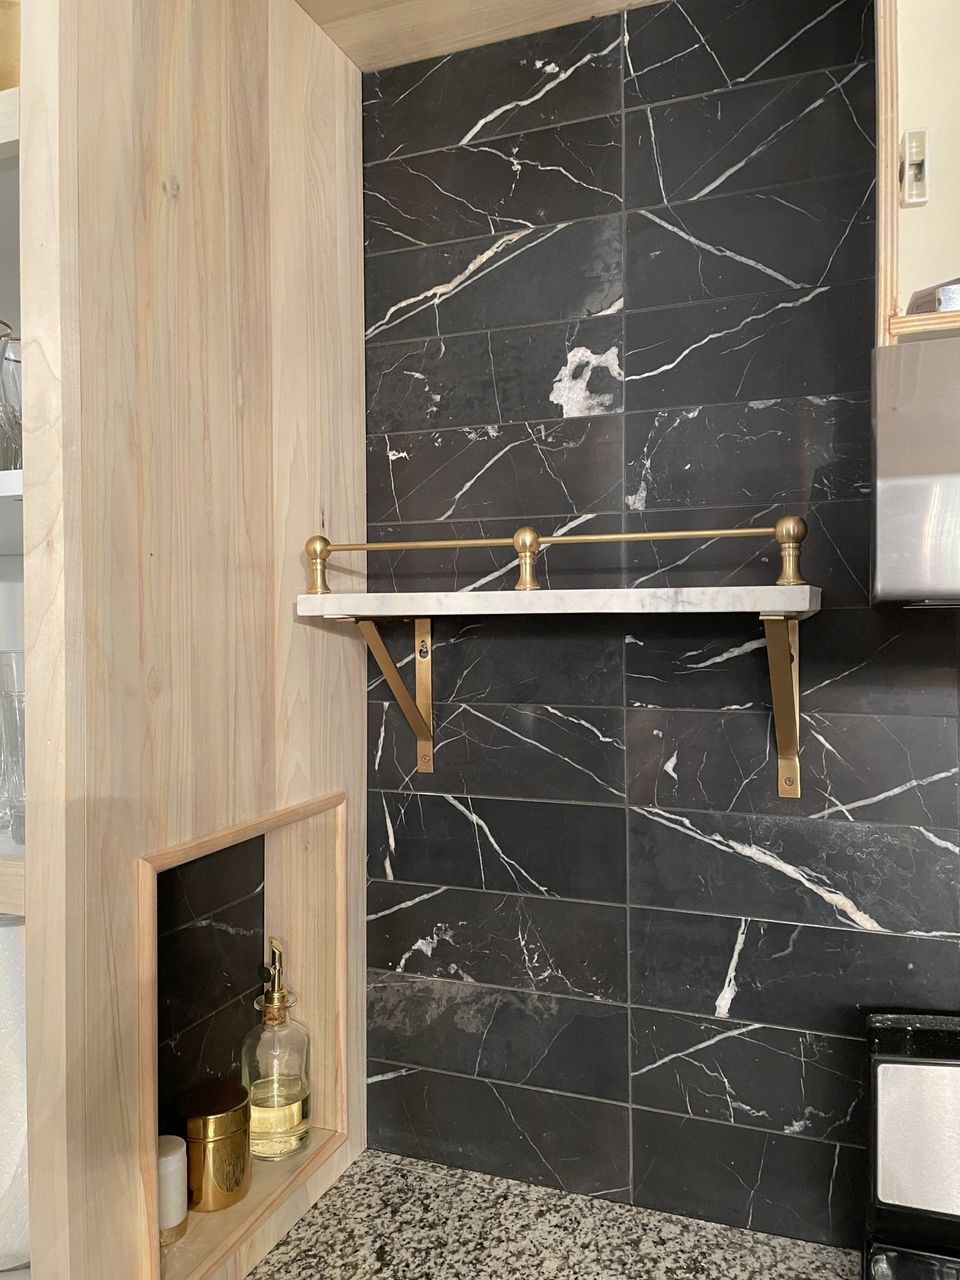
I customized these brass gallery rails from Paxton hardware. I love that vintage touch!
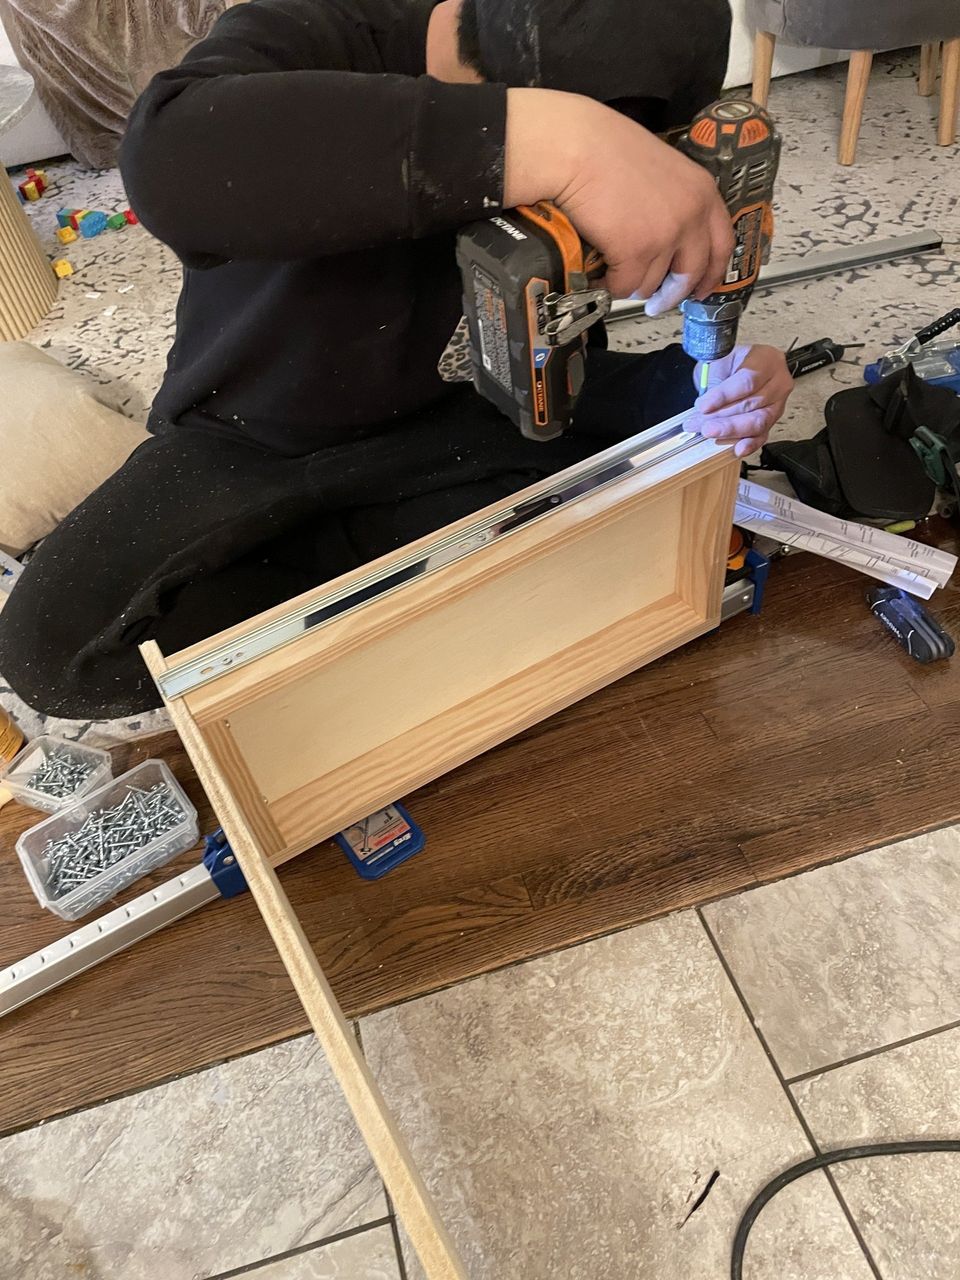
We really wanted a fancy spice drawer in our kitchen. We started building the base of it here..
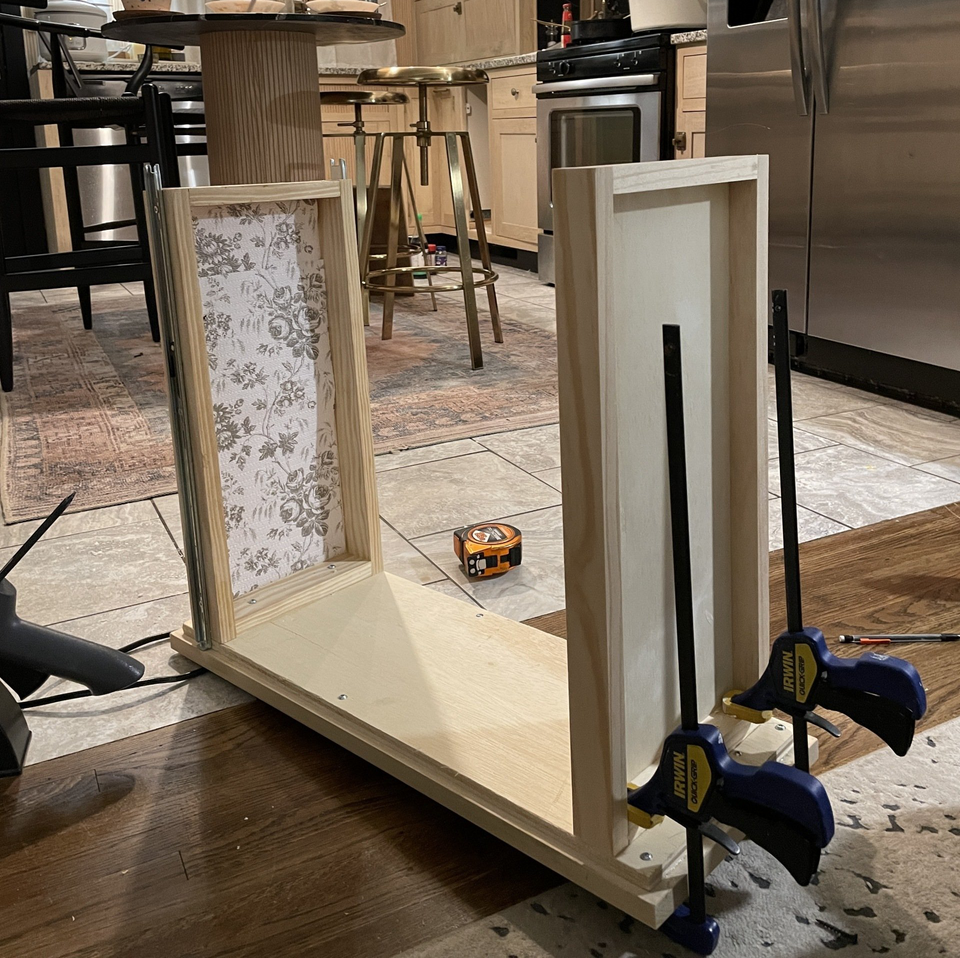
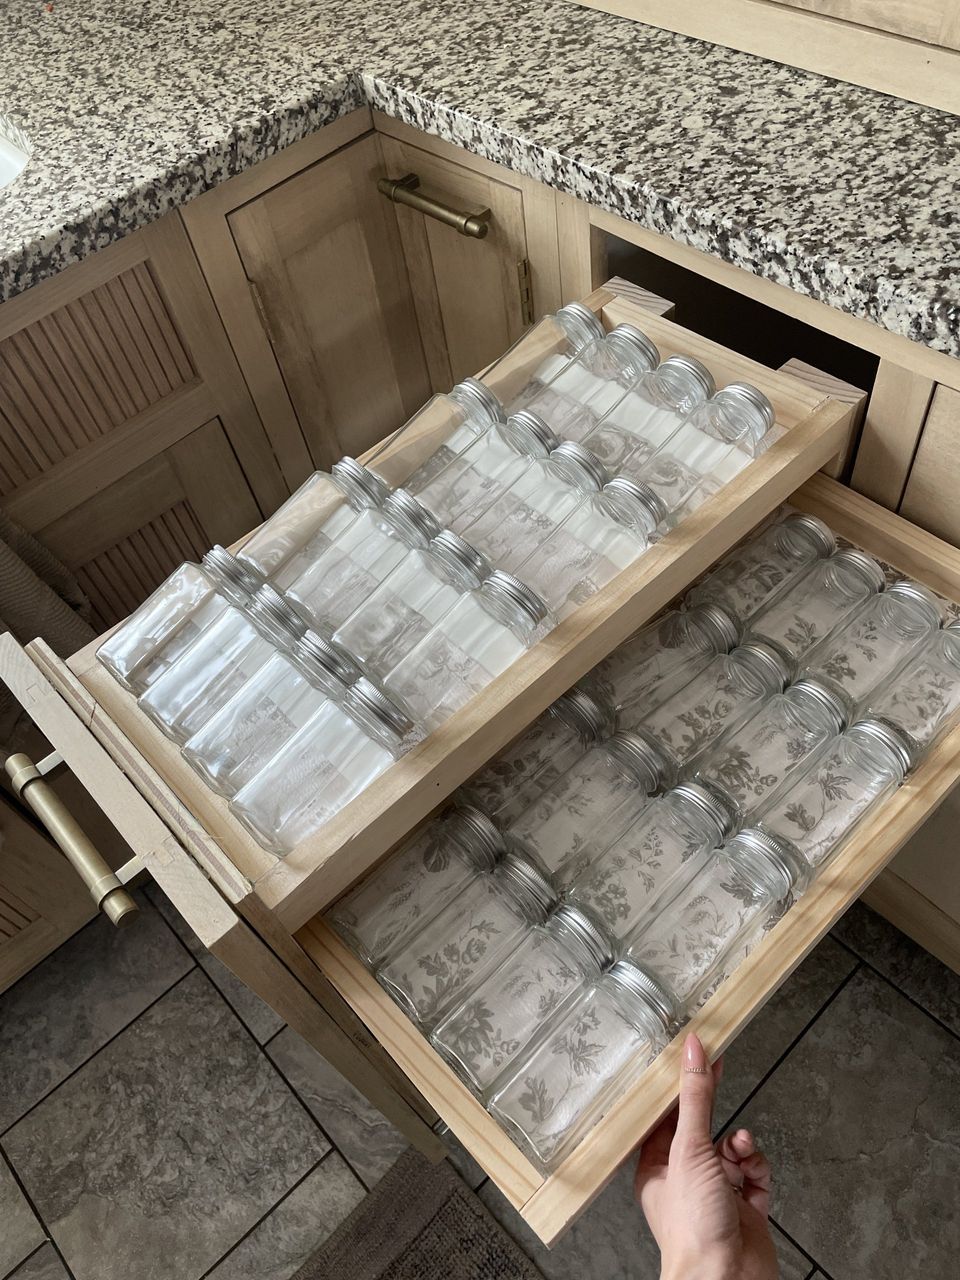
There are 2 shallow drawers for our smaller spice jars, 1 medium drawer & the bottom drawer for large items. We created these with our own handmade wood sliders because it was impossible to find drawer slides of the right length. Pretty awesome that it works so well.
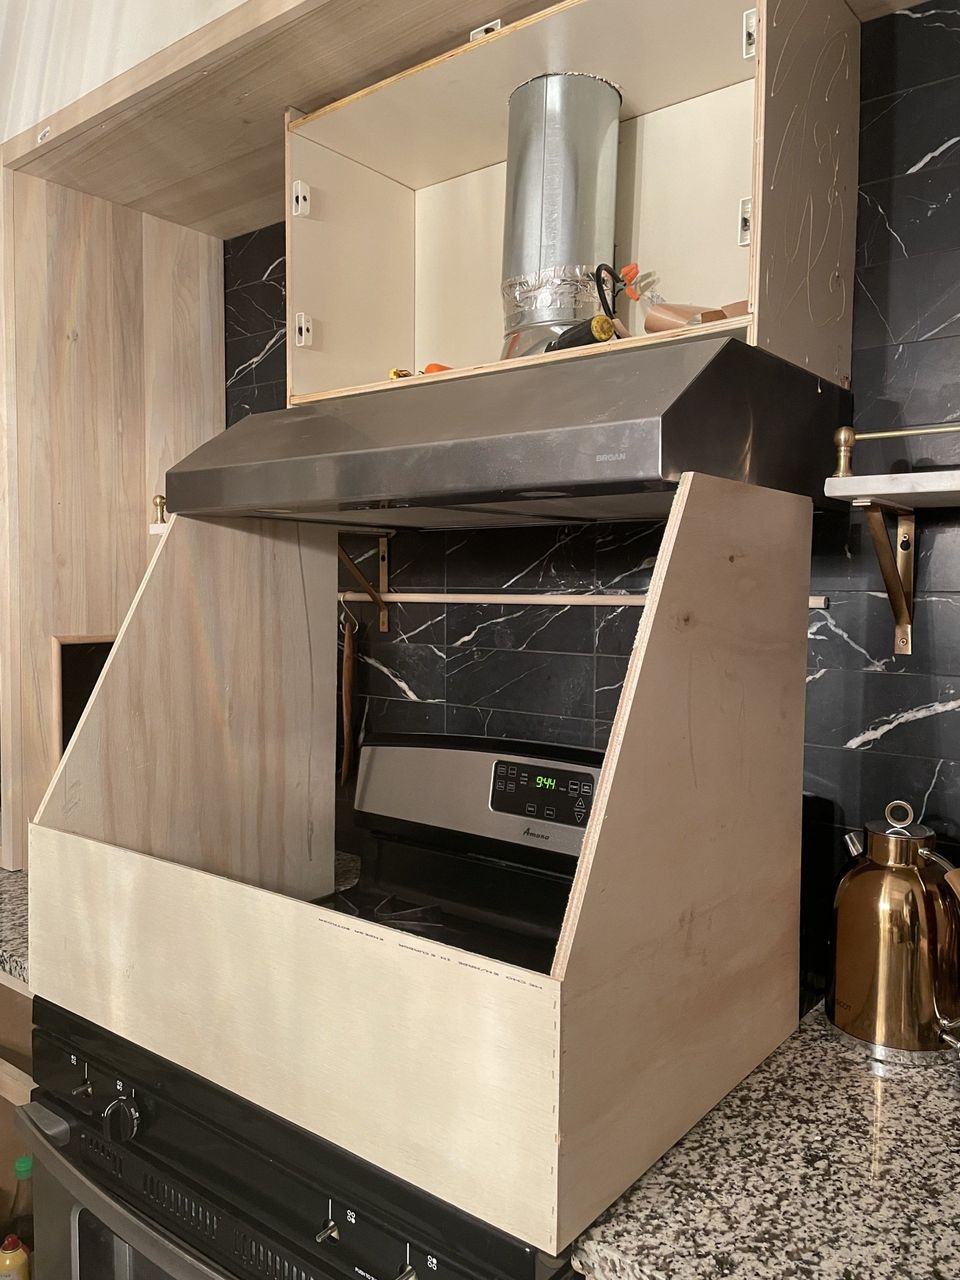
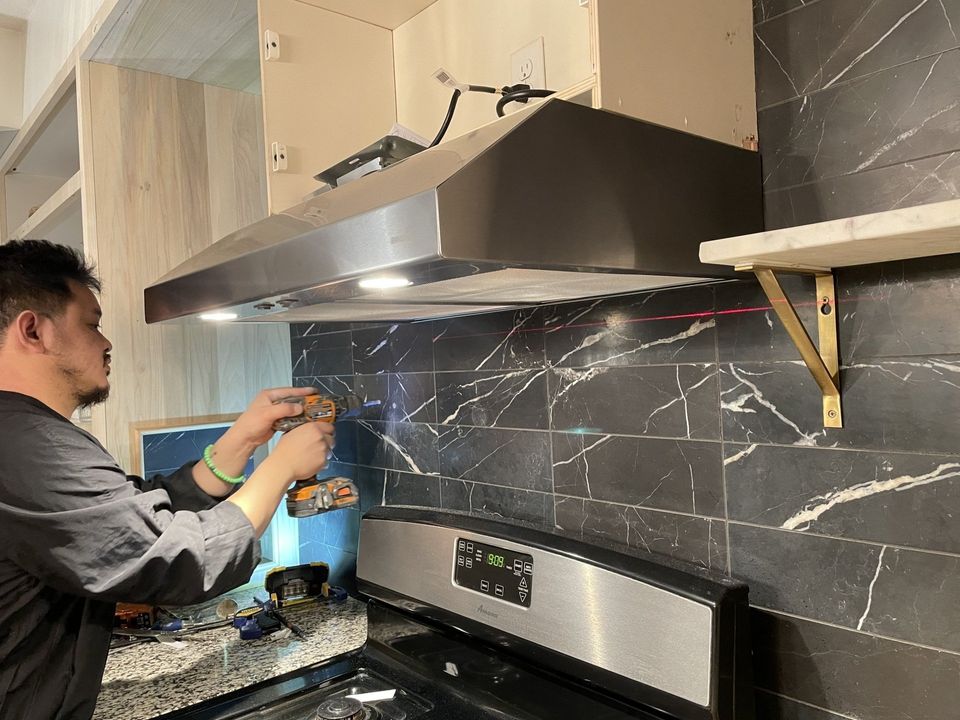
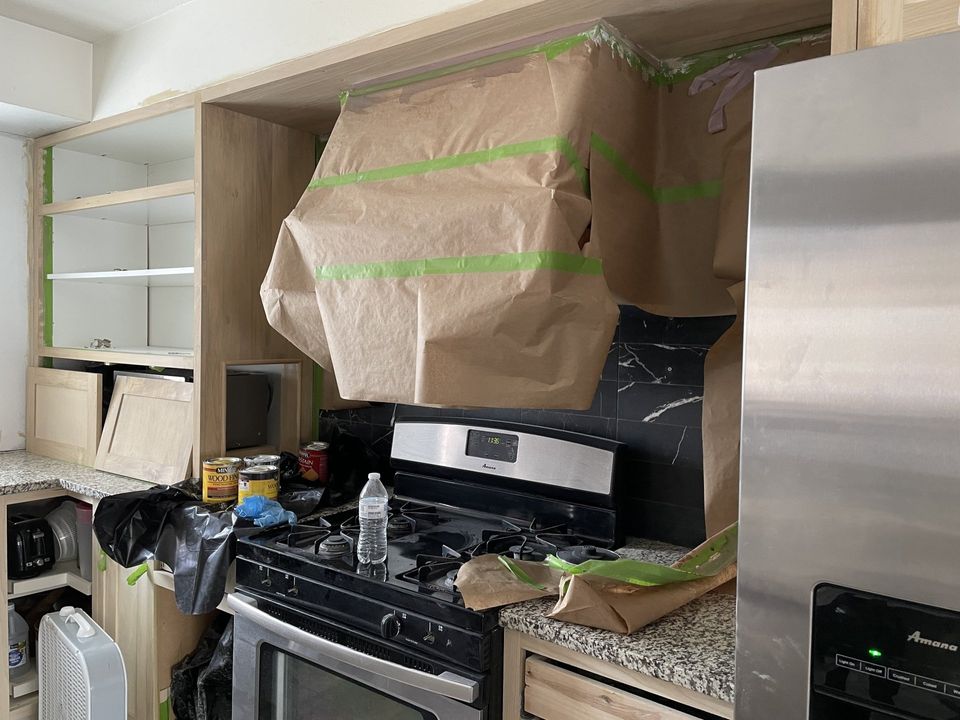
I totally forgot to mention the removal of the microwave vent above the range! One of our main purposes of this kitchen renovation was because of the terrible ventilation system we had. There was so much built up grease because of the poor functioning vent. We ripped that out early on and replaced it with this vent. There was already a duct system hooked up from the previous owners which made it really easy to install the new one!
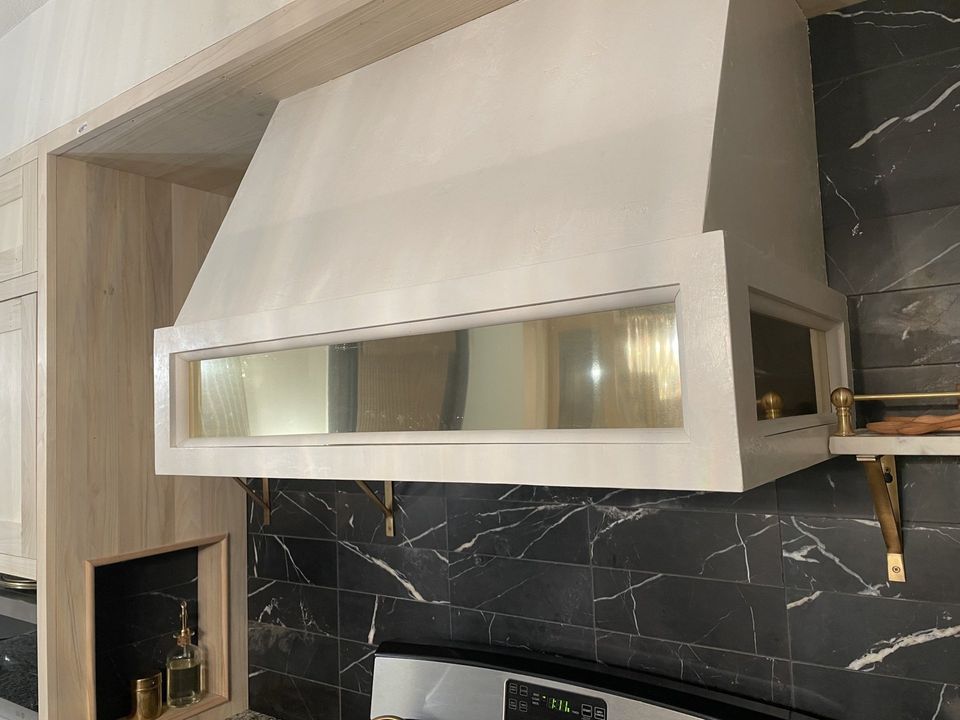
The range hood cover is made out of plywood & will be plastered over.. but first,

.. a fun little gold detail. This is actually a door kickplate! I love to think outside the box and be creative by using materials in totally different ways.
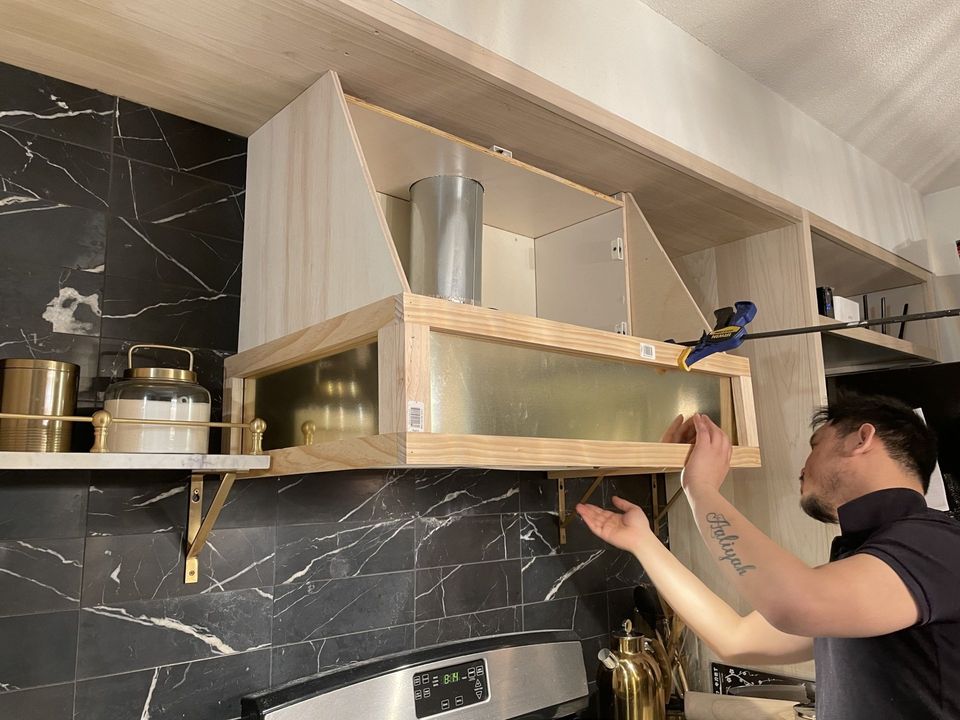
We covered the base with pine for a more finished look. The control buttons are located at the bottom which is great for easy access!
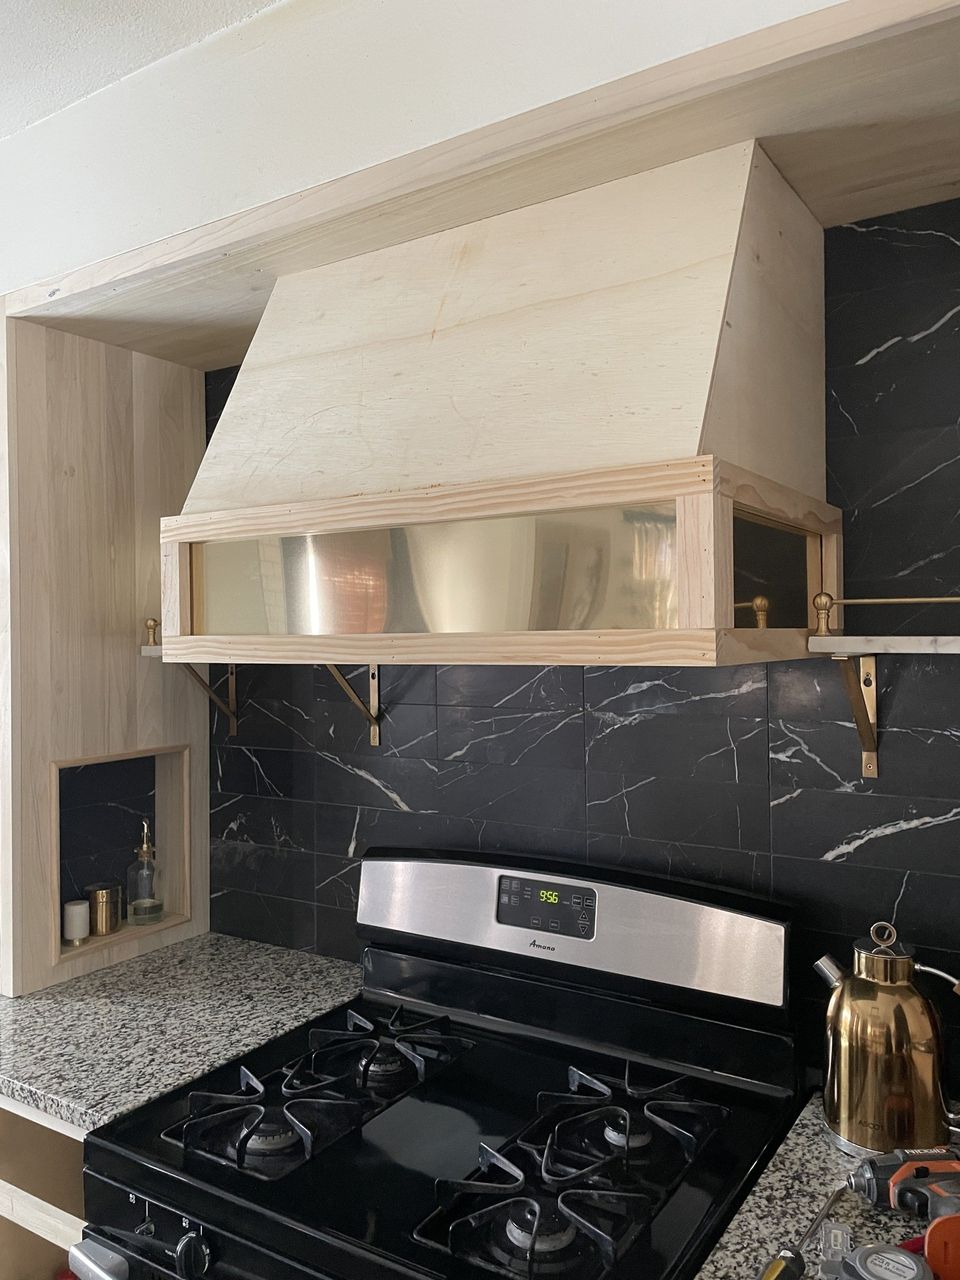
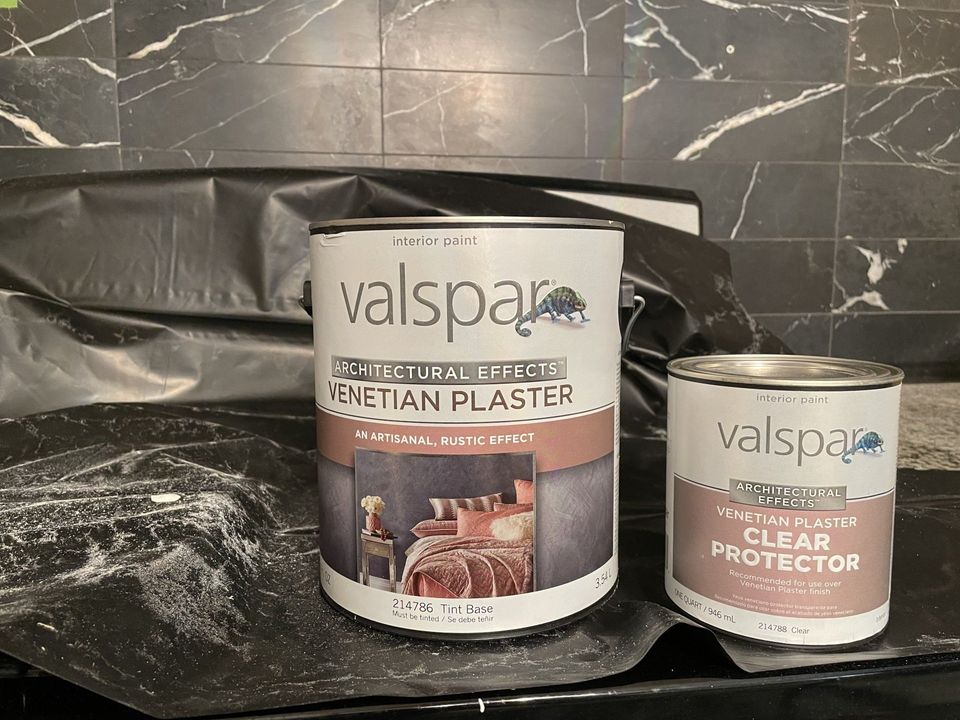
We covered the hood cover using the Valspar Venetian Plaster. I found this product at Lowes and didn't have them tint it. It was honestly a little troublesome to buy because the employees weren't very knowledgeable on the product. They kept telling me over and over that it wouldn't turn out if I didn't tint it, which made no sense to me lol. I wanted the texture of the plaster which is exactly what I got!
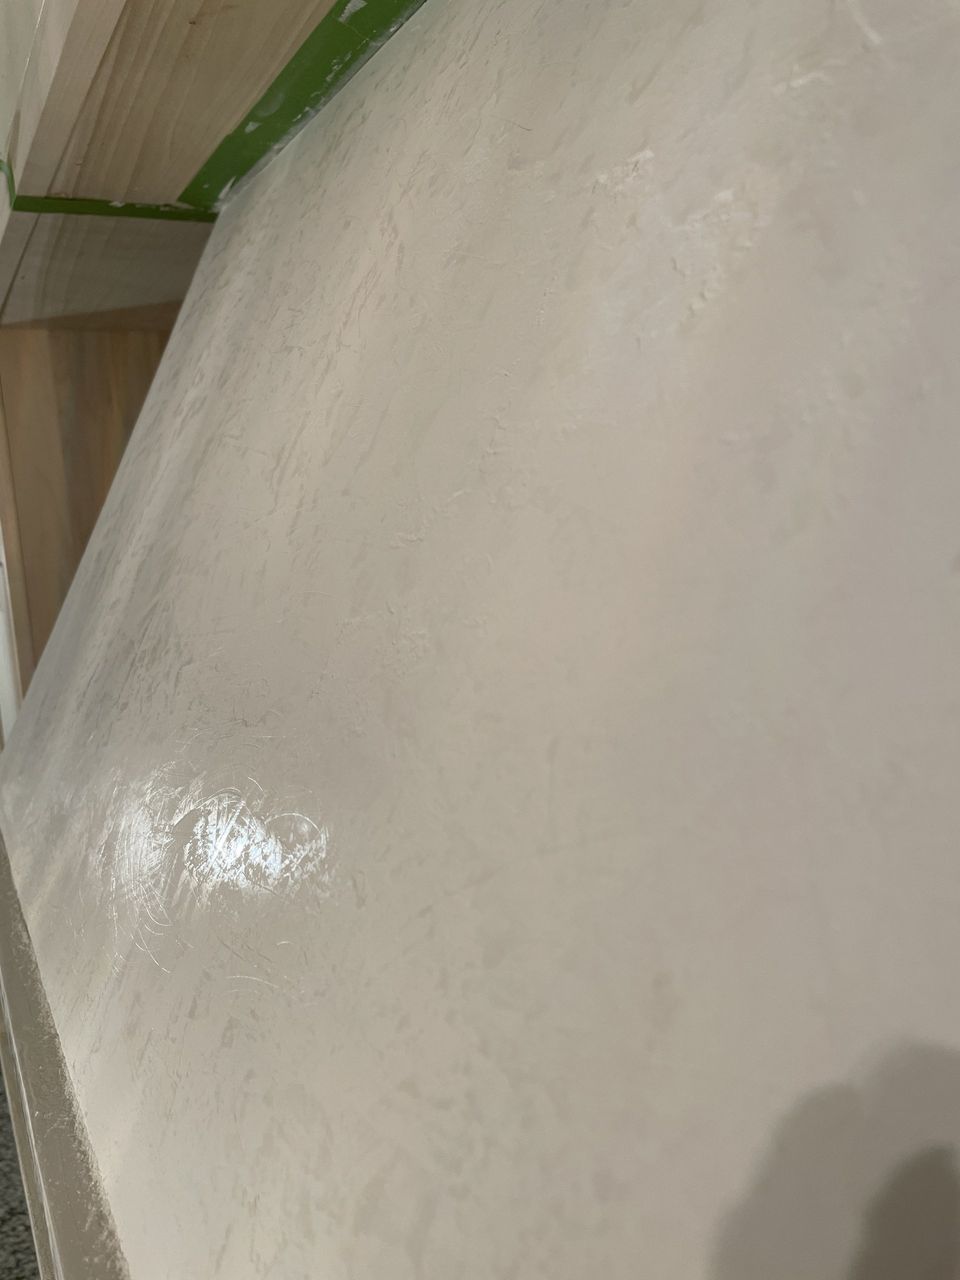
After letting the plaster dry for an hour, I went in and burnished it to give it a polished look. It's really beautiful, you can still see the texture! The burnishing gives almost this marble, polished look.
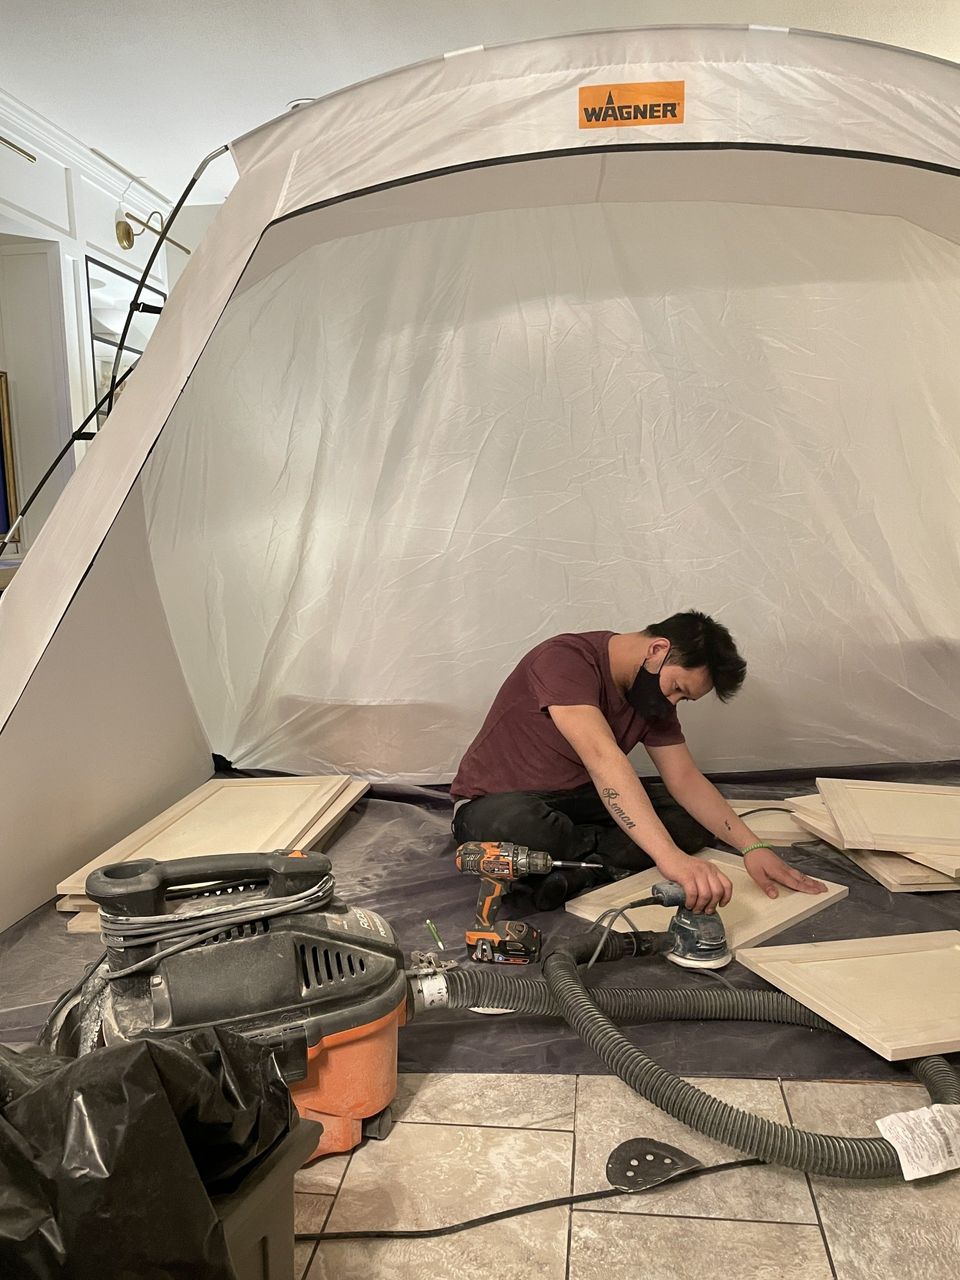
Let's fast forward now - all of the cabinet doors and face frames are done & have been dry fitted. Since it's pretty cold here in Minnesota, my fiancé set up a tent to contain the dust while he sanded everything.
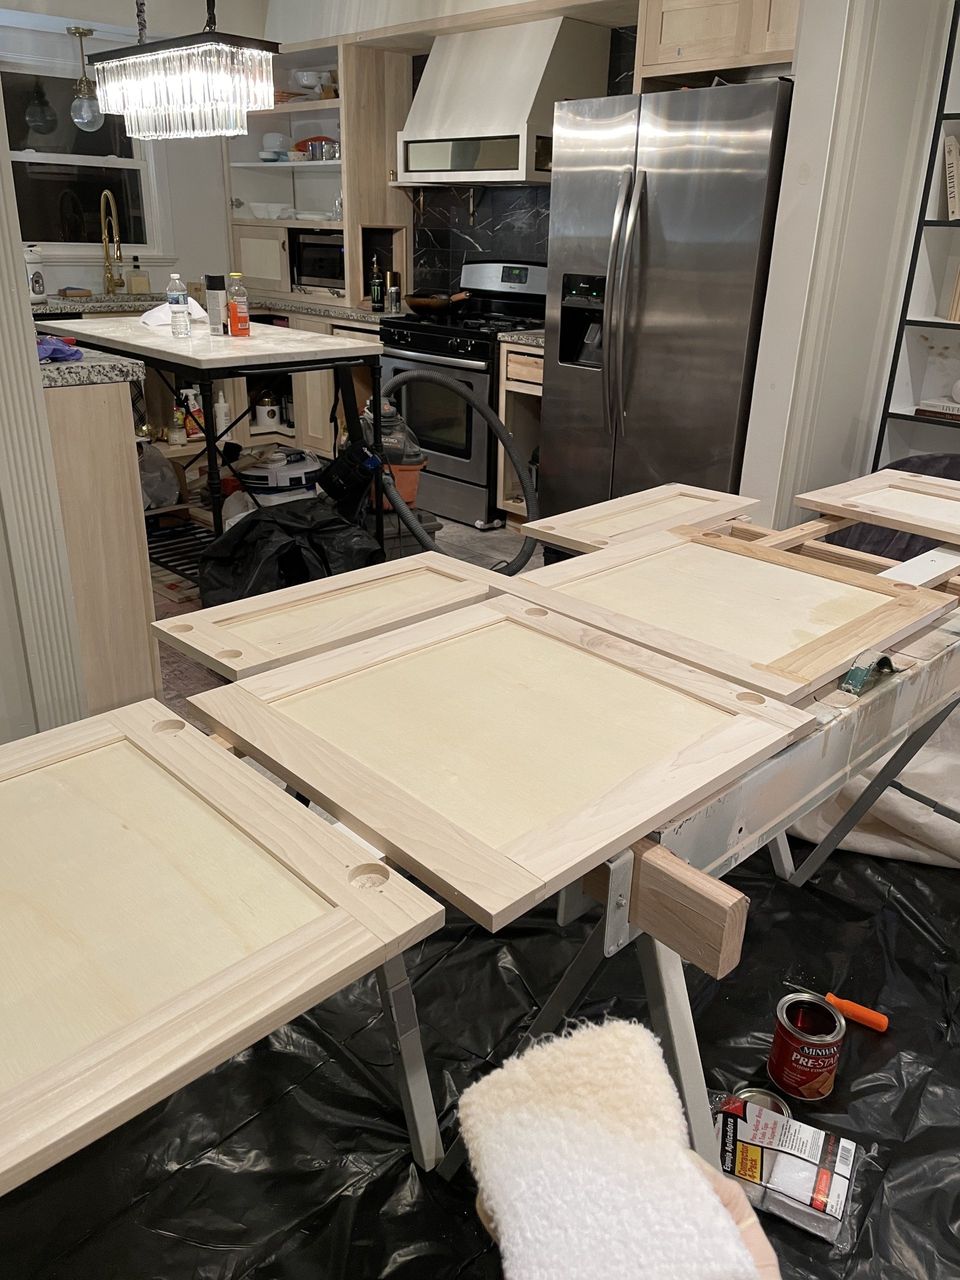
The worst part of this entire process! Staining. I honestly hate staining wood so much lol. We used the same combination that I've used on several projects in my home which I will list below:
- 1 COAT SIMPLY WHITE
- 1 COAT GOLDEN OAK
- 1 COAT WEATHERED OAK
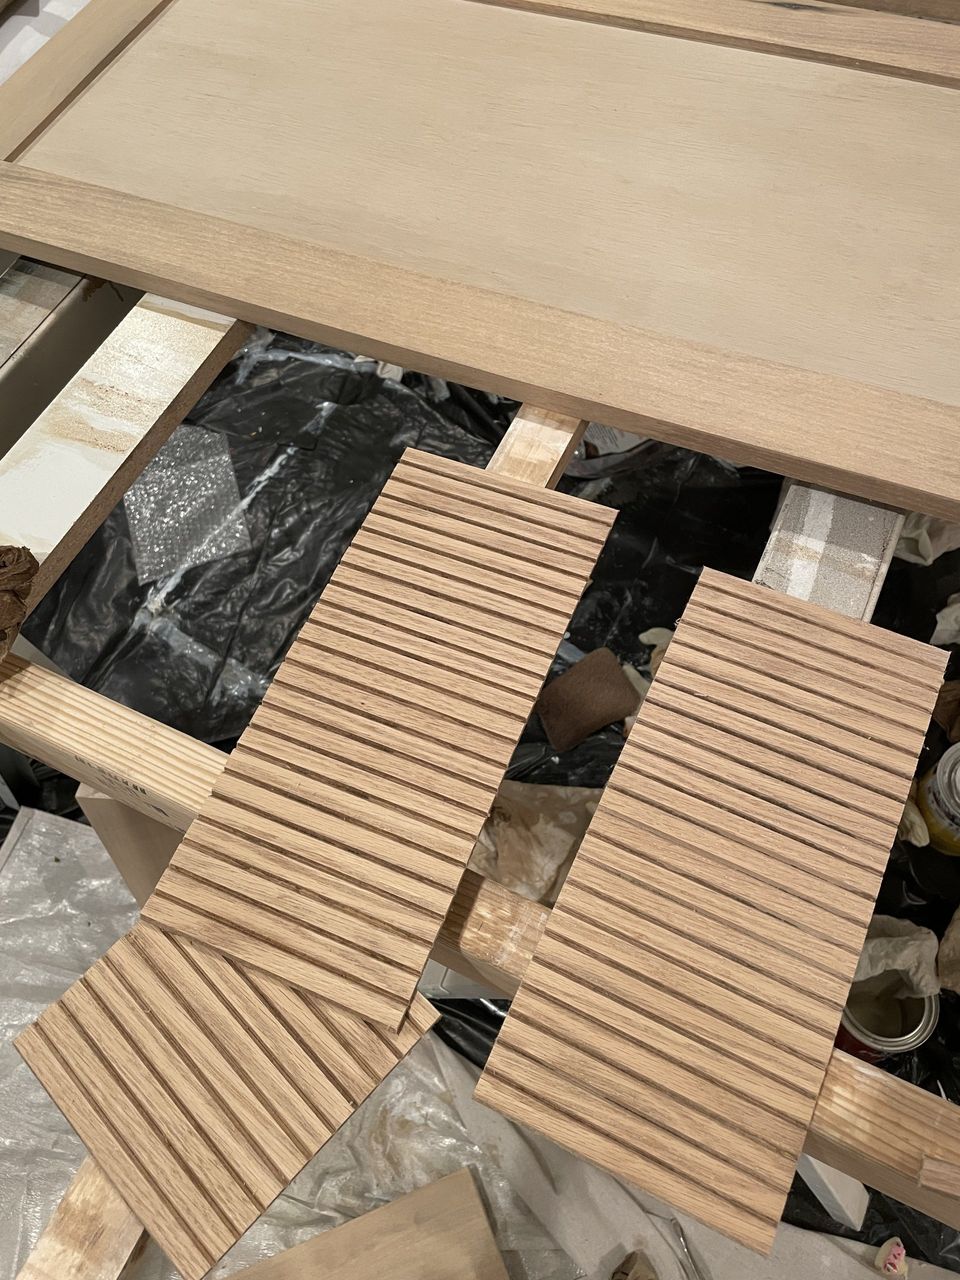
I came across these fluted pieces which are actually oak pole wraps. They came in huge sections that are 96" long! We cut them into sections to use as the fronts for the cabinet doors. I love the visual interest & texture! We repeated this detail behind the sink as well!
Staining is such hard (& stinky) work. We didn't worry about getting stain on the walls because we needed to paint the whole room anyway.
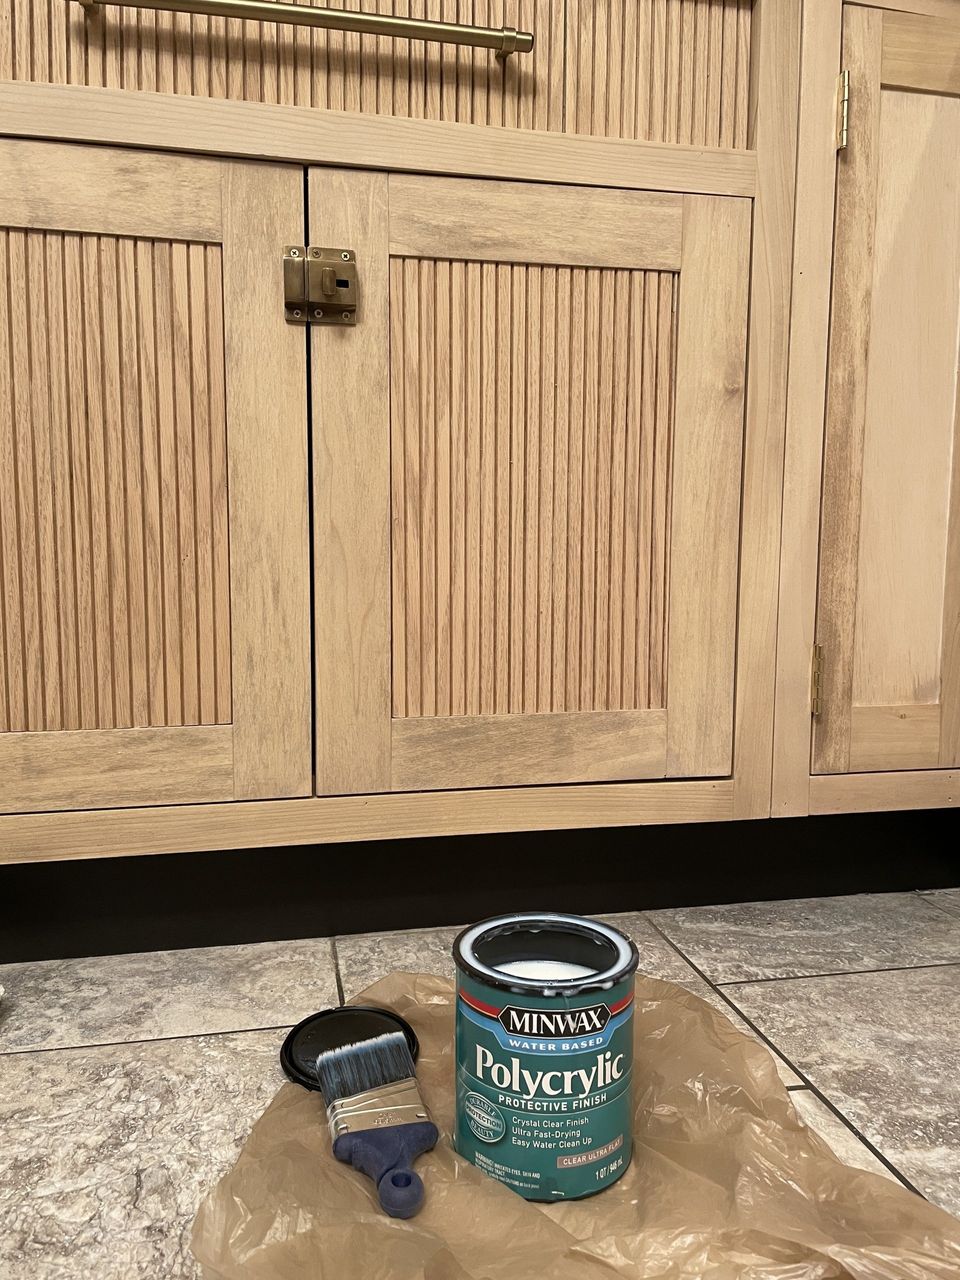
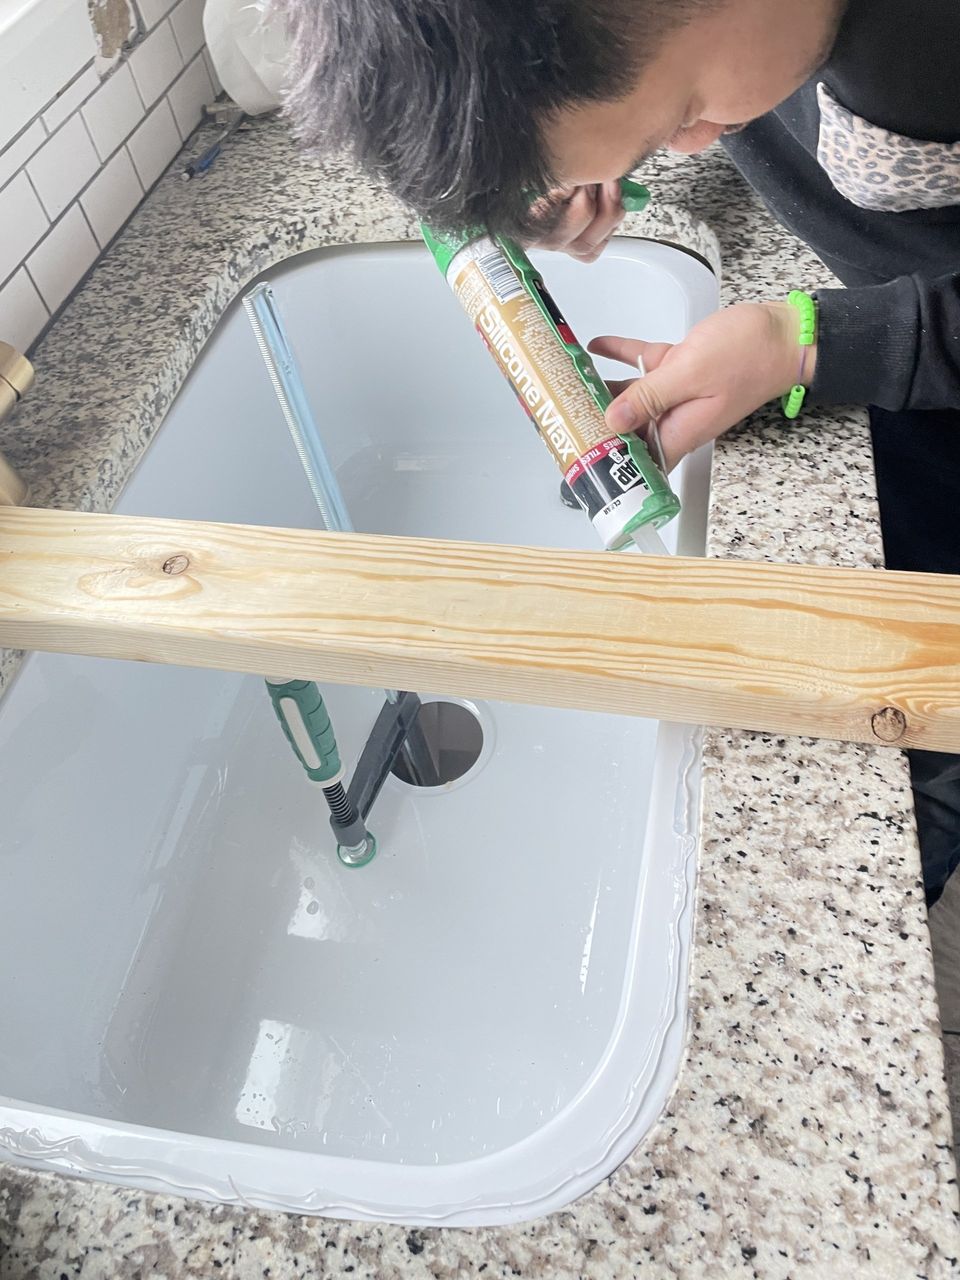
Ahh! Aren't they so beautiful? Pictured above is me sealing the wood with an ultra flat polycrylic. Notice some of the hardware? This means that we're done with the cabinets!!!

I fell in love with these antique gold latches. They were a great color match for some of the existing pulls that I own (on my living room built-ins and bathroom vanity), so I decided to use knobs by the same company for the kitchen. Repeating little details like this throughout the house really helps the flow of the home.
CEILING PROJECT
I think we can all agree that popcorn ceilings are the worst. They make a room appear so much smaller because of the shadows created by all the texture. It's a huge dust magnet which is impossible to clean. In this case, the built-up grease was never going to come out! Trust me, we have had many failed attempts & it'll be forever stained.
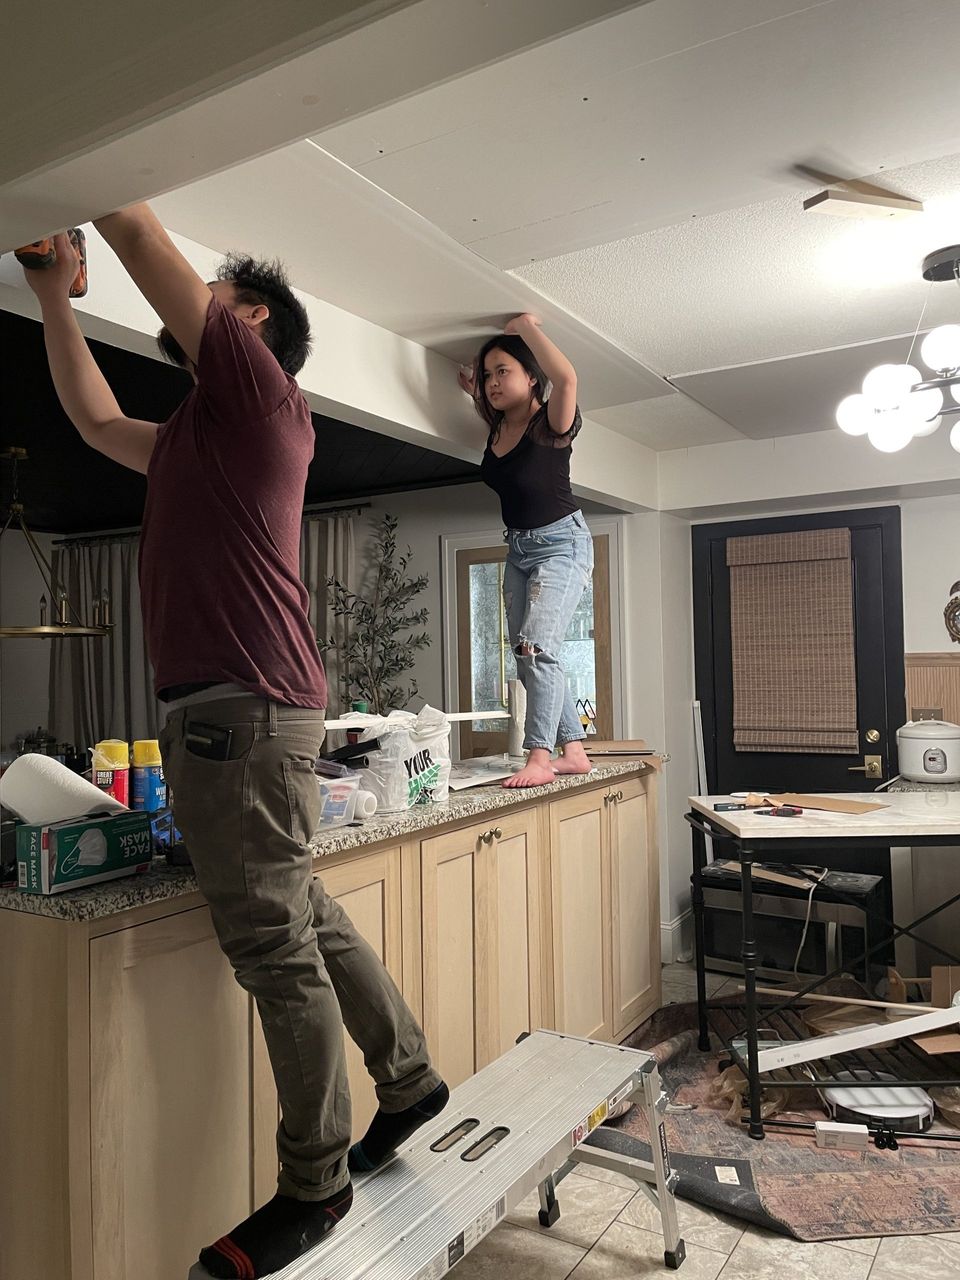
A part of me wasn't mad at it. That just meant that we could finally get rid of that horrible texture! Considering our home was built in 1963, we didn't want to deal with any possible asbestos (and the dusty mess), so we decided the best way to go about this was to cover it with new drywall. It only makes the ceiling a tiny bit shorter which isn't noticeable & it makes the process 100% times easier.

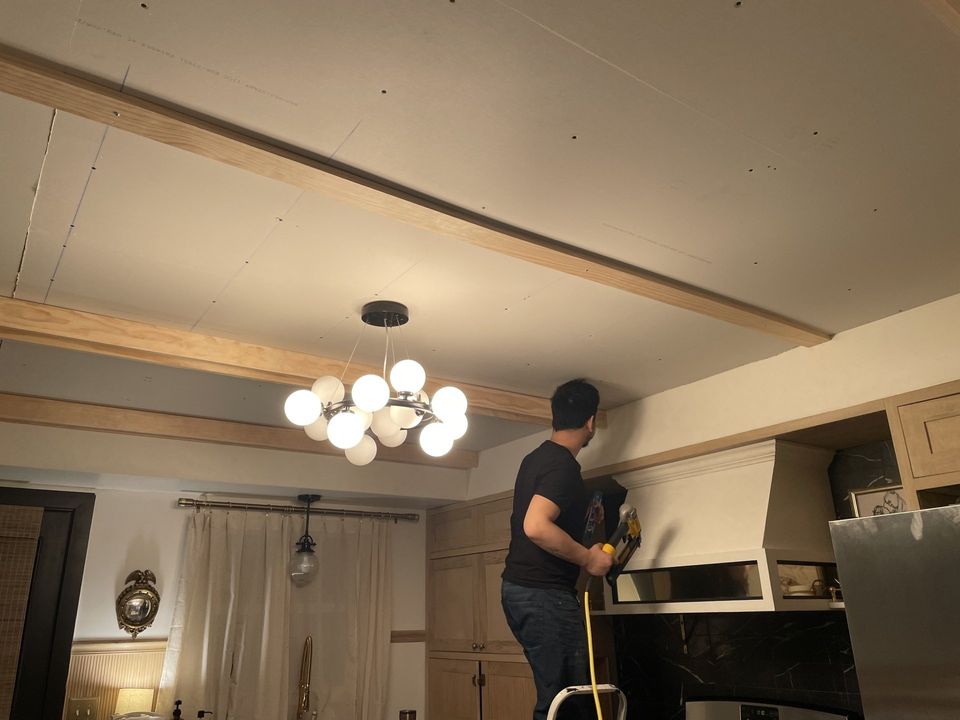
Did you think I would just leave a bare ceiling? It wouldn't be me if I left it plain, lol. This was the perfect opportunity to add in some faux beams for a little architectural detail. Also- don't mind the light. Haha I went back and forth between light fixtures.. this one just wasn't the one. I had imagined it to be a lot bigger but it ended up way too small.
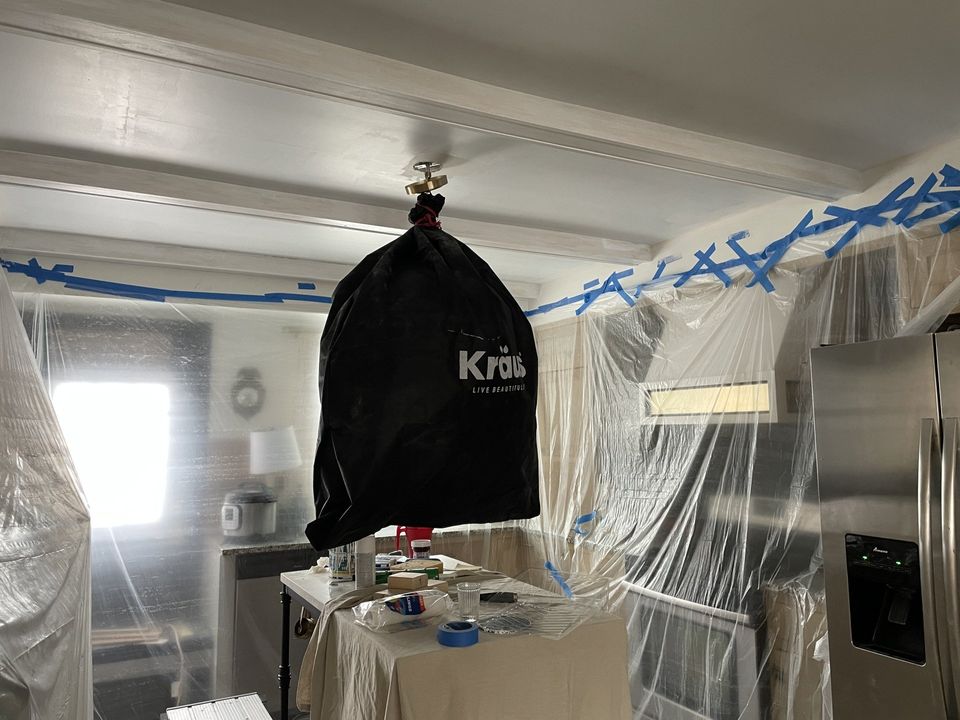
However, here you can see I replaced it with something different. Haha it isn't made by Kraus, by the way. I used the packaging bag that my sink came in to protect my new fixture from dust & paint for the ceiling. Ahhh, this part is so exciting!
We used Pure White by Sherwin Williams in flat for the ceiling & satin for the faux beams.
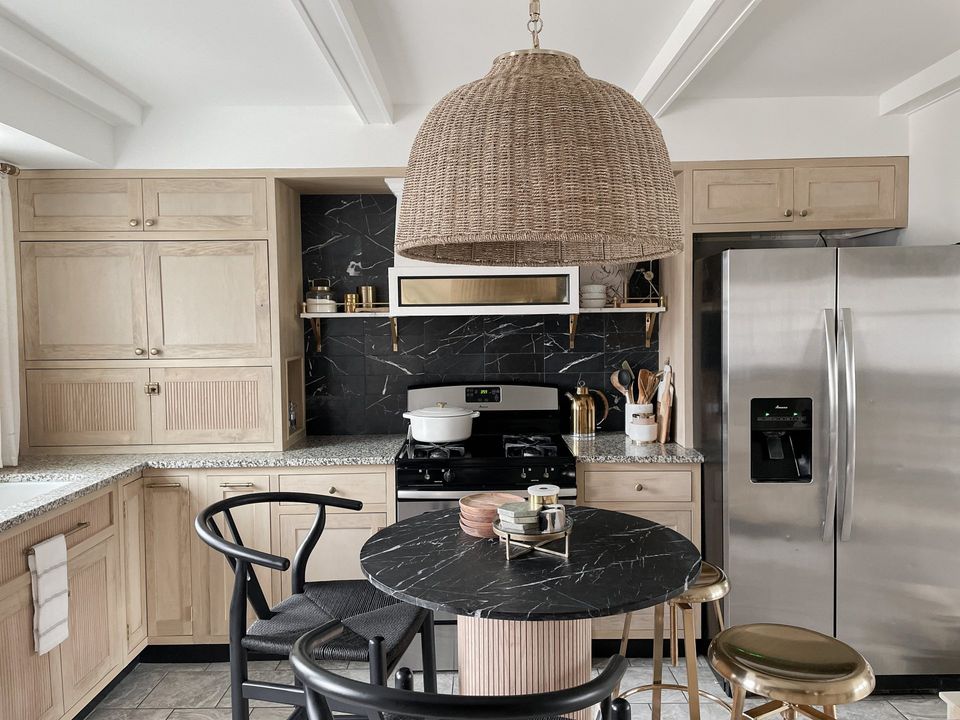
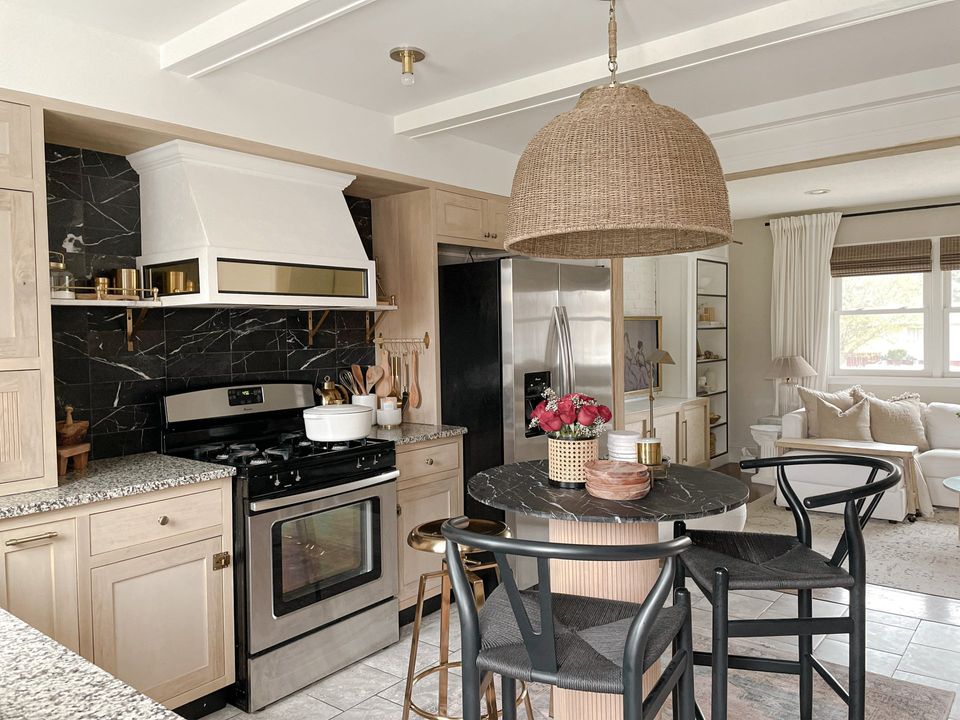
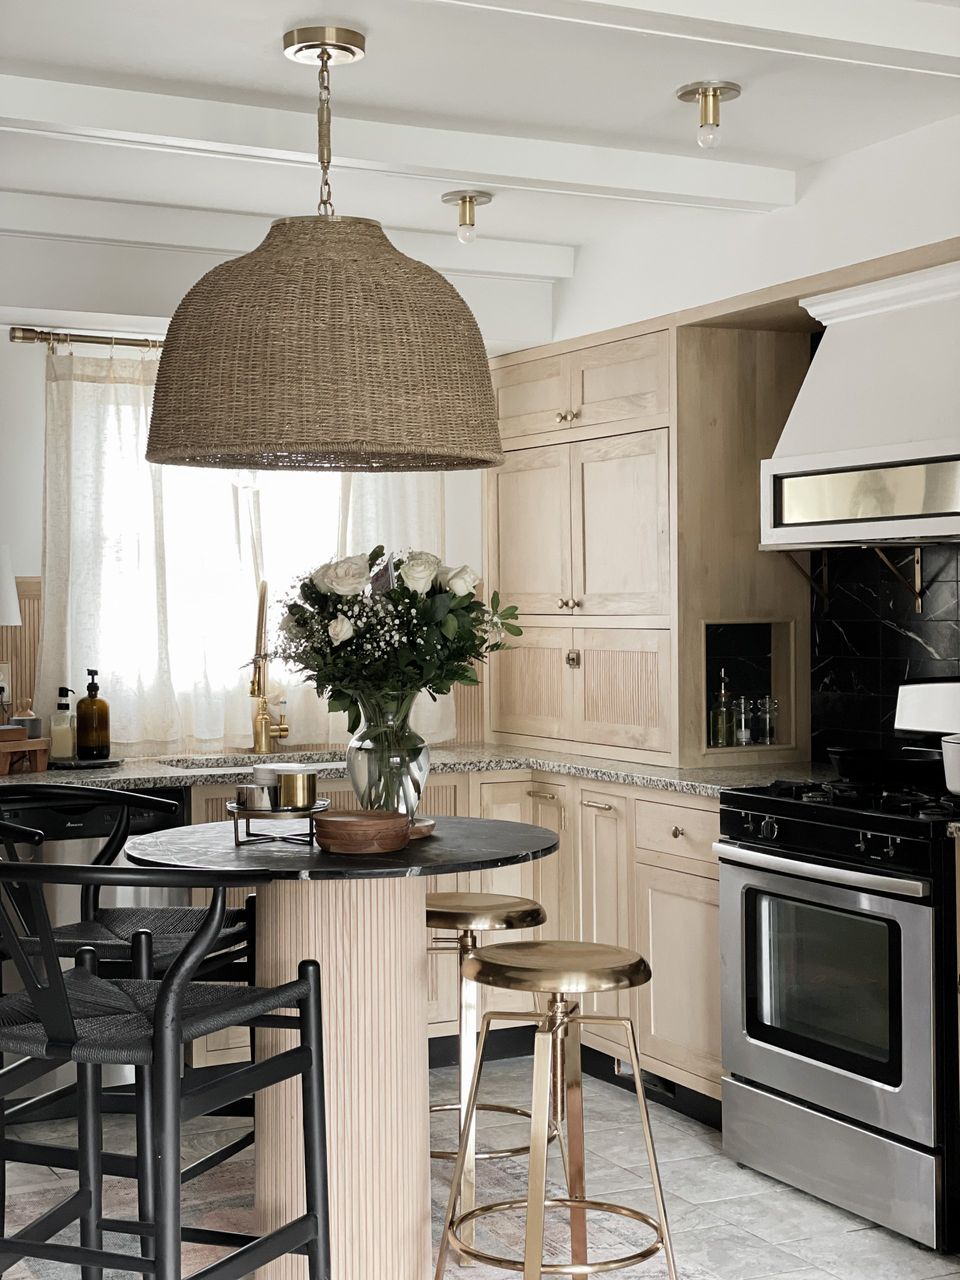
OUR D.I.Y. FLUTED/BLACK MARBLE ISLAND
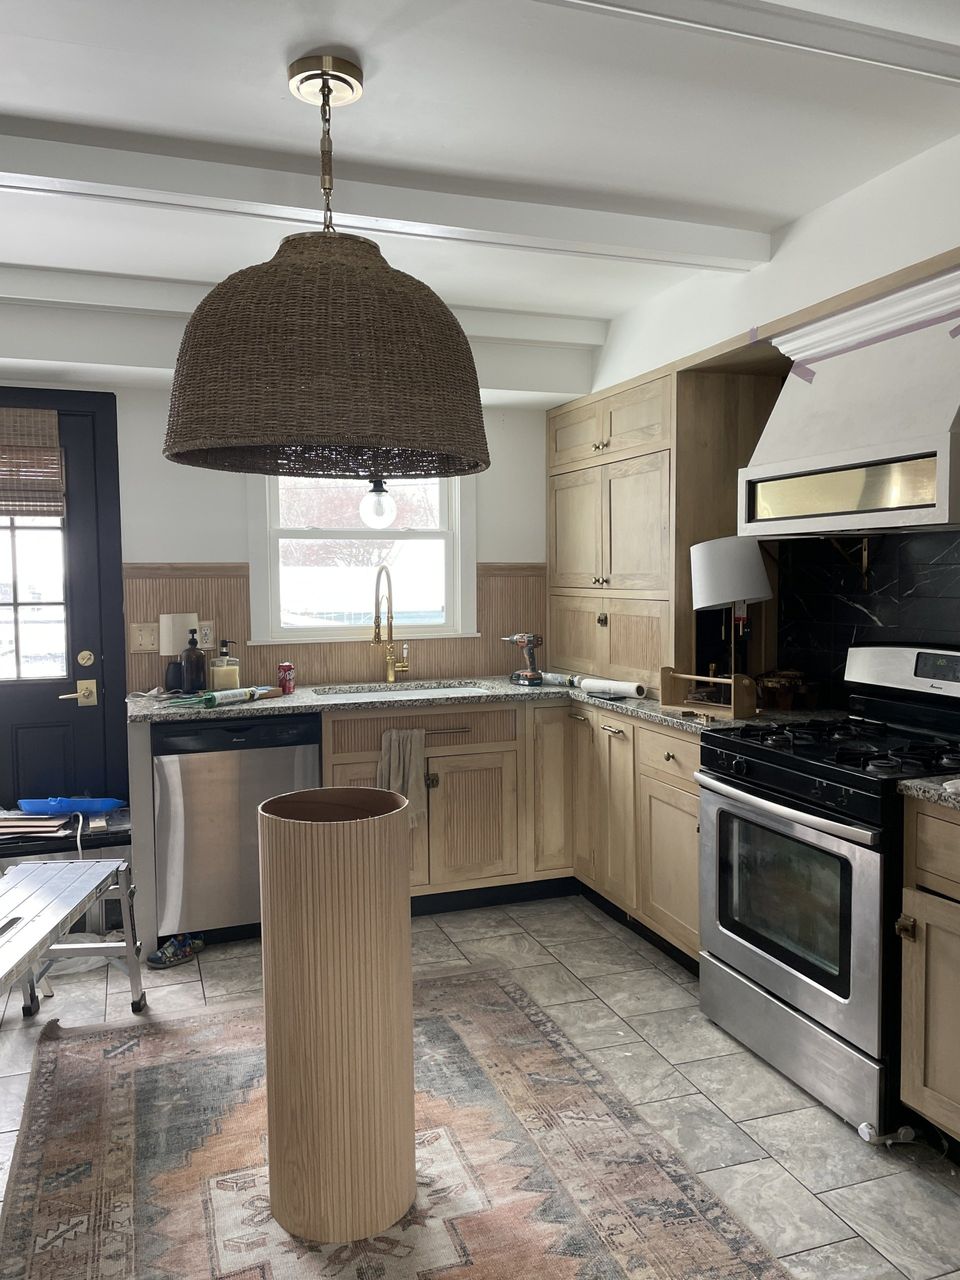
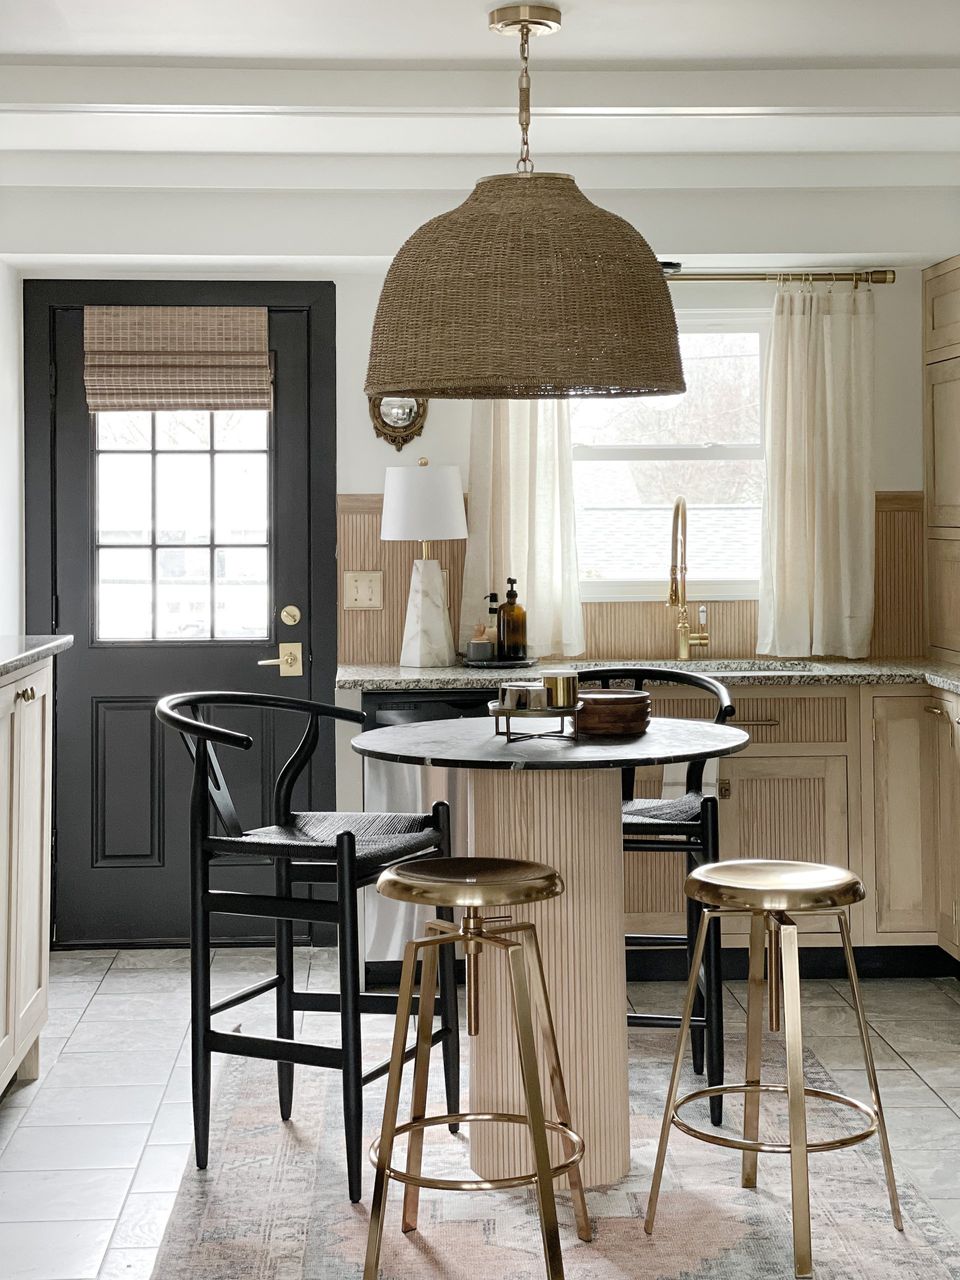
Look at that beautiful oversized woven pendant! It's by Studio McGee Threshold. I love how substantial it is.
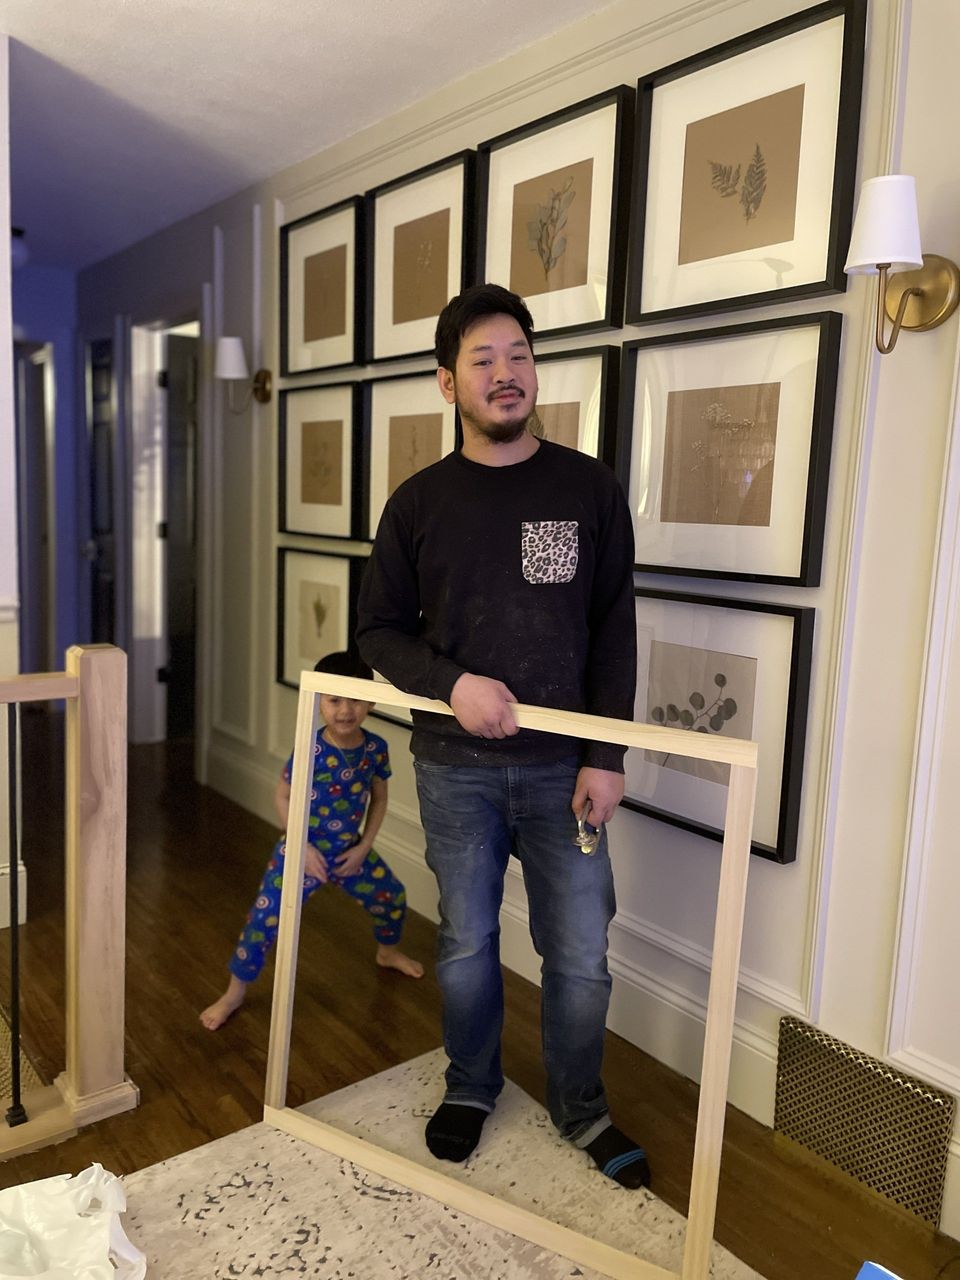
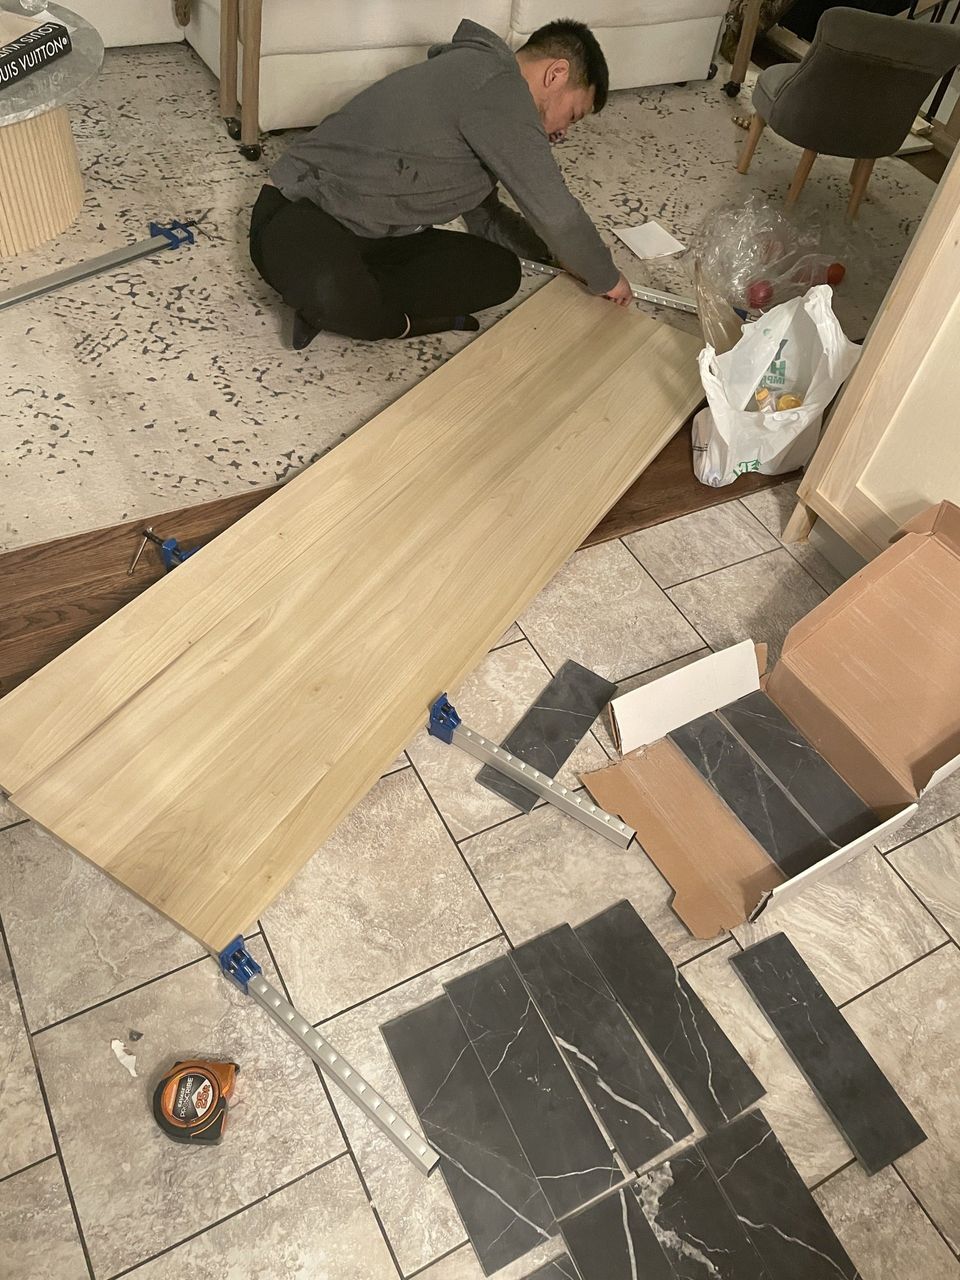
Now that all the other chaos is finished, it's time to move onto our island. We needed something smaller for our little kitchen because our previous island was too big. I really love round tables but I found it challenging to find the perfect piece. So we took it upon ourselves to just build our own, of course. The fluted panels were perfect as a base! We attached it to a concrete form tube and filled inside with sand bags to give it some weight, which keeps it from tipping over.
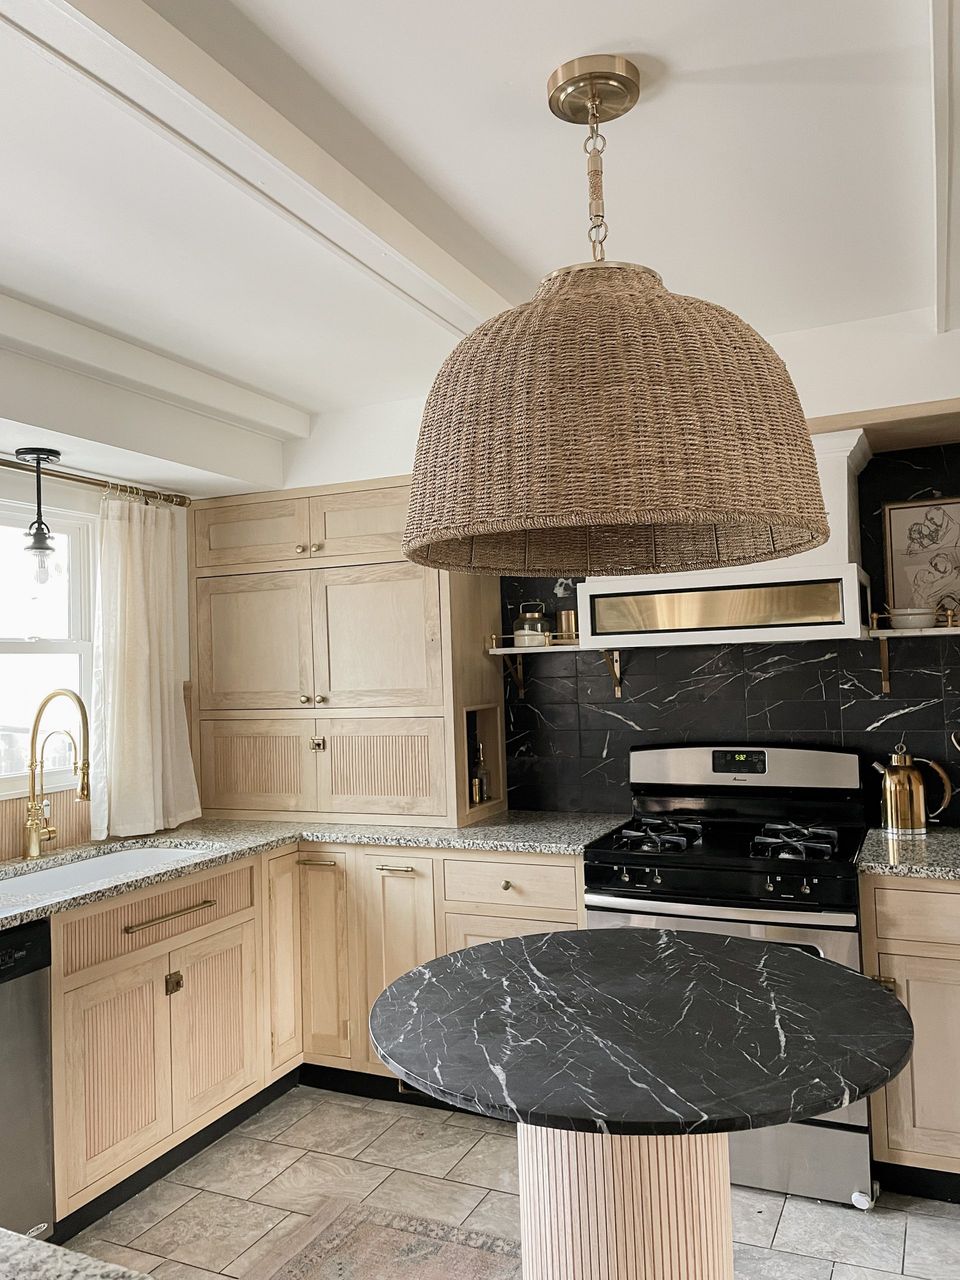
For the black marble top, I stole a table top from our family room's coffee table! It's the perfect size & I love that it goes so well with the backsplash. It looks so cohesive & custom. However, the marble used to be polished which wasn't really the vibe I was going for. So we did a crazy experiment & poured vinegar all over it to hone it! It didn't turn out perfect but it still looks so much prettier than it did before.
Next, searching for the right chairs..
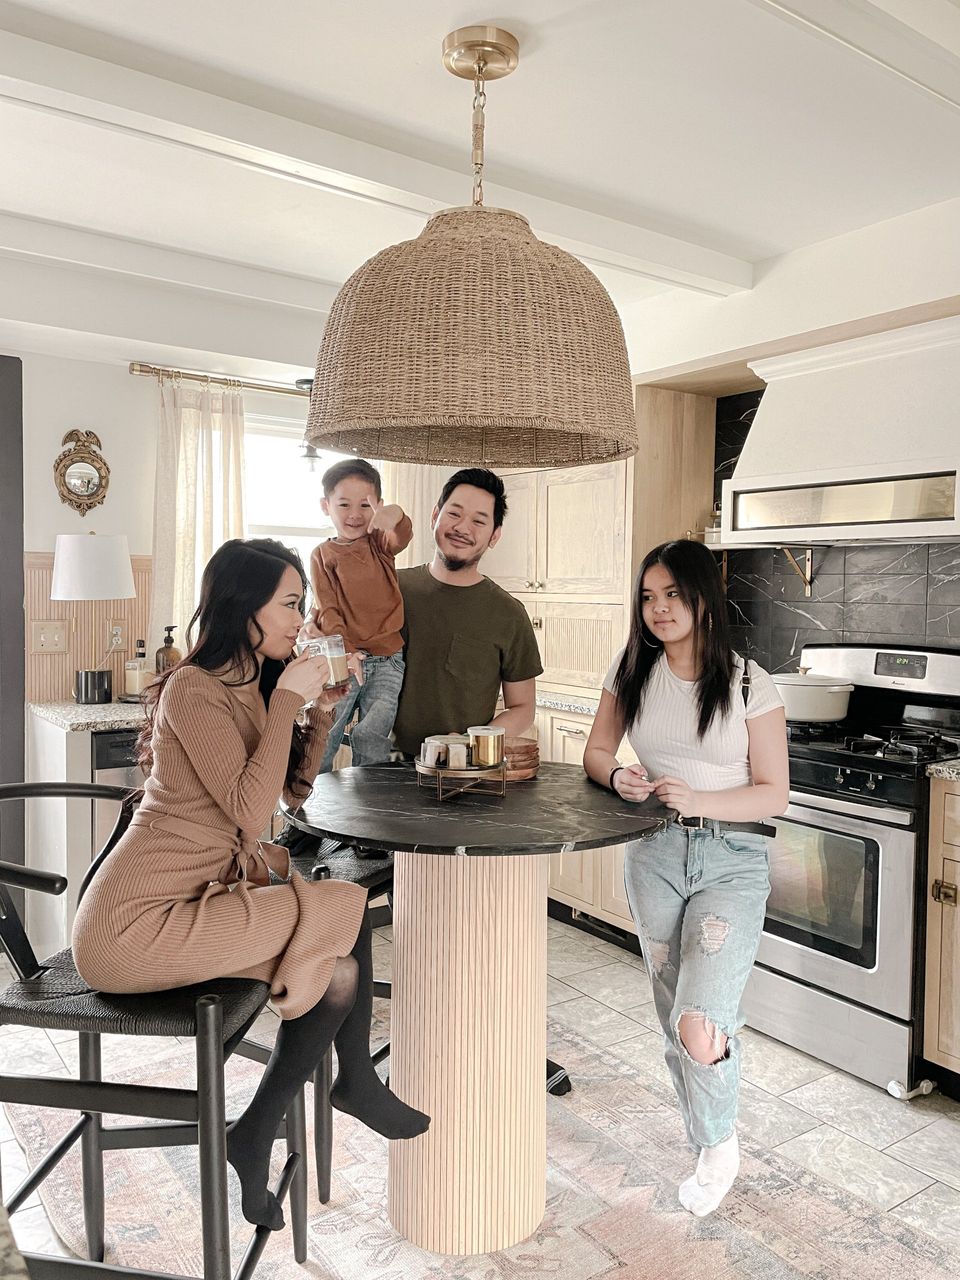
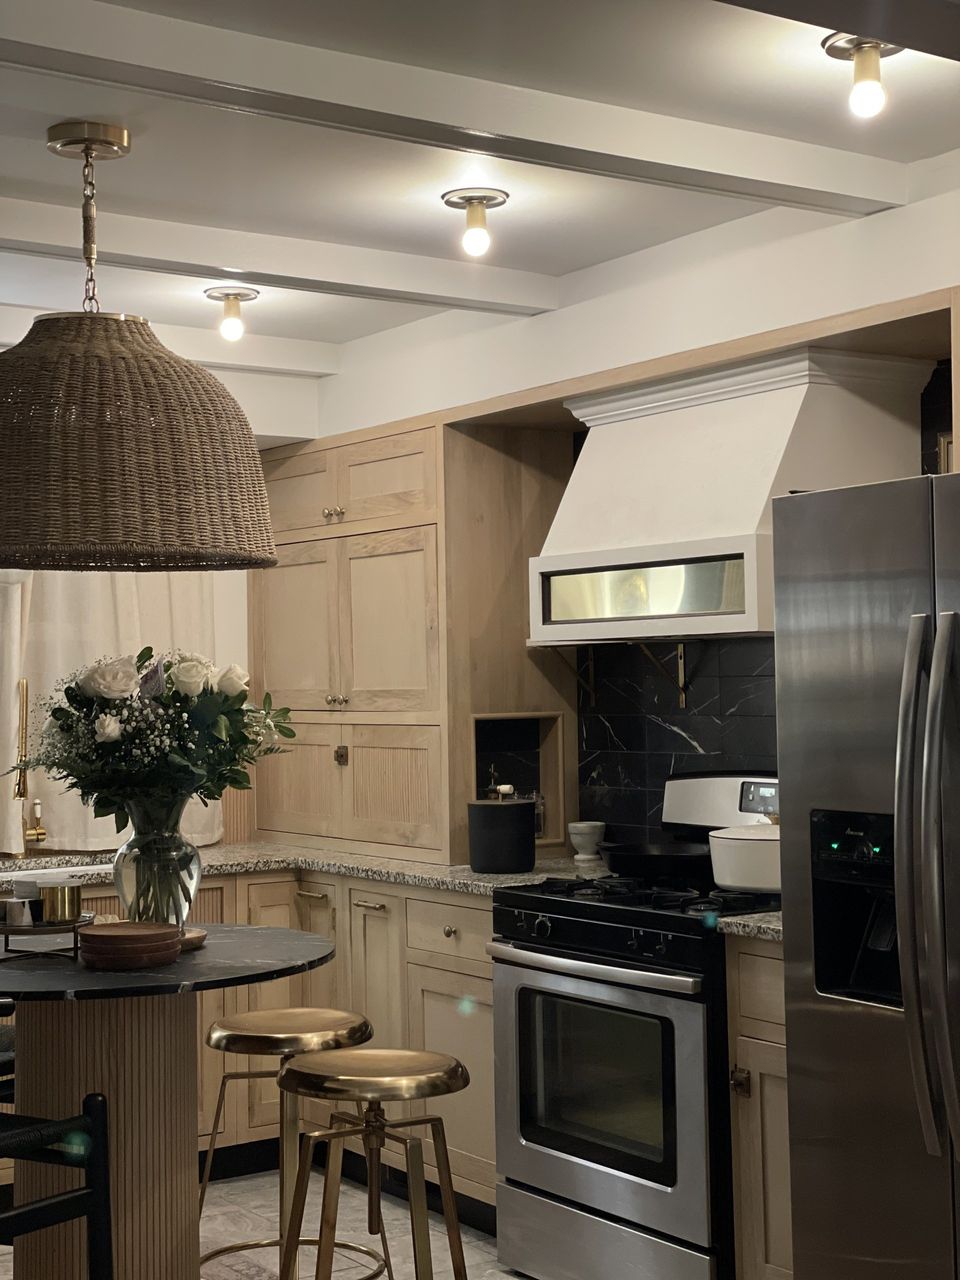
.. which we found! A fun little touch was to mix two different chairs together. I went with black wishbone counter stools and gold backless stools. I love having a variety of seating options available. Also, did you notice the minimalist looking sconces on the ceiling? We installed those towards the end of the remodel. They're super simple with a little mixed metal detail! They really tie in the appliances with the brass elements. In the future, I'd love the incorporate brass/stainless steel appliances. I already have my eye on a couple options!
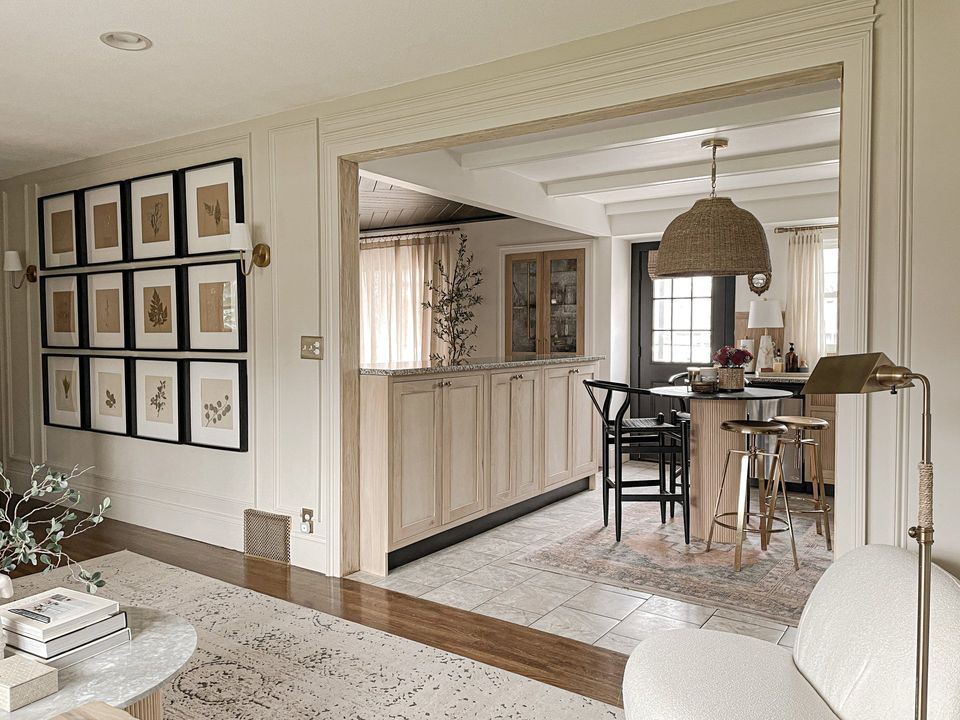
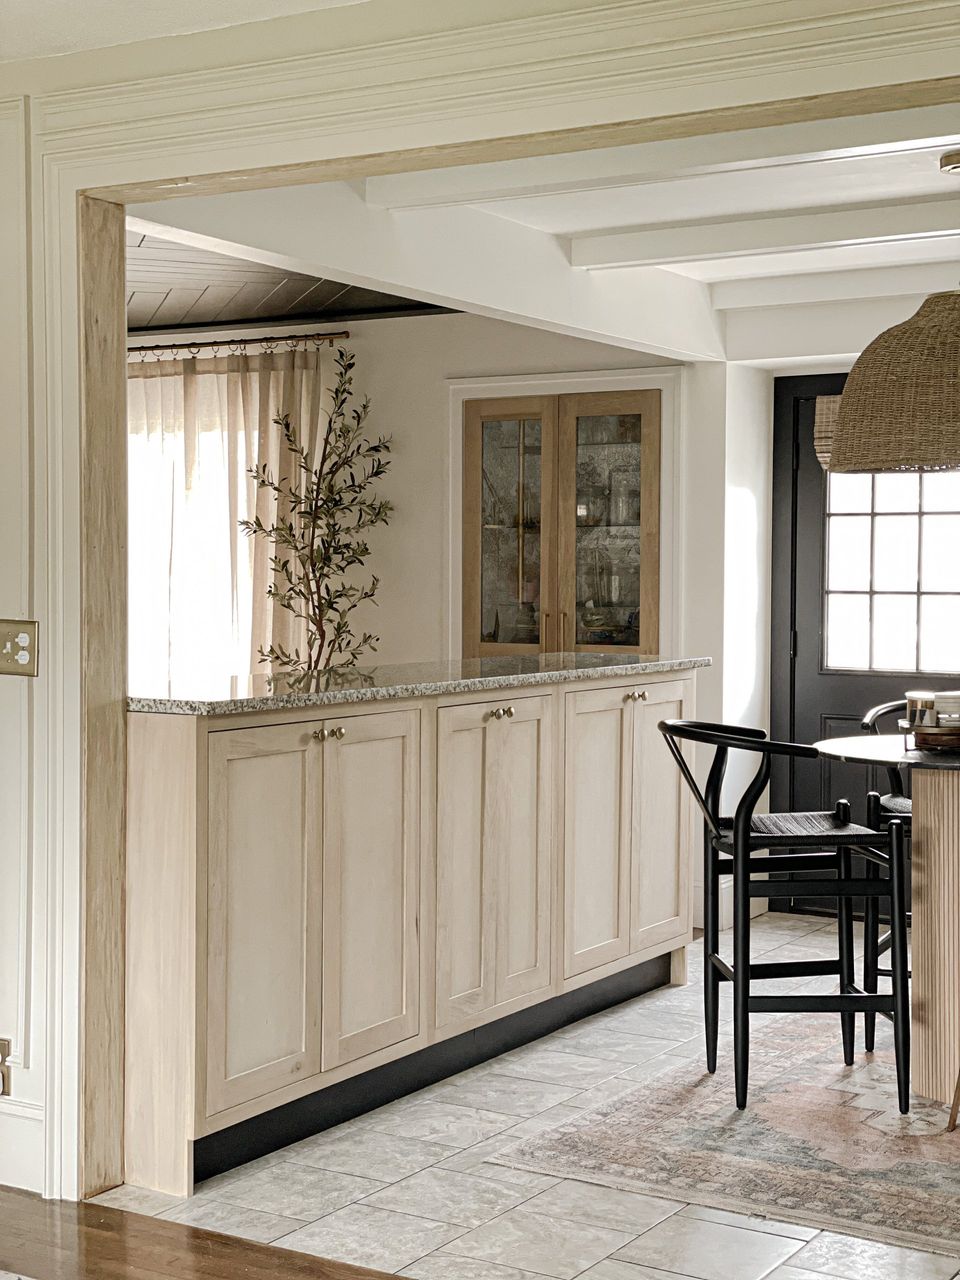
CASE OPENING INTO THE KITCHEN
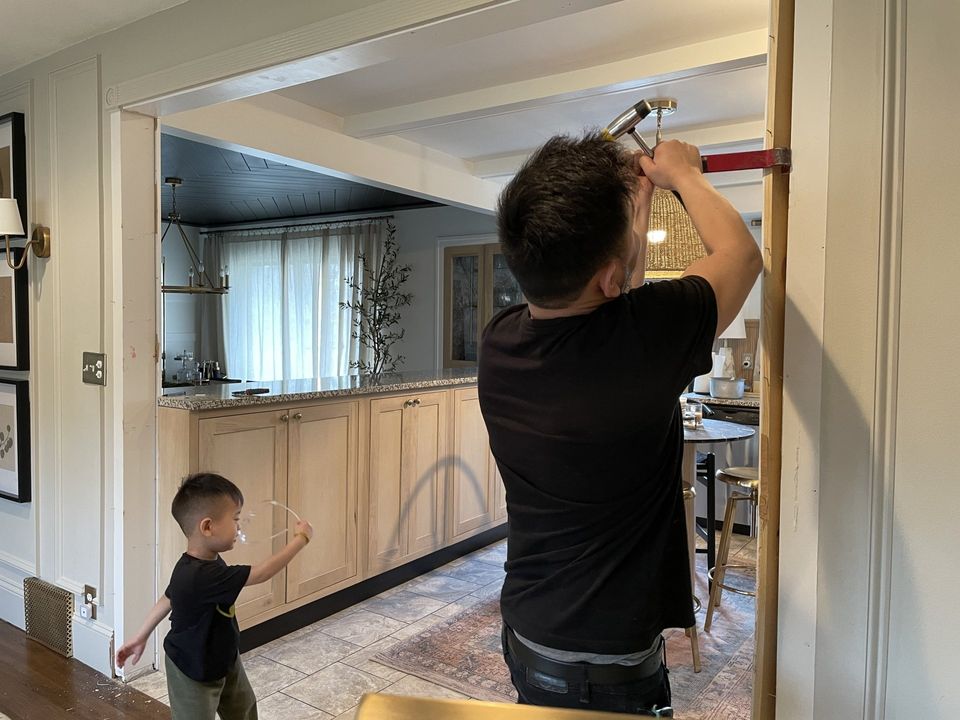
Roman looks like he's doing a happy dance because we're so close to this kitchen being complete. Honestly, as I'm writing this post, I kind of can't believe we did all of this in 2 months lol. Anyway, we really needed to replace the builder grade trim on the case opening. It's such an important detail because it looks right into the kitchen.
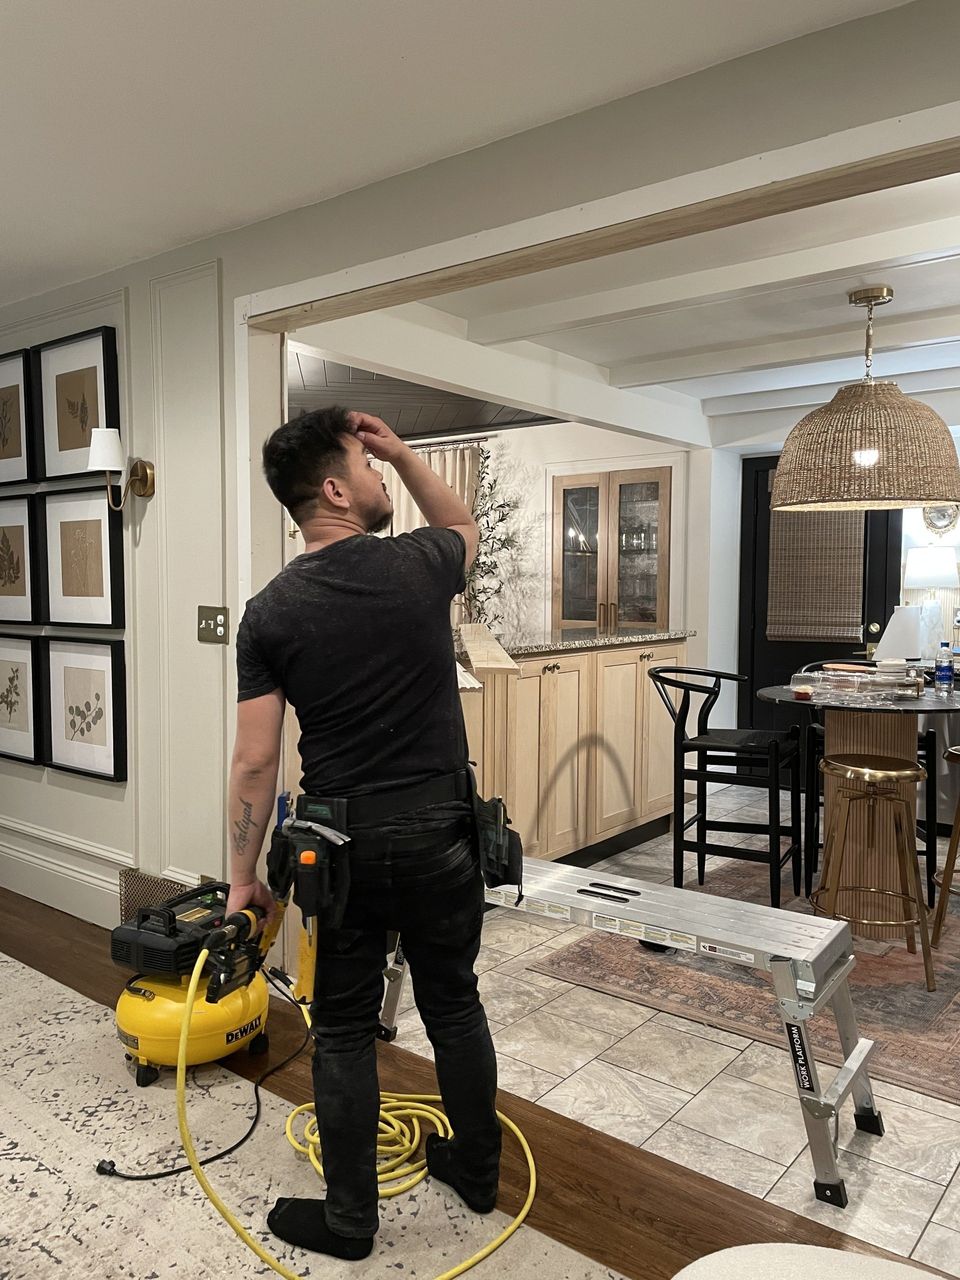
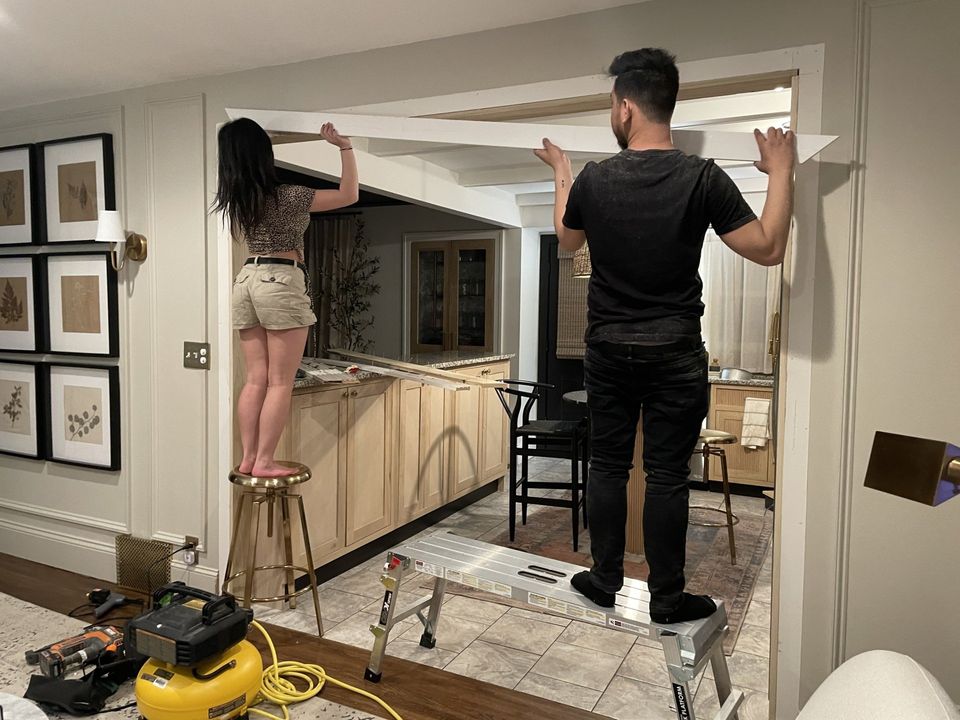
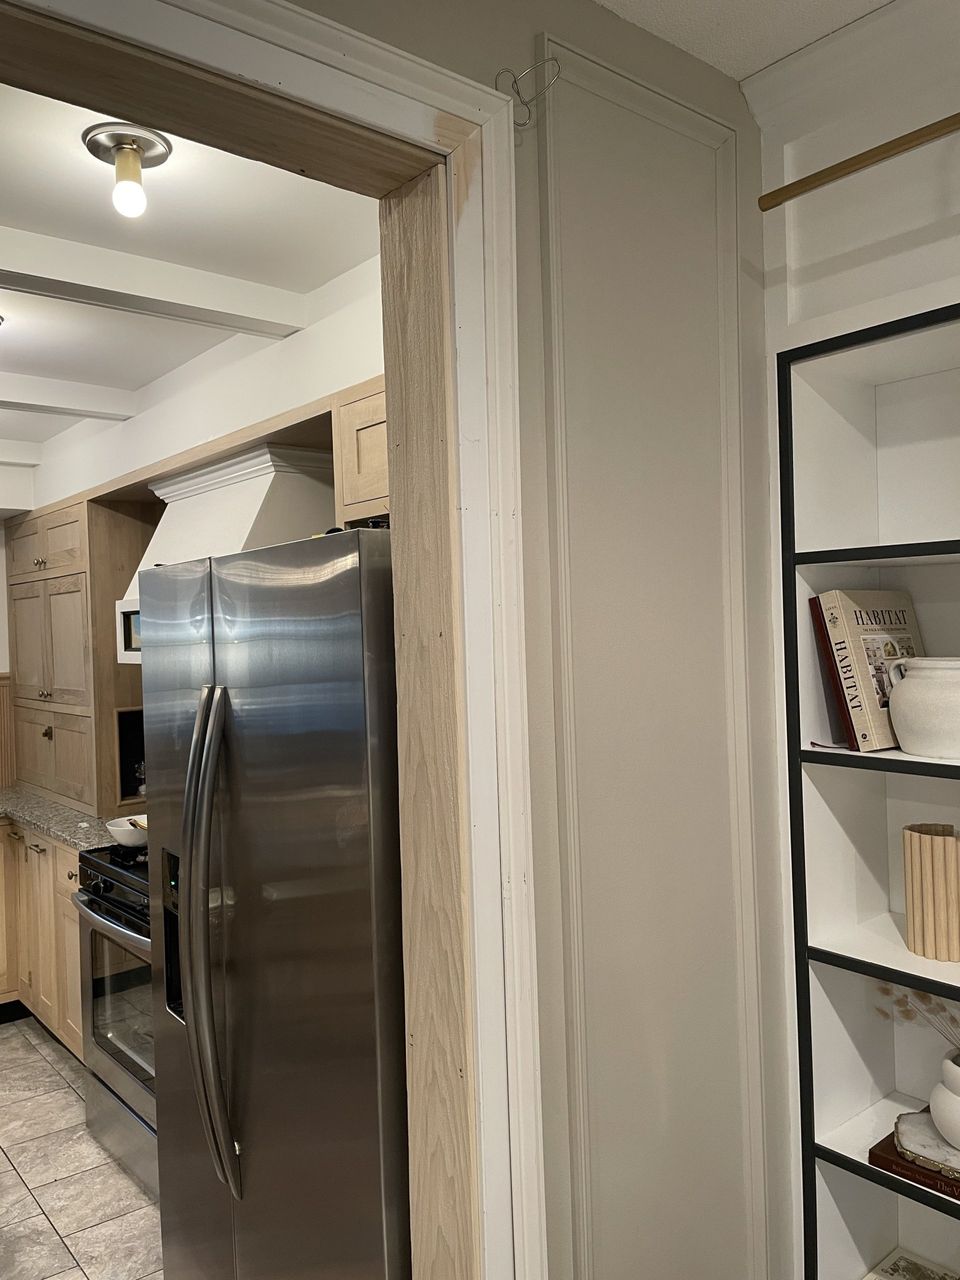
I wanted to add in some aged-looking wood for the door jamb paired with more decorative trim (to match all the wainscoting) on the outside. I love that the wood detail is "introducing" the wood cabinetry in the kitchen.

We used a variety of different trim profiles for a more layered, dimensional effect. All it needs (in this photo) is just paint! We went with the same color as the walls - Sherwin Williams Accessible Beige @ -25%
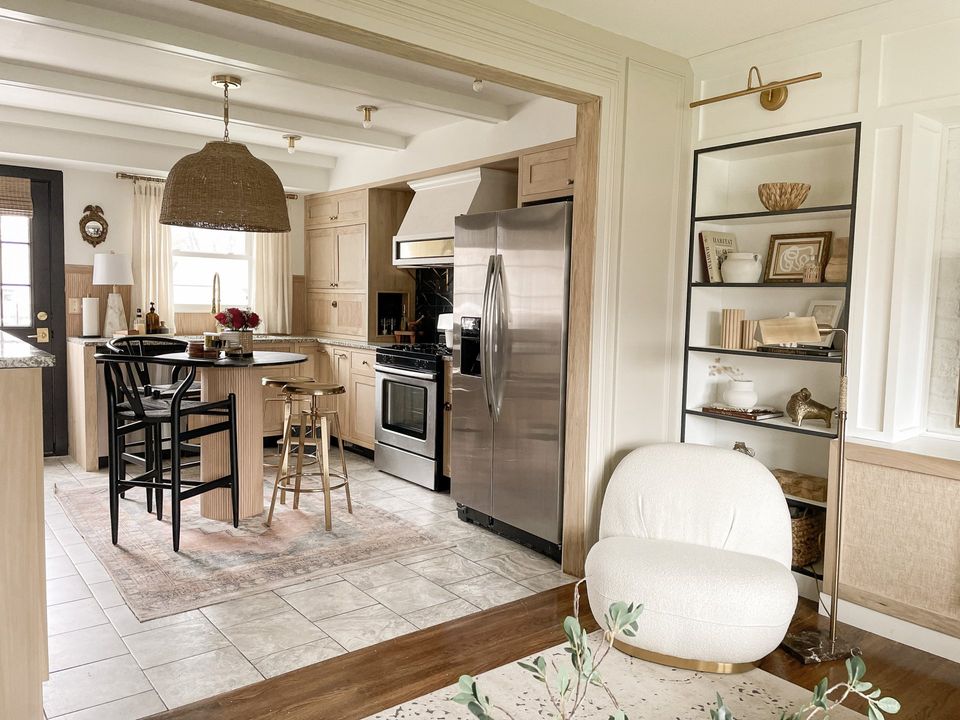
THE COMPLETED KITCHEN
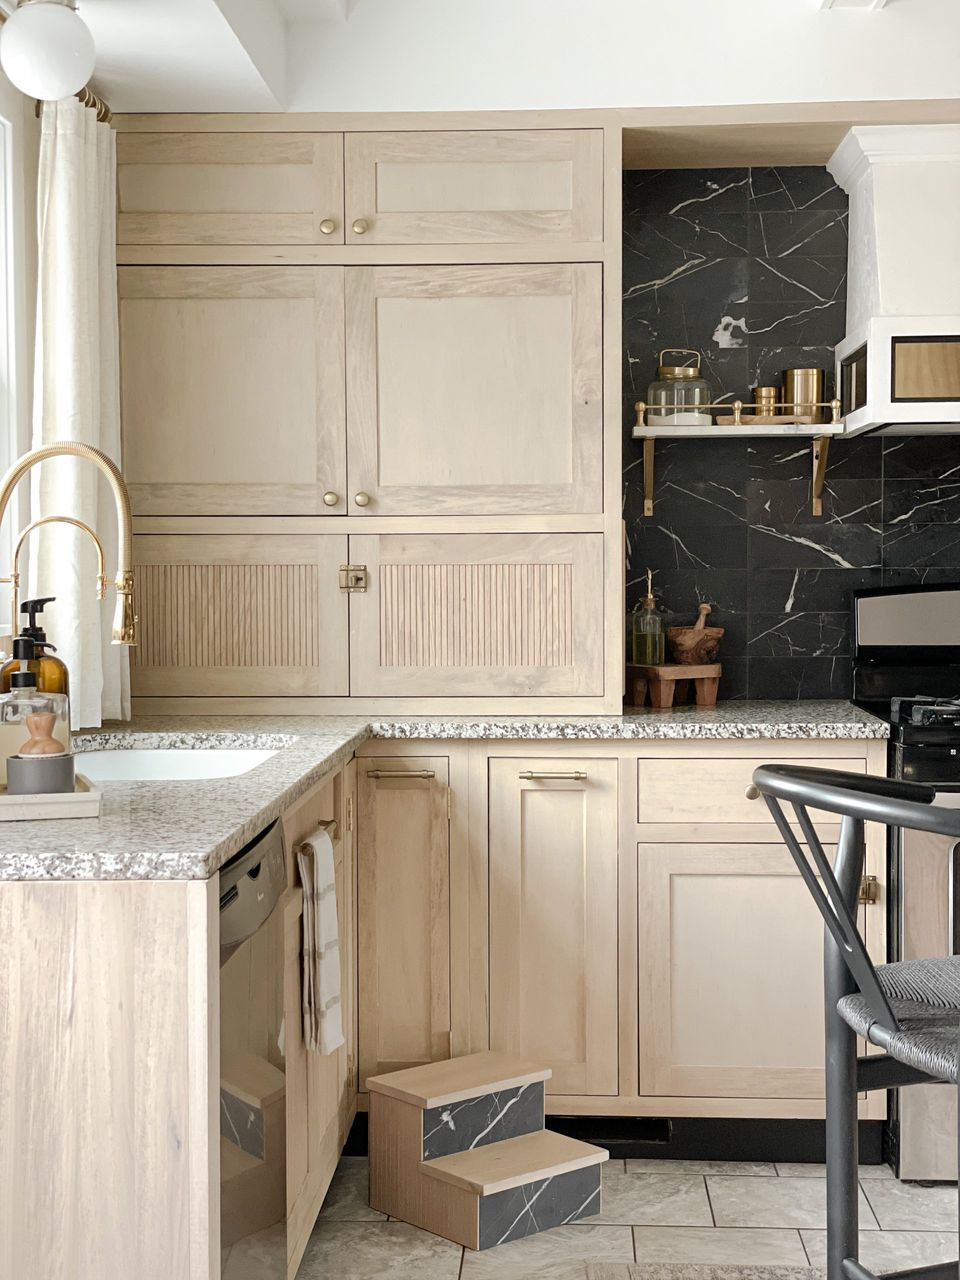
Notice the matching step stool that we built? It is literally the cutest little addition. Look out for a future blog post on that.
If you guys are wondering where we ended up placing the microwave, it's hiding in the hutch! The right side door opens down, giving the microwave room to open freely. The left side door opens normally, with a drawer the slides out housing the coffee maker. I love this little corner! So functional.
Oooh that flow into each room. I can finally say that I love almost every view in my house.
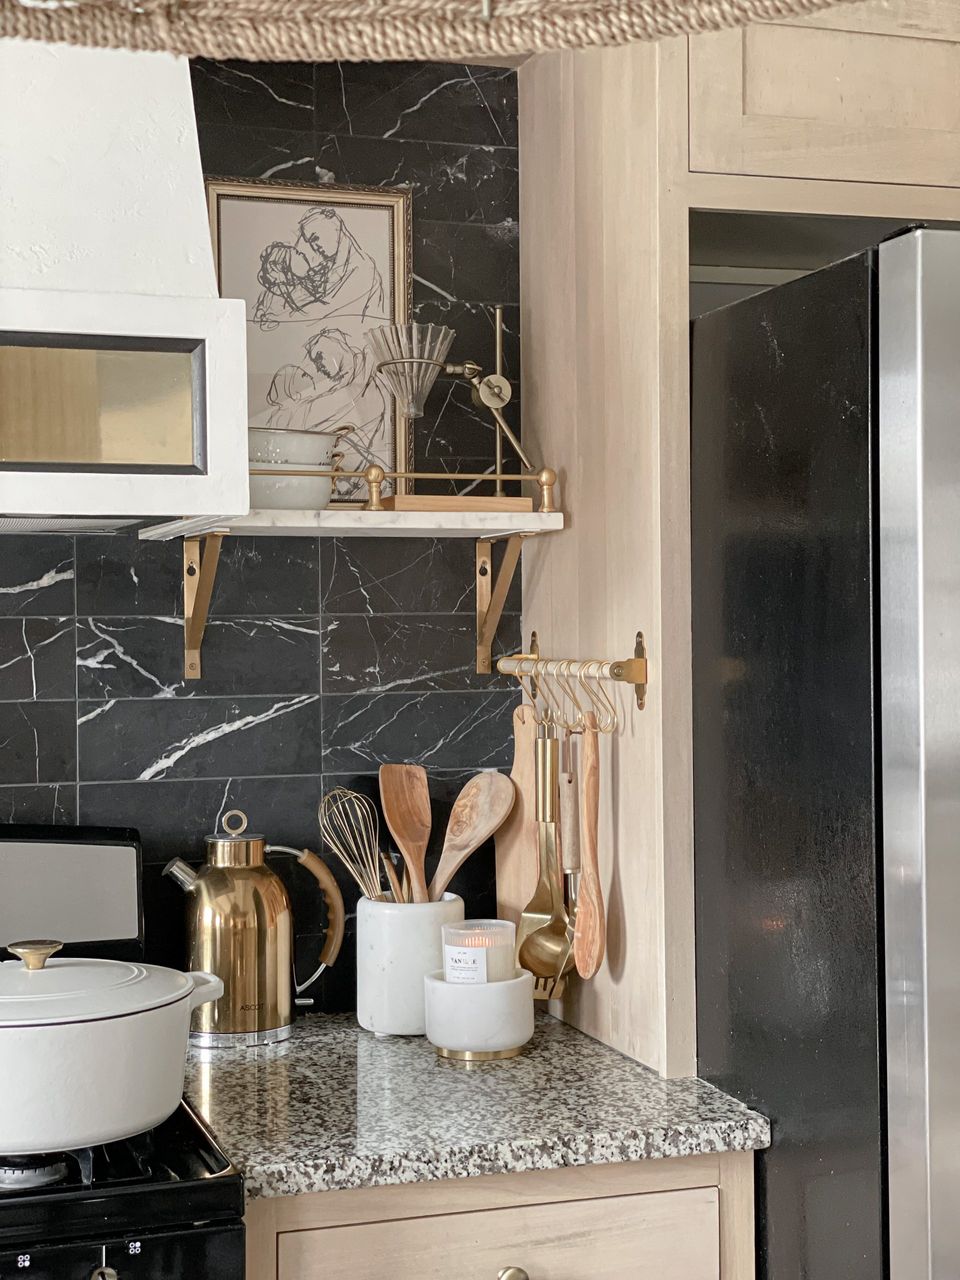
We added this brass & wood utensil railing in last. It's such a cute little touch, although I do have plans to replace it with a magnetic knife holder. Super excited for that! It's one of the things that my fiancé really wanted.
That sweet framed art (called "Lovers" by BFFPRINTSHOP) is my little reminder of the love that my fiancé & I have for each other. Even through a stressful, overwhelming kitchen remodel. We made it through the other side without killing each other, hahaha.

These spice jars bring me so much joy! This! is exactly what kitchen dreams are made of lol
The beams. The lighting. The mixture of different hardware. The fluted detail. The honed marble. The niche. Ugh everything in this kitchen makes my heart so happy! & to think we did this all on our own. I'm so proud of our hard work!
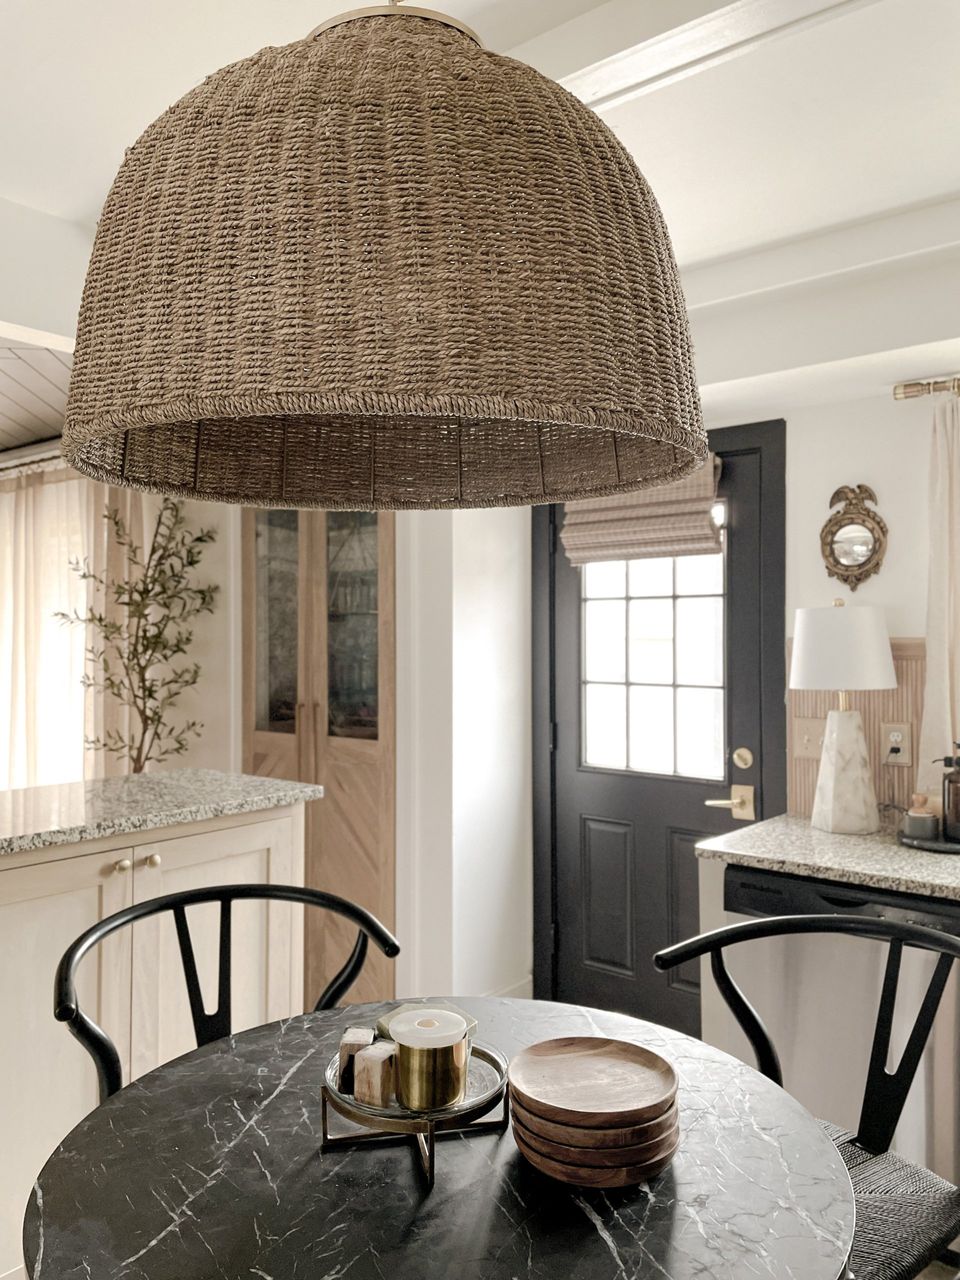
Views on views on viewsss!!
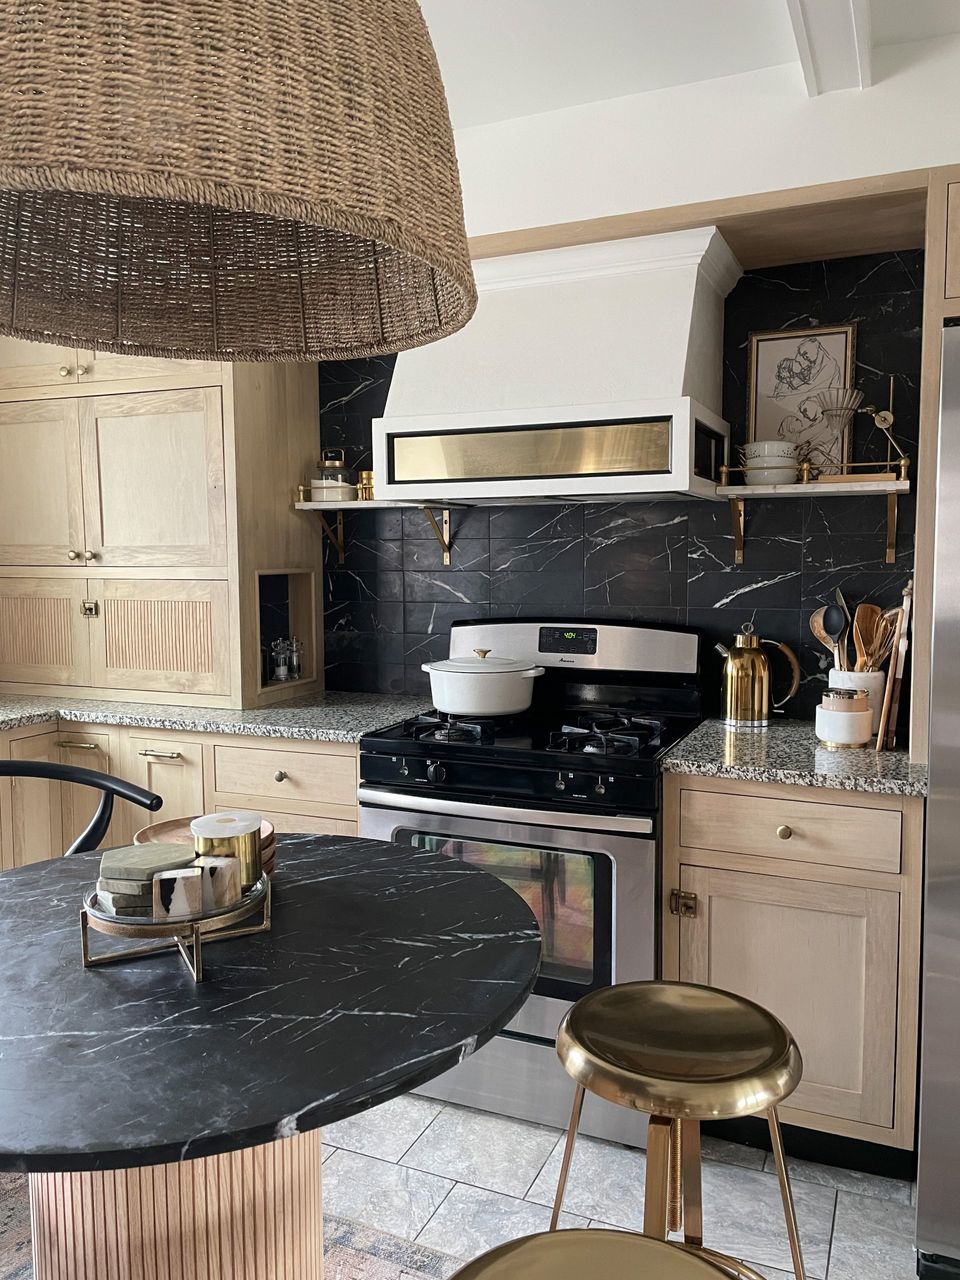
A really great shot that shows the black toe kick! I didn't mention it above, but I thought painting it black would be a nice, modern touch. It's so beautiful with the wood cabinets. I feel like this detail anchors everything else.
Doesn't this view have a quaint little cafe vibe? If you've made it this far into this blog post, you deserve to be invited over to come see this kitchen in real life.
There are still a few more things that we'd love to change (such as the countertops, the floors and appliances). Still, the transformation is incredible & we're so proud of all our hard work as a family to make this come alive. I hope you all love this space as much as we're enjoying it! Now, what's next?