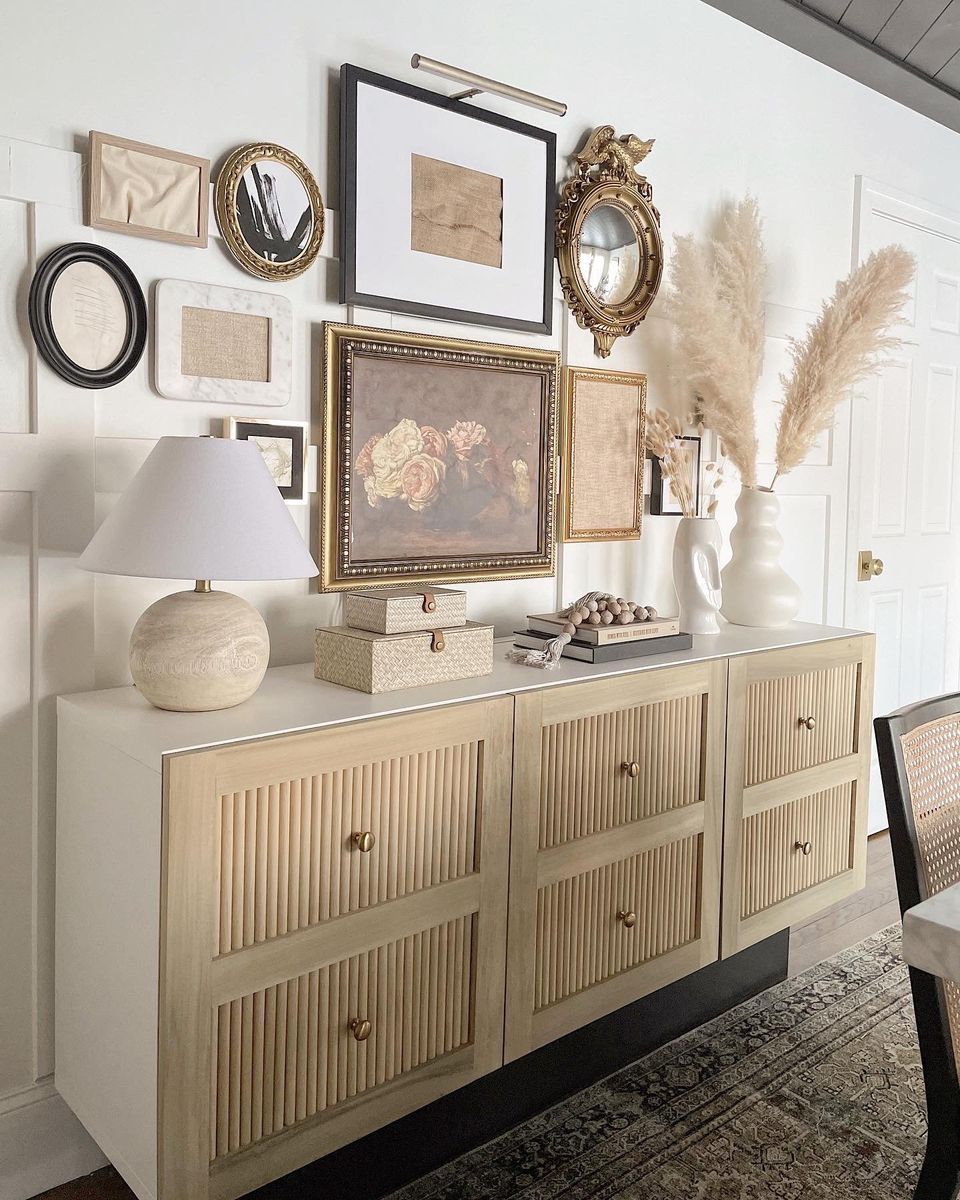
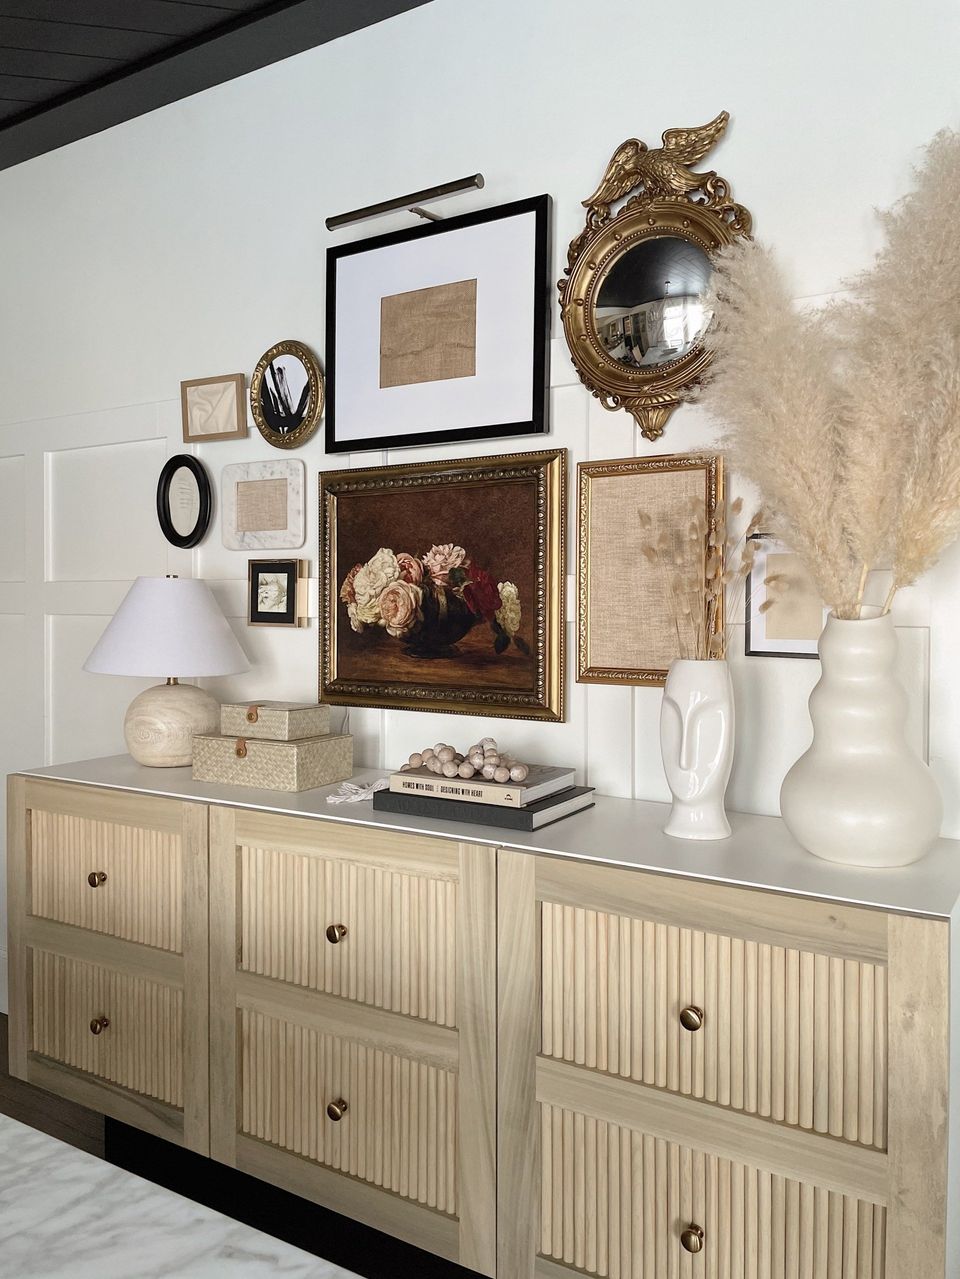
DIY FLUTED CREDENZA
THE VERY MUCH ANTICIPATED BLOG POST.
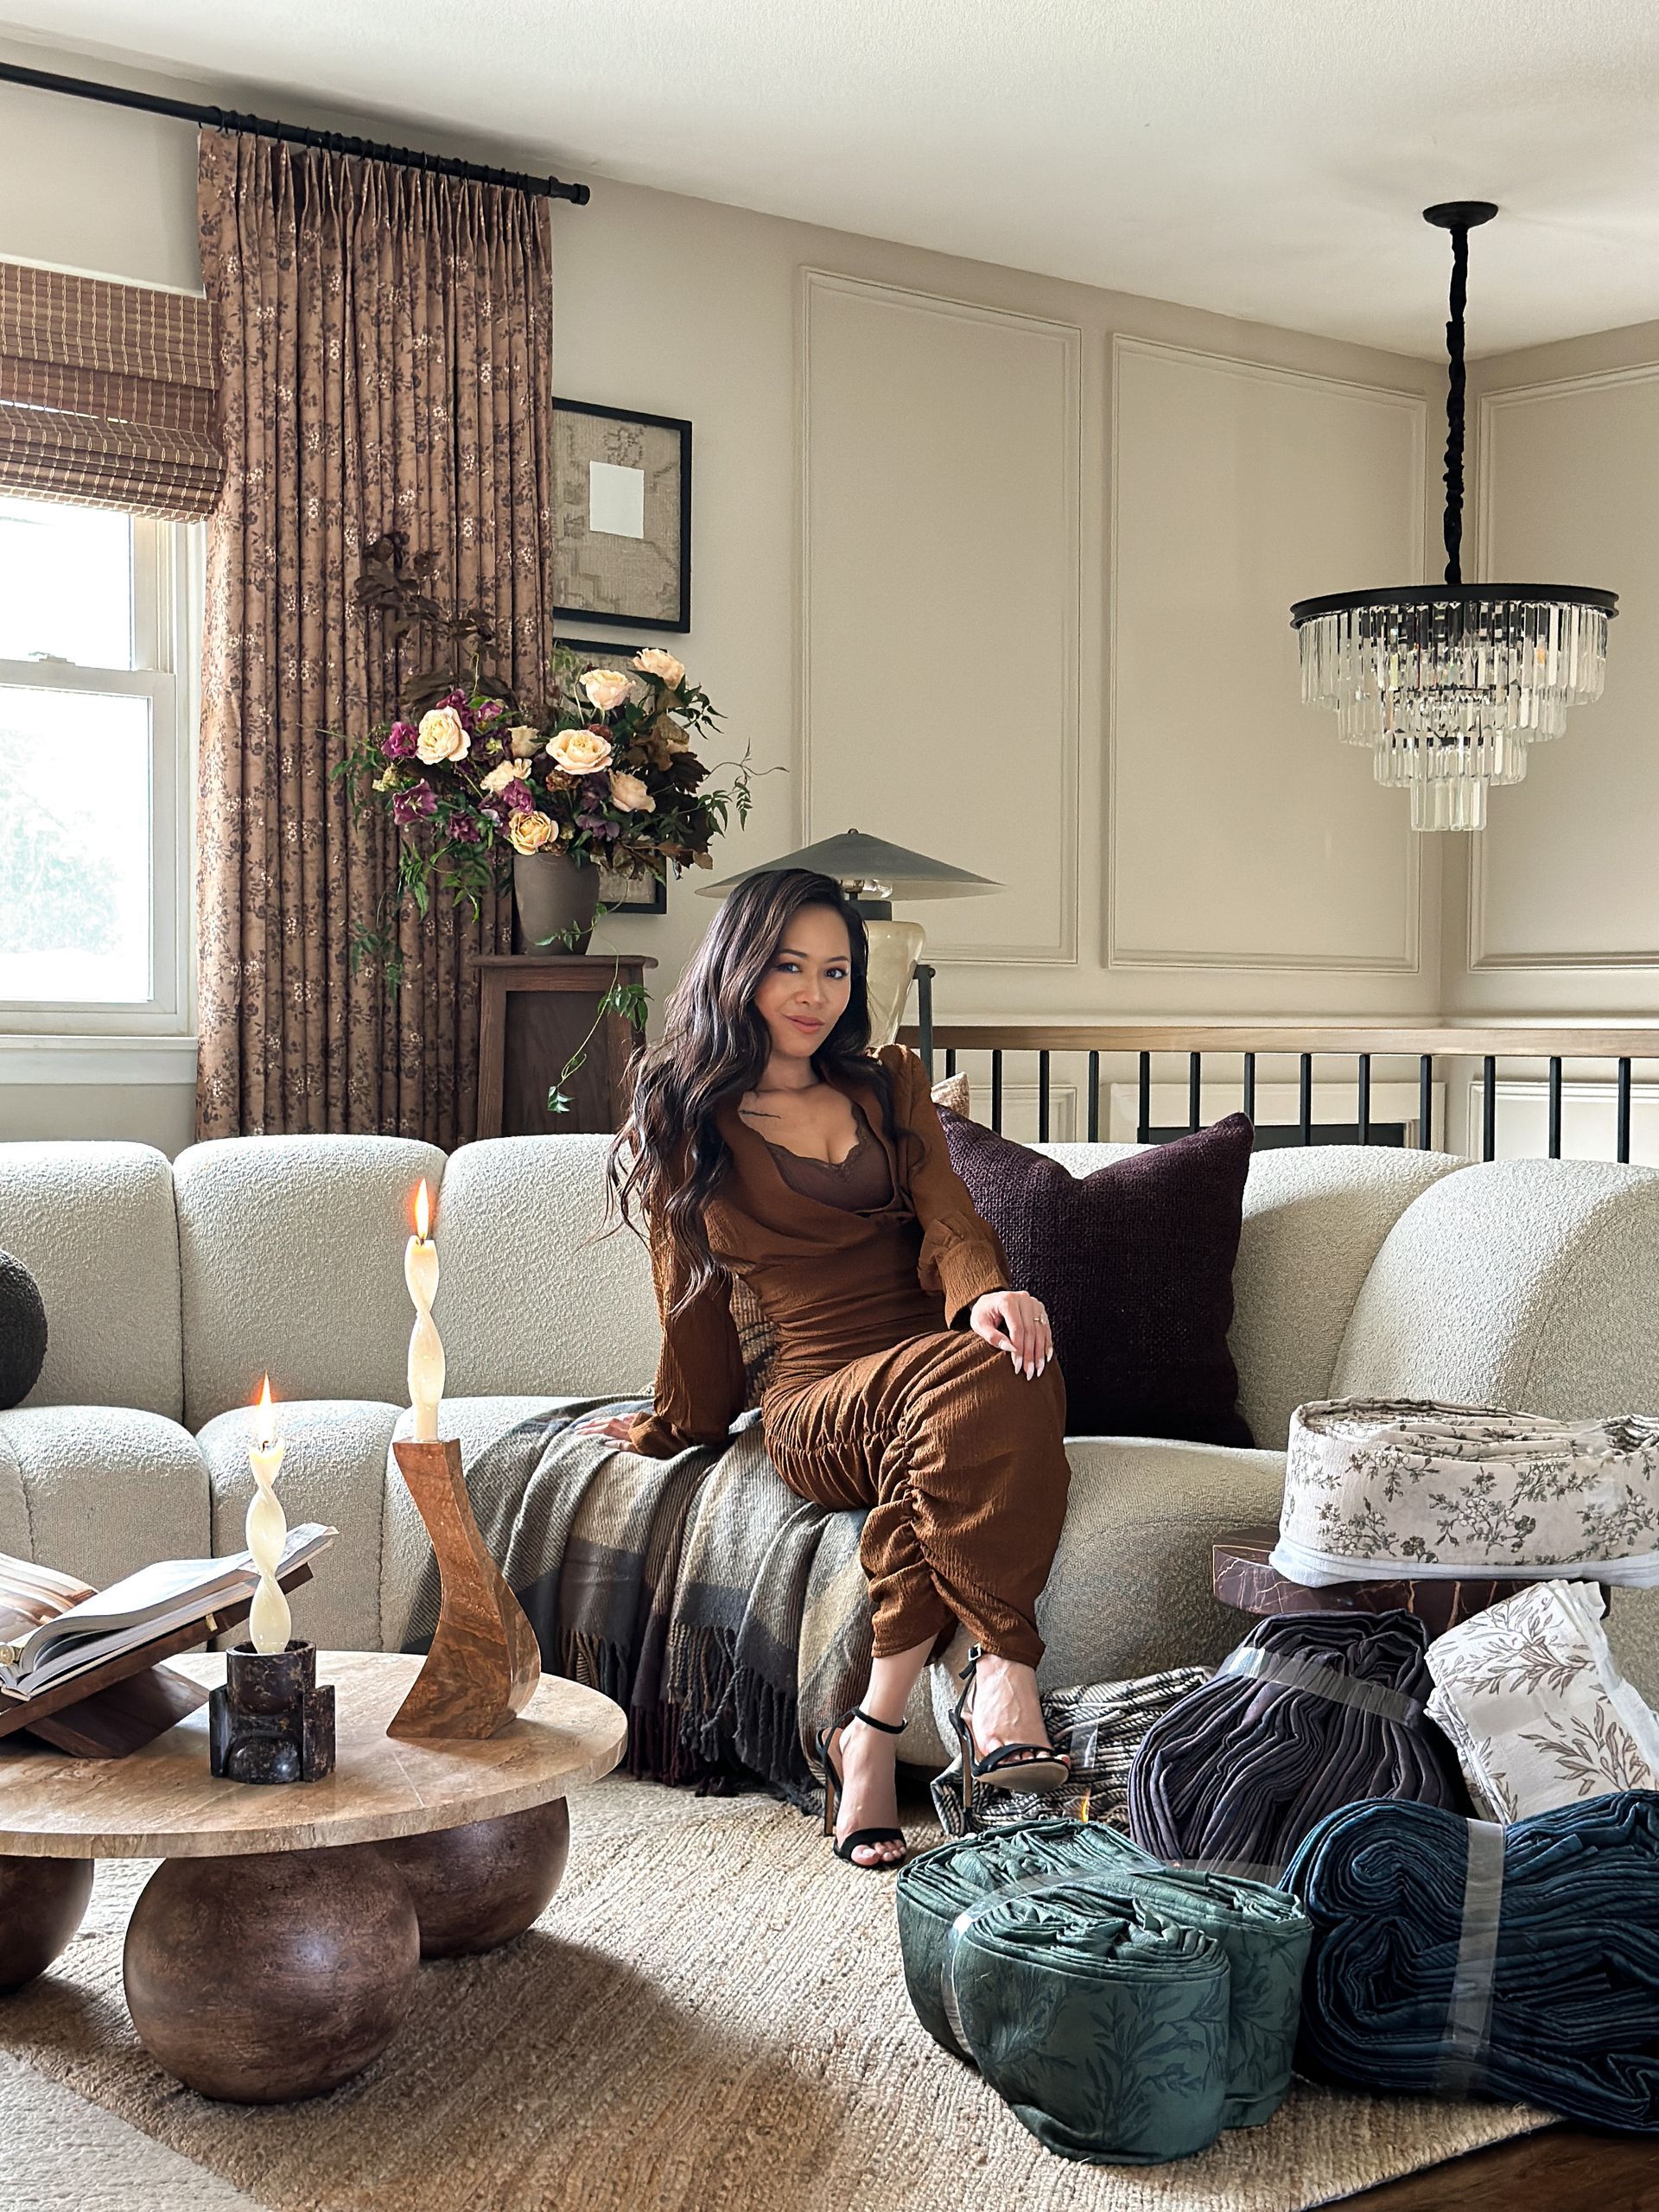
& I don't blame you guys for being excited about this one. I fall in love every time I look at this masterpiece! I was so inspired by my DIY fluted coffee table, I knew I had to incorporate that same beautiful detail somewhere else in my home. Originally, I wanted to make a fluted base for the marble dining table but it just seemed too complicating to figure out at the time. Although, I was completely certain that the days of my previous mirrored cabinets were over. They just felt heavy and no longer represent my style, so I sold it on Facebook marketplace & started to visualize a replacement!
My brain was already racking up ideas. We quickly planned a day to venture out to IKEA to grab their Besta TV unit frame for a fun DIY. At this point, I still hadn't worked out every detail but I knew it would eventually come to me. My idea of making the doors have the appearance of 6 drawers came suddenly at the last moment & I absolutely love the outcome!
If I'm being honest, I'll admit I was a little too excited to take down all of the Christmas decor so that I could transform my home again.. especially as a fresh start for the New Year! I've been drawn to all of the beautiful interiors filled with details with geometric, curvy, abstract decor.. some sculptures mixed in, organic pieces, light wood tones, etc.
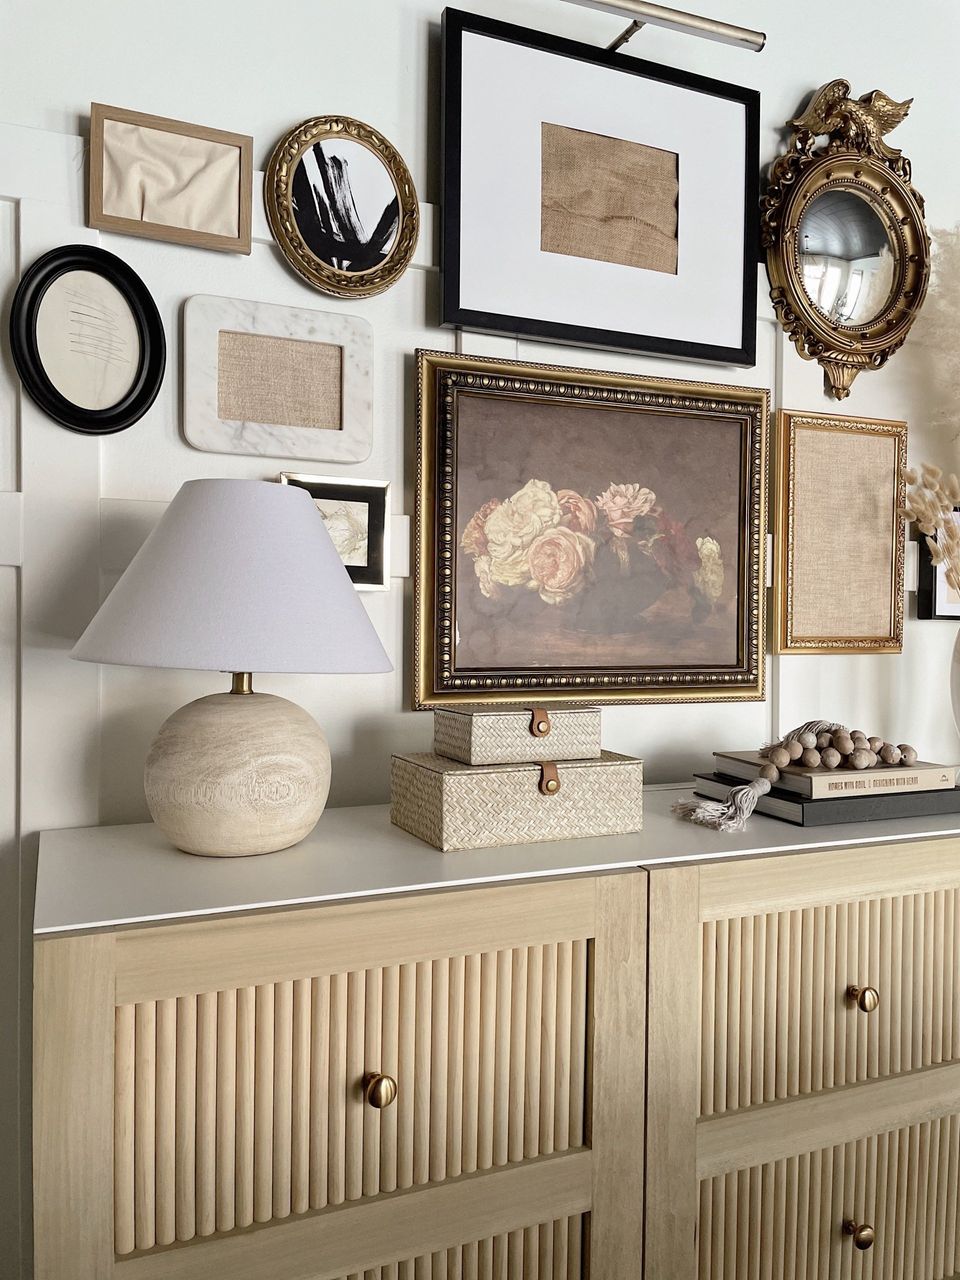
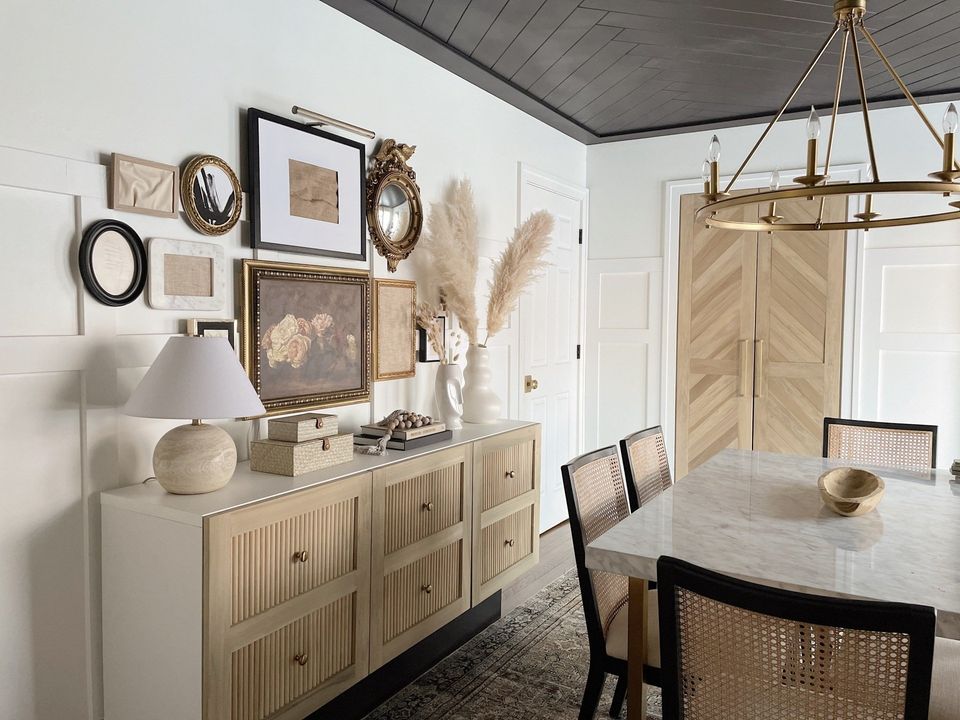
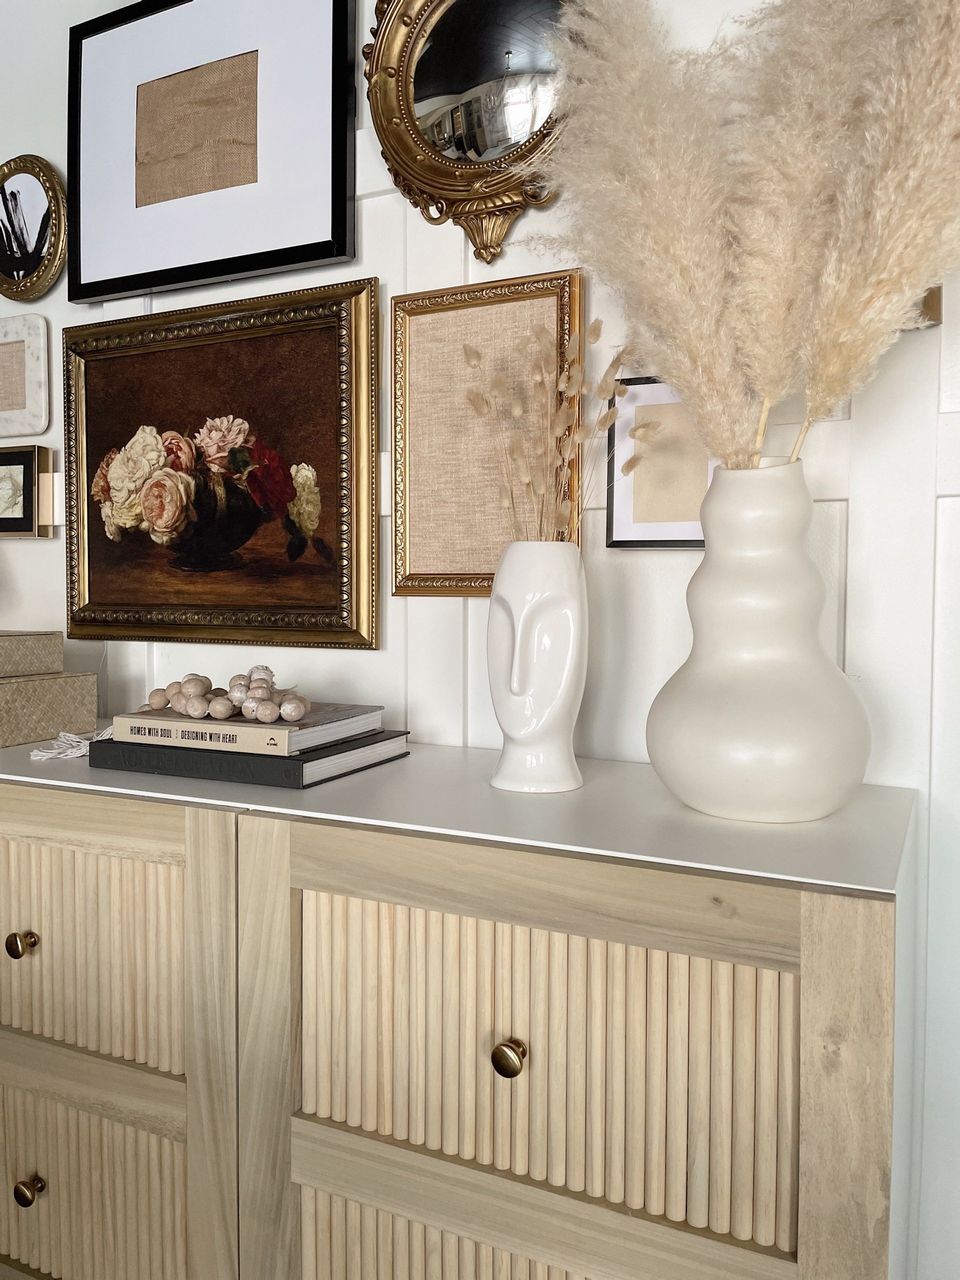
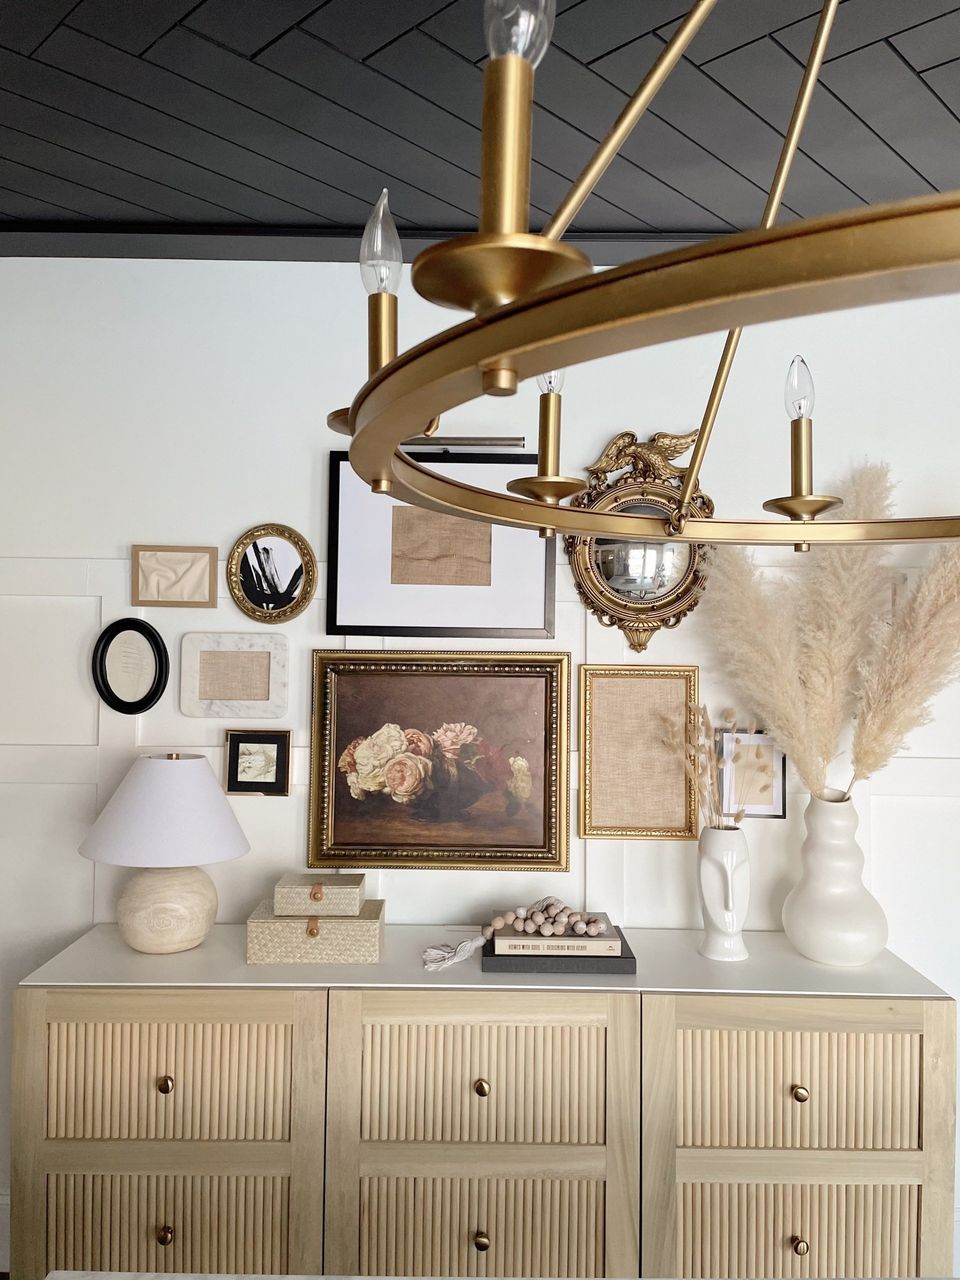
This fluted credenza is the perfect addition that helps me achieve this new aesthetic that I'm aiming for! After it was complete, I didn't have much time to style it for a photo. My gallery wall surely needed simplifying. I removed some of the more wintery prints and replaced them with textural fabrics that I already had on hand. It was a spur of the moment styling decision but I think they look great & are here to stay!
Okay, let me stop rambling and just show a quick step-by-step explaining how we built this incredible addition!
DIY FLUTED CREDENZA
MATERIALS:
- (4) 1X3X8' POPLAR BOARDS
- ROUGHLY 20 PIECES OF 8' HALF-ROUND MOULDING
- HARDBOARD OR PLYWOOD
- MINWAX WOOD STAIN: SIMPLY WHITE, GOLDEN OAK, WEATHERED OAK
- POLYCRYLIC
- WATERED DOWN NEUTRAL PAINTS FOR FLUTED DETAIL
& of course: power tools, screws, wood glue, etc.
*I have not included materials or the process for the black base that the credenza sits on.
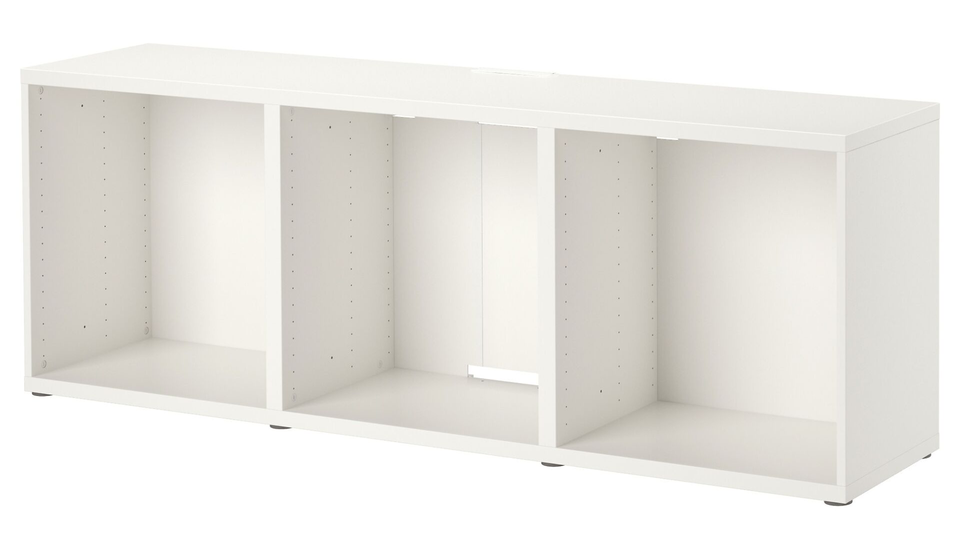
Let's begin with the Ikea Besta TV unit. The perfect size & so easy to build off of. This isn't our first time hacking this piece. We actually feel pretty experienced with it at this point! The fact that we know the measurements for custom doors, have the ability to buy the hinges and extra shelves at the same time and we save time on building our own frame makes it a no brainer as a starter piece. Also, it's inexpensive which makes it perfect for a D.I.Y. project.

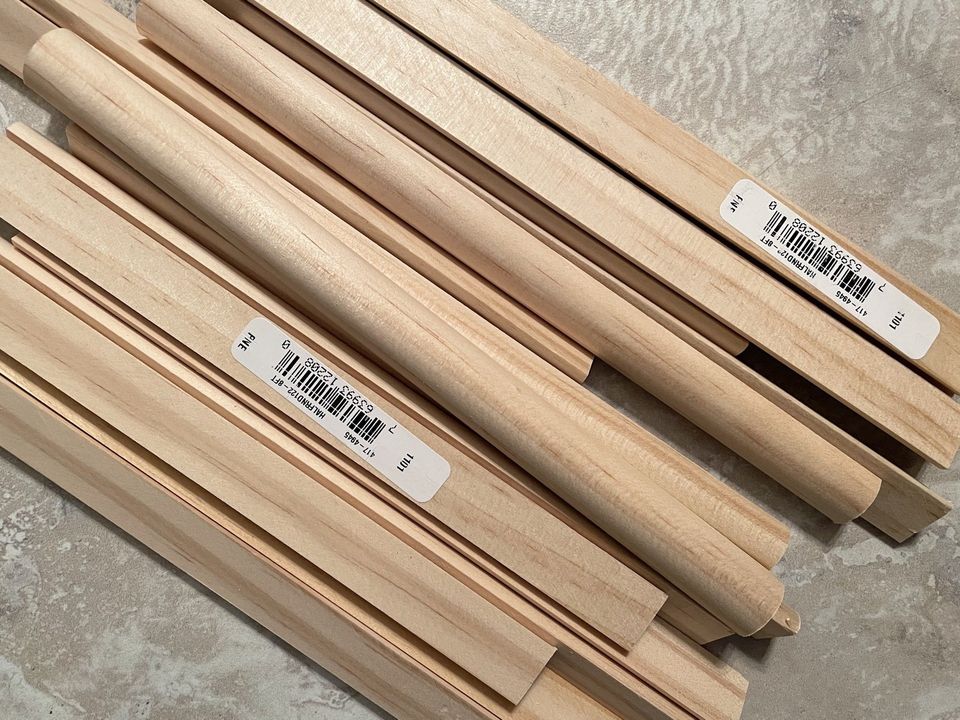
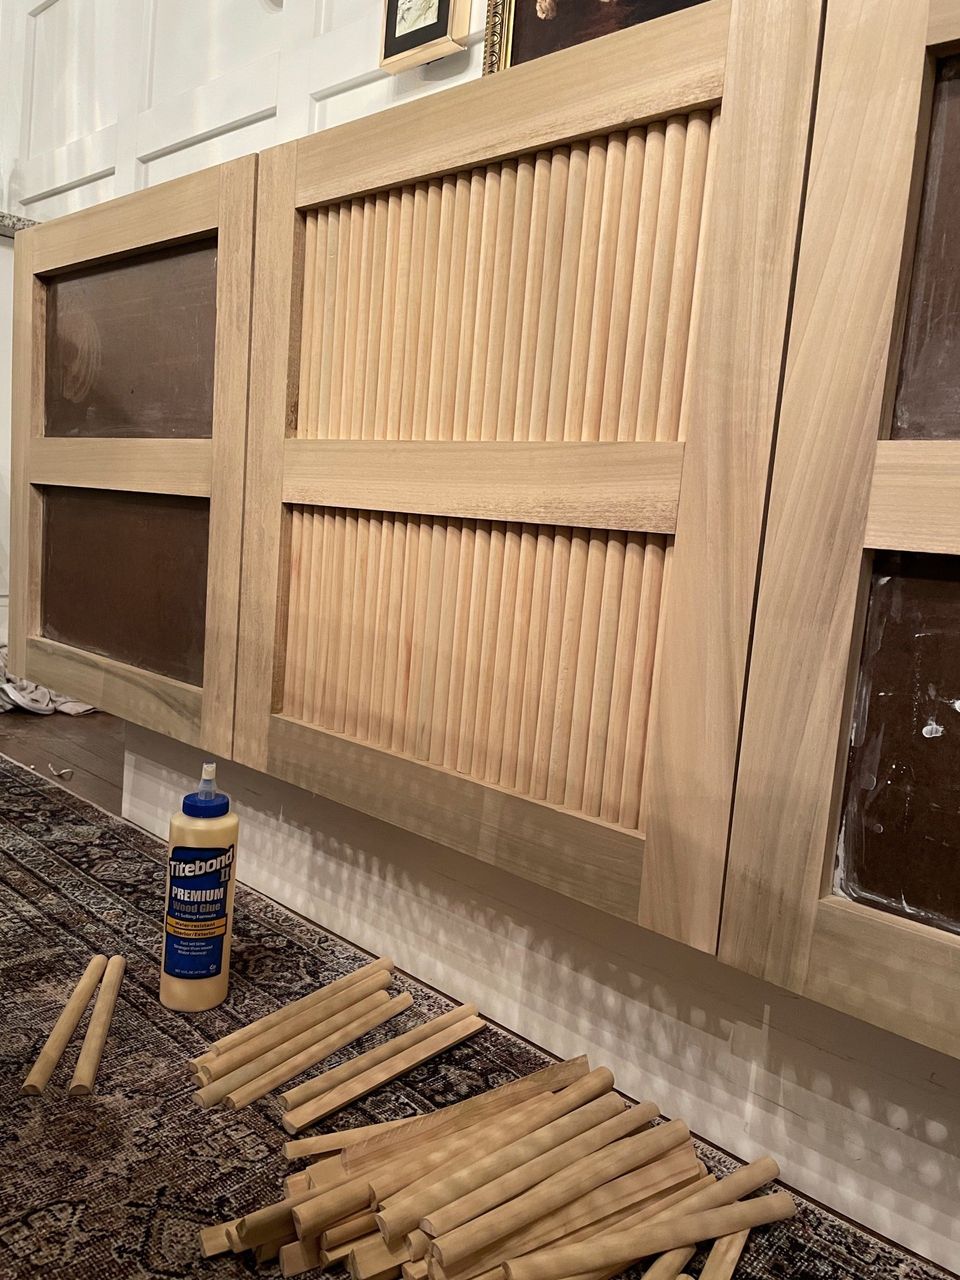
Using Poplar 1x3x8' boards for the door frames & Pine half-round mouldings for the fluted detail.
I purchase the moulding from Menards (here) but you may possibly find them at your local hardware stores such as Home Depot or Lowes, depending on your area and availability. They're also available to purchase online, however, I like to see my product in store to make sure they're straight. I'm also particular about the wood grain. A lot of them look extremely stripey, so I try to pick pieces that have minimal grain for a lighter wood toned appearance. My fiancé had to drive to a handful of stores looking for the half-round moulding. We sort of bought all the good ones when we built our fluted coffee table, haha.
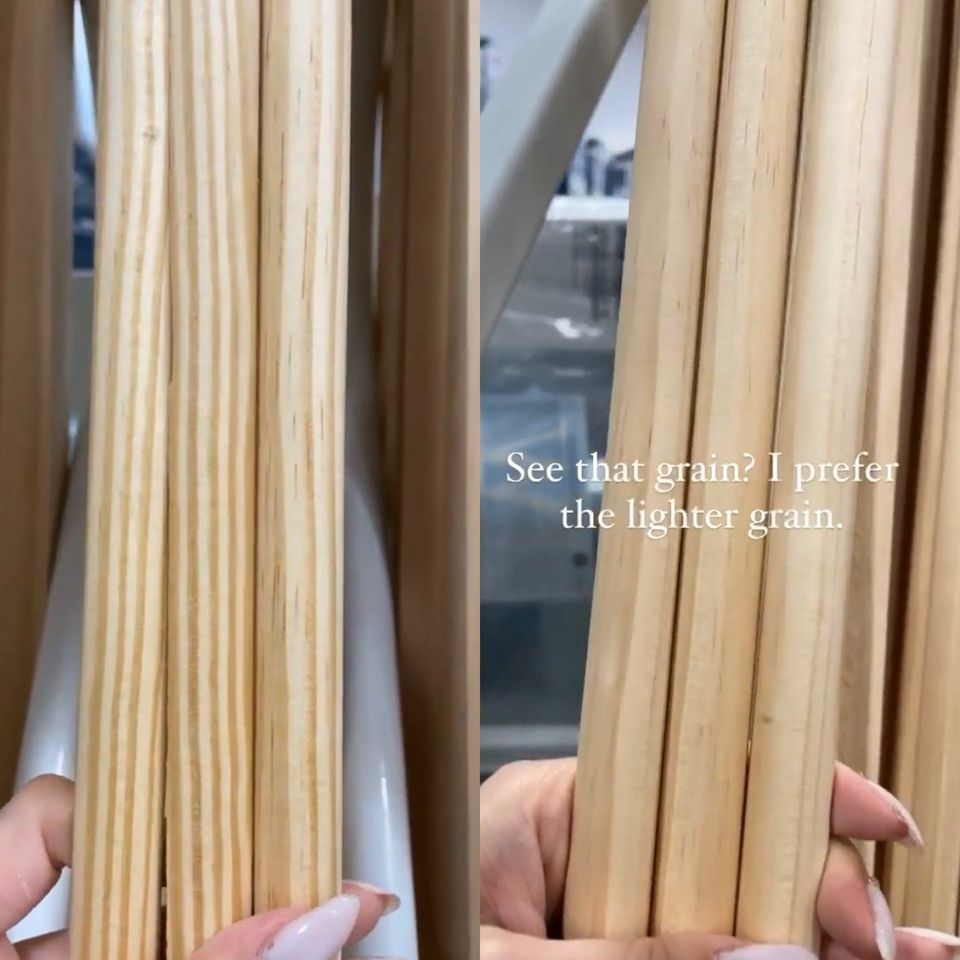
The difference between these pieces of half-rounds will make a dramatic difference in how the end product looks unless you completely paint over them. I wanted to keep mine pretty natural so I had to be a little picky!
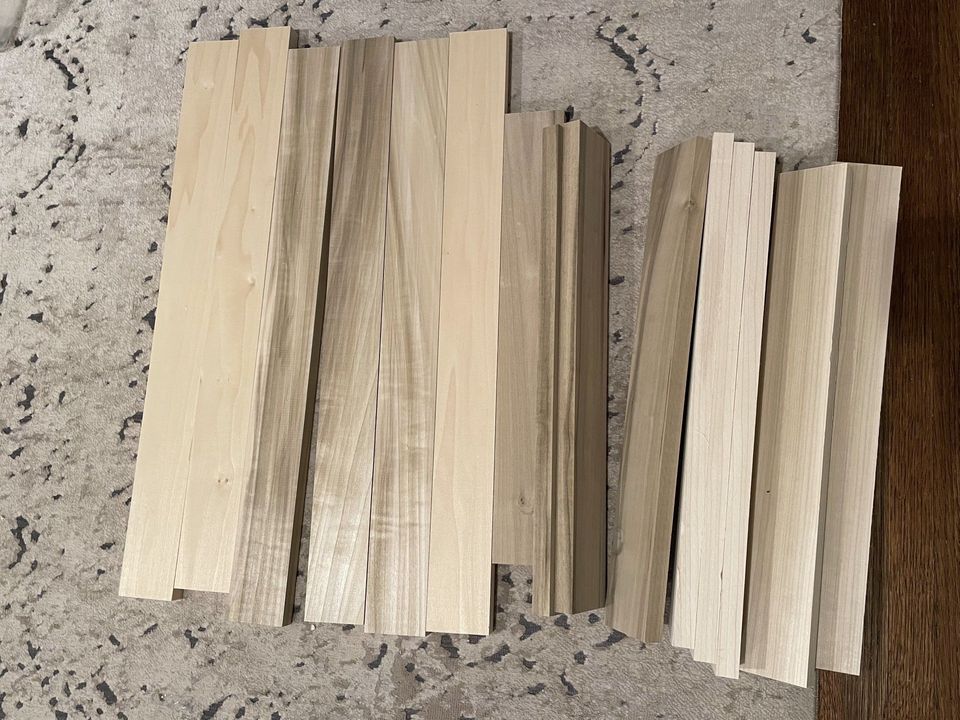
We cut 6 - 25" pieces & 6 - 18.5" pieces for the door frame.
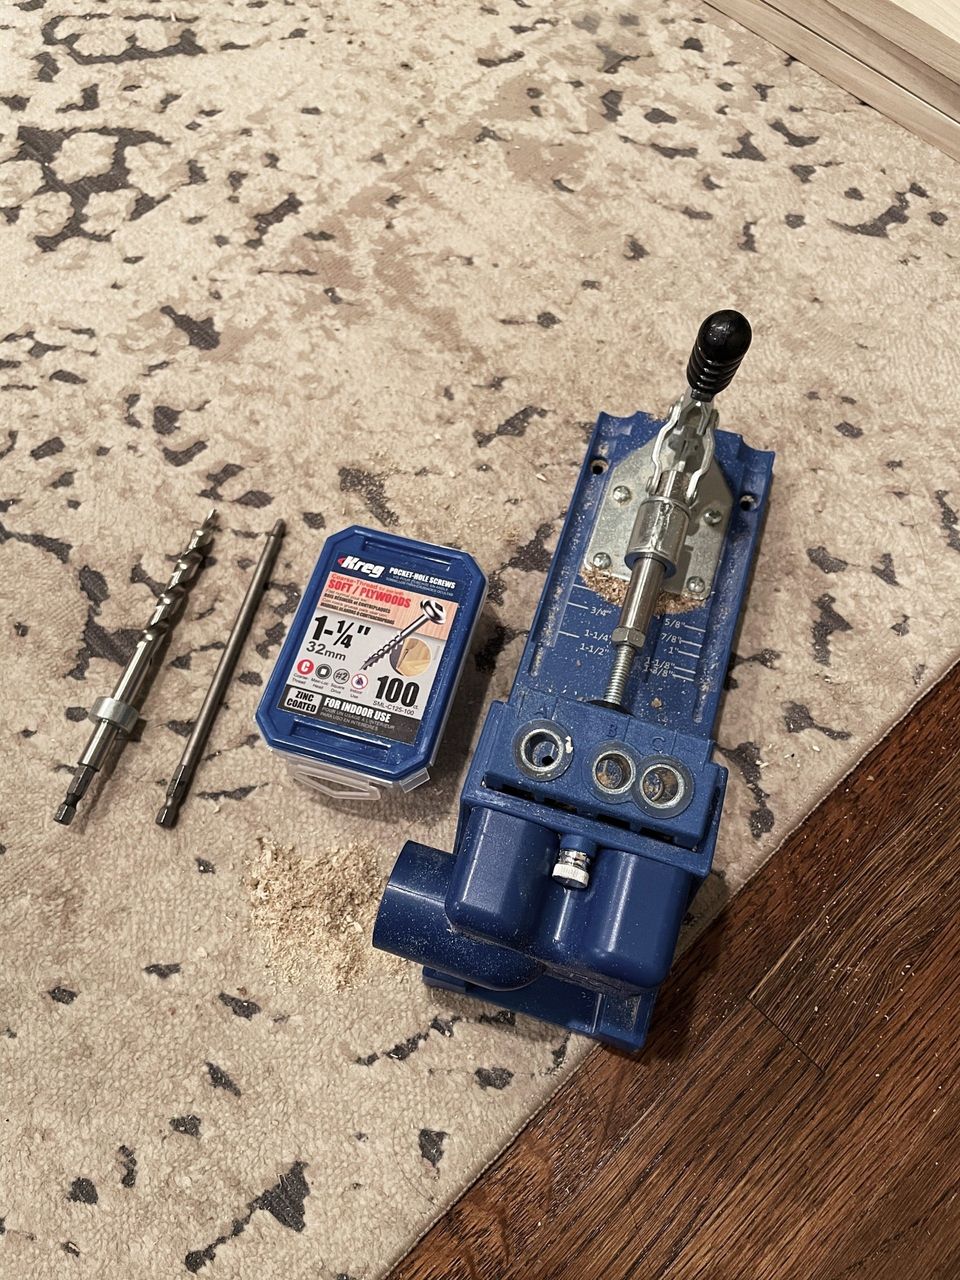
Using the Kreg K4 Pocket Hole Jig for the pocket hole screws.
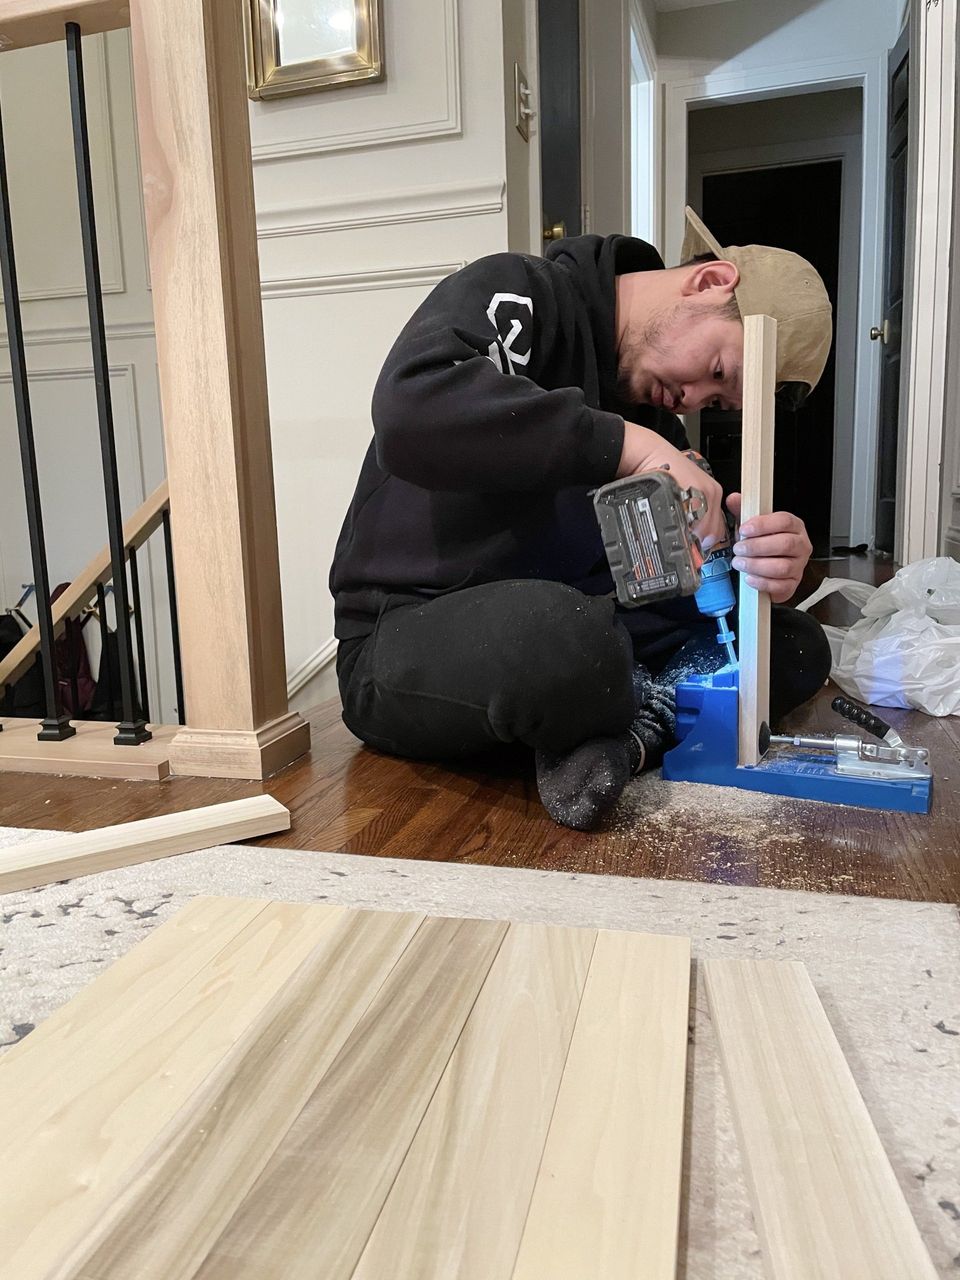
My fiancé made two holes on each end of the 18.5" pieces. These will screw into the 25" pieces.
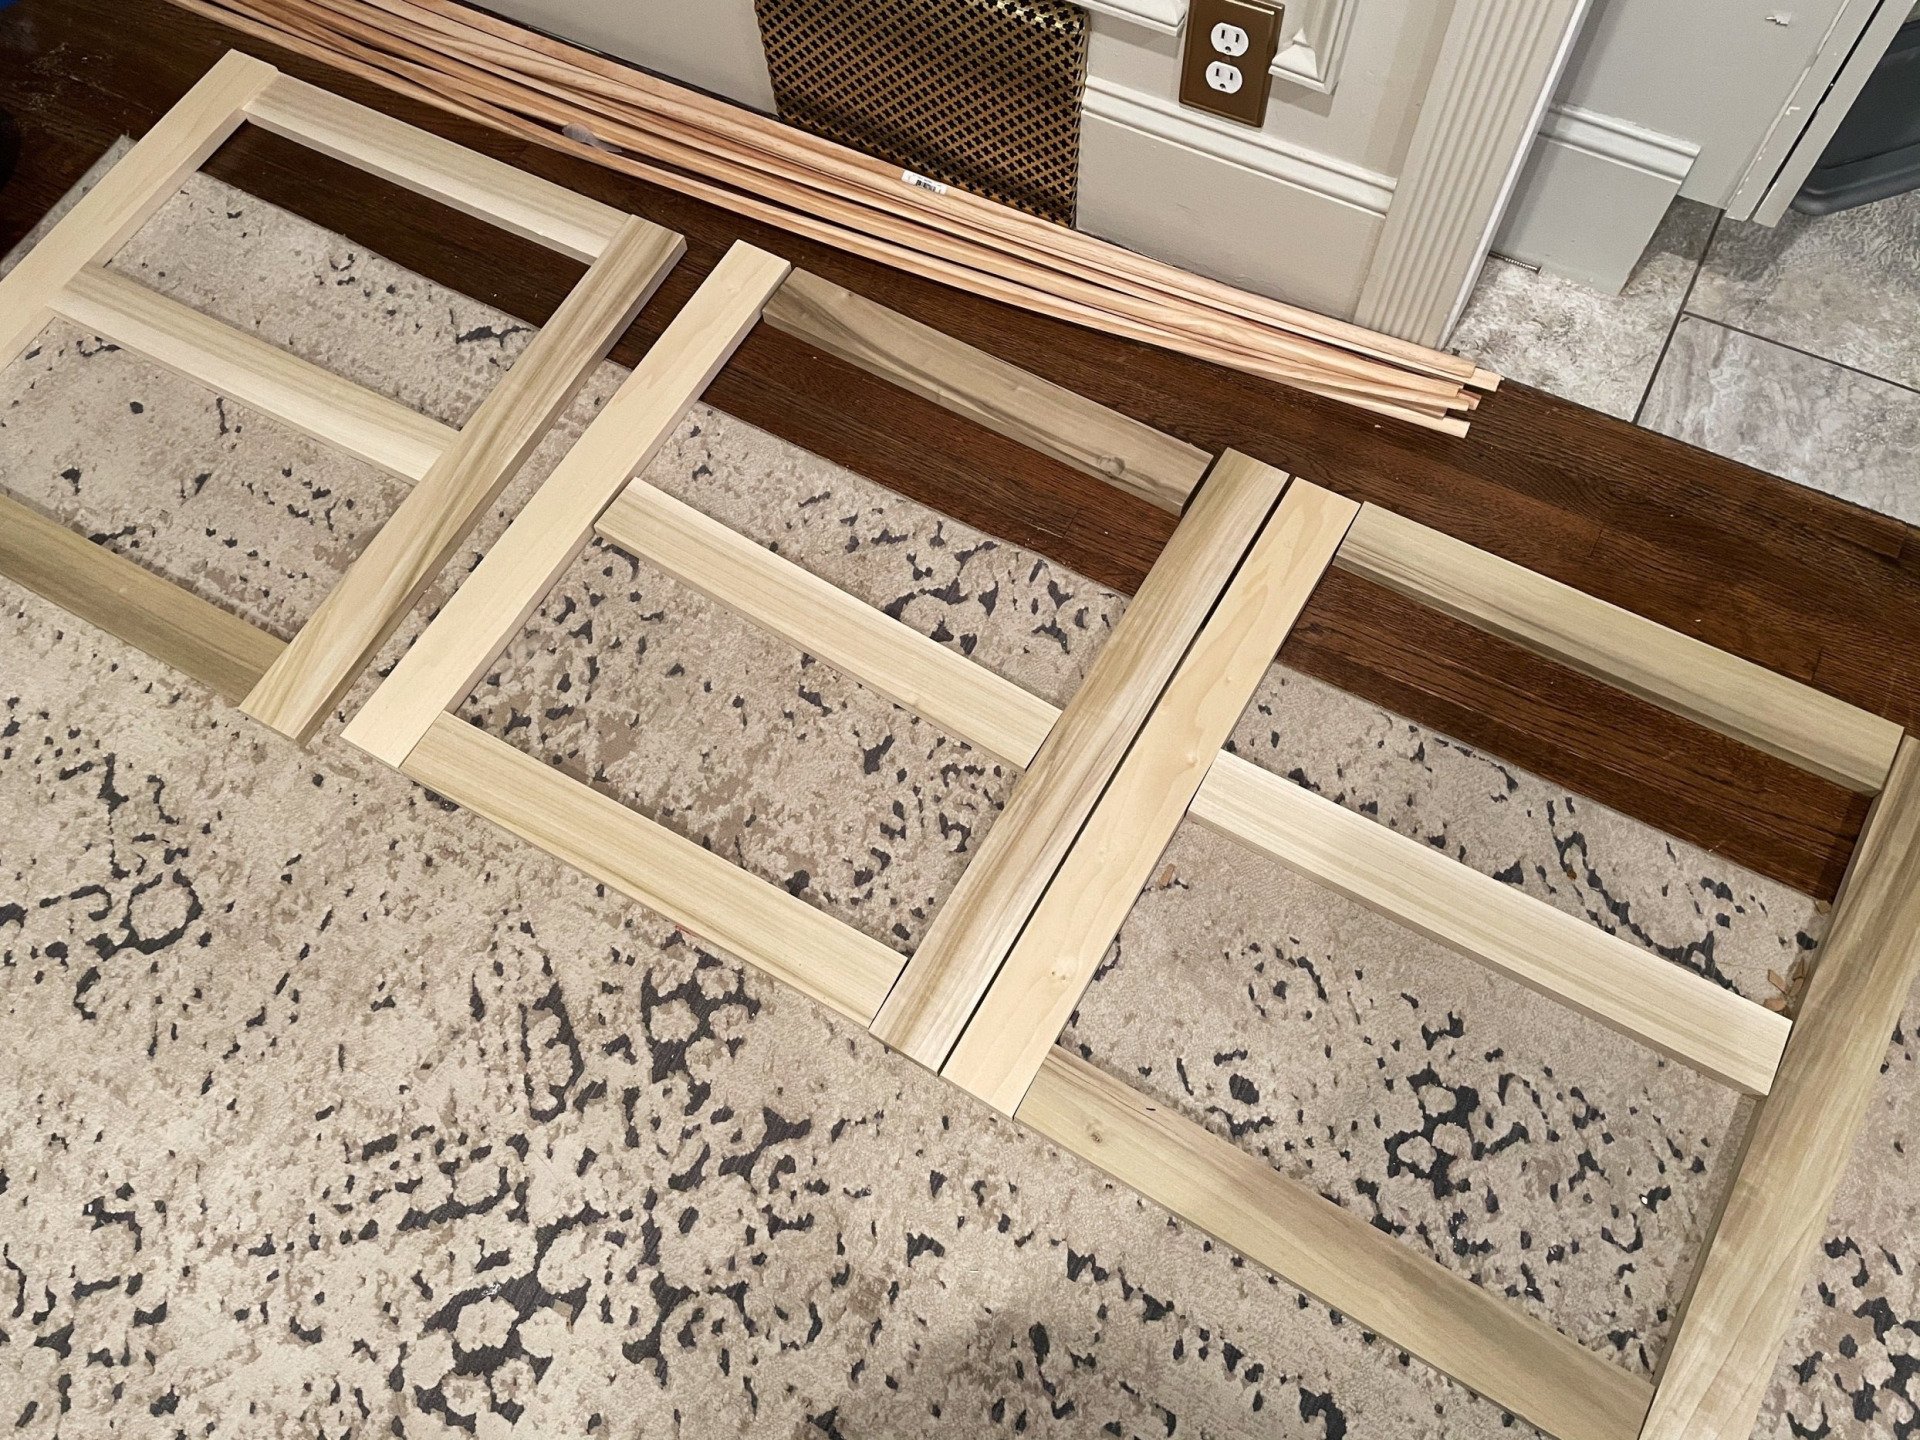
Here's the plan for the doors. We'll assemble the pieces to have the appearance of 6 drawers but there will actually only be 3 doors! We'll add a piece of hardboard for the back and the fluted trim will be glued onto the back piece.
Using clamps are important/helpful in order to keep the pieces of wood flush & in place.

Now that the frames are attached together, we glued a piece of hardboard to the backside of the door.

The glue is pretty strong, but we also used brad nails to keep it all together. We also put weights down on the doors (not pictured) while the glue was drying, for extra adhesion.
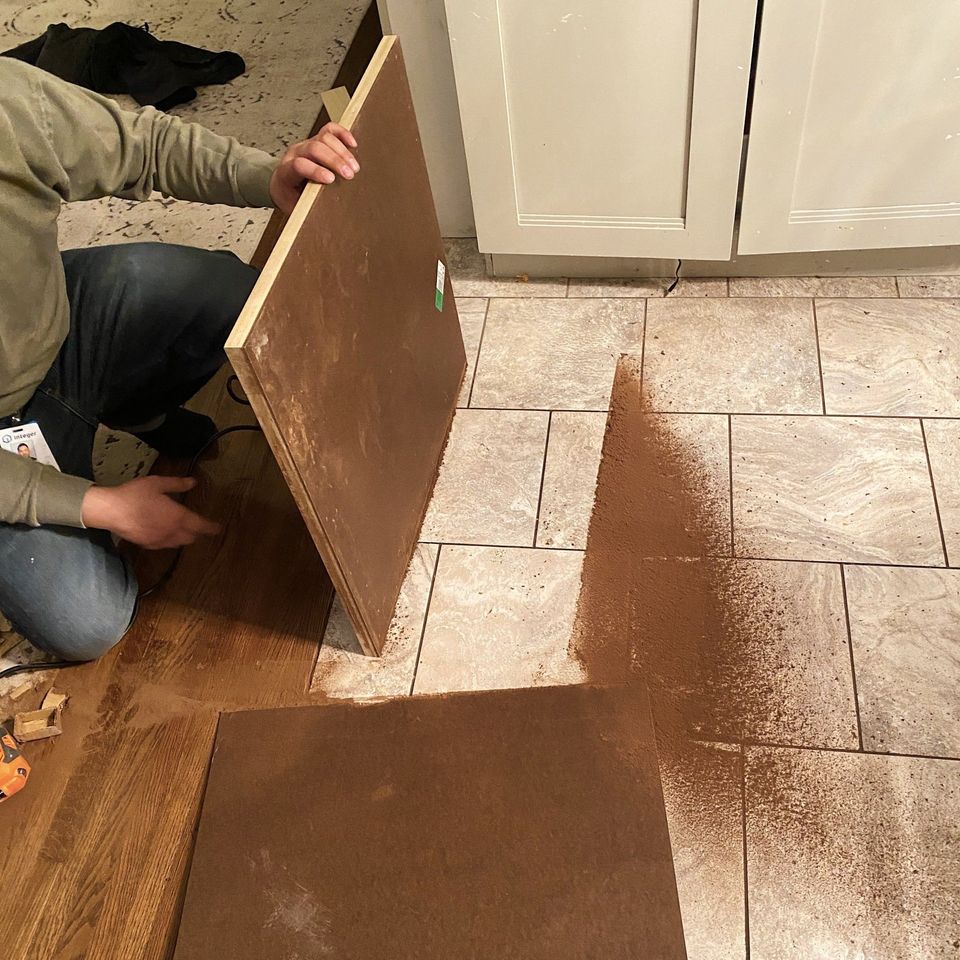
My fiancé used his router with a flush trim bit to cut the extra hardboard.

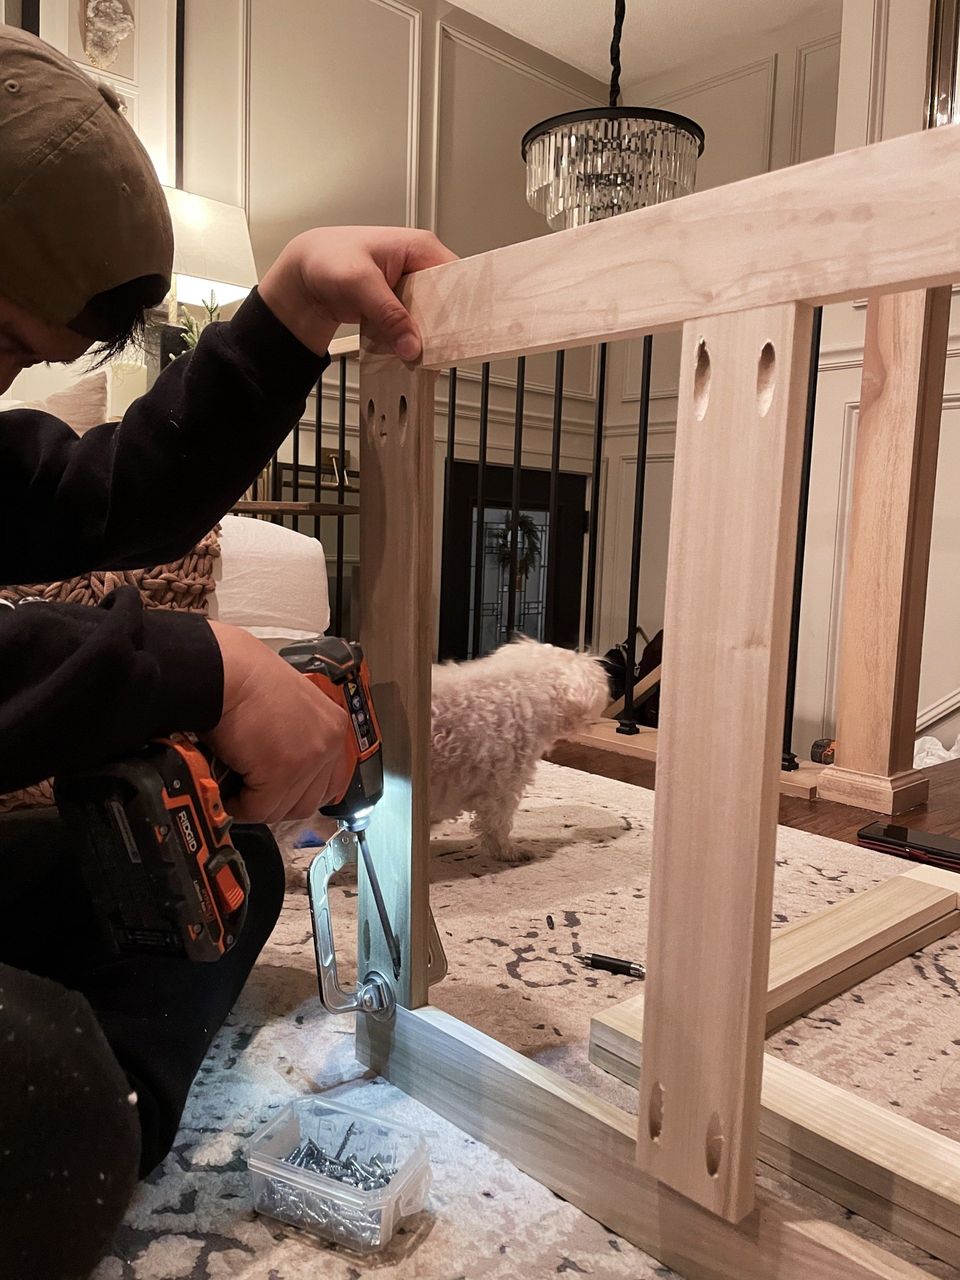
Now that we have the basic door frame assembled, it's time to drill holes for the hinges! Since we have built doors for the Besta unit before, we based the measurements off of those ones. We originally got the measurement from the cabinet doors that Ikea sells specifically for this unit.
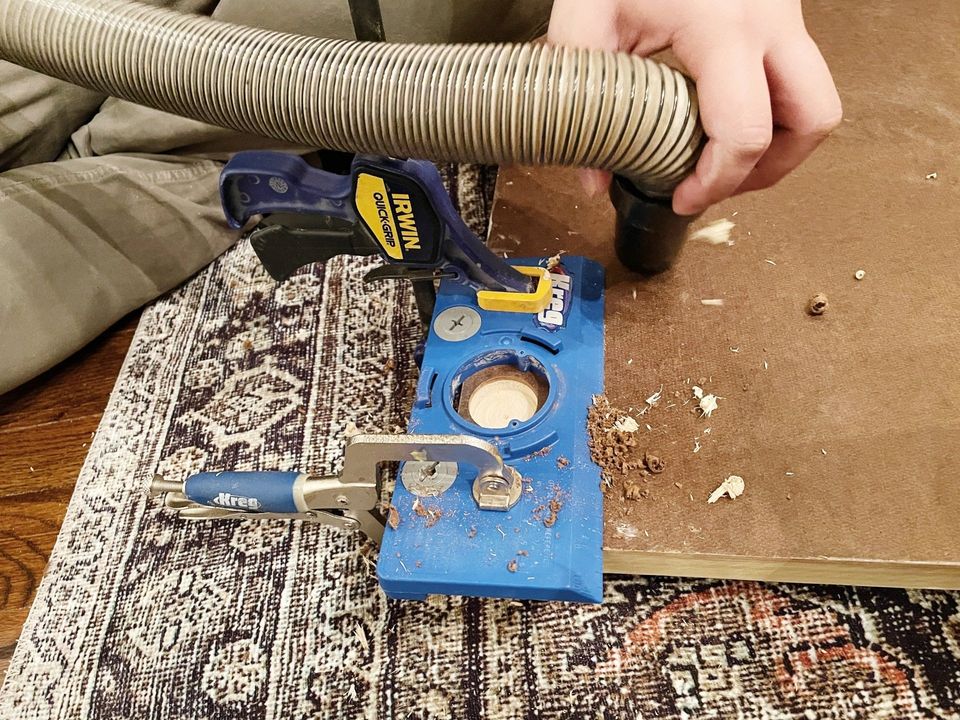
Vacuuming as we go to minimize the debris.
For the half rounds, we cut pieces to fit the inside spaces of the doors. There is no special measurement here, we had to make tweaks for the length since not all of the spaces were "exact" and we wanted the fluted pieces to have a super tight fit. This minimizes any gaps and prevents us from having to fill in any gaps!
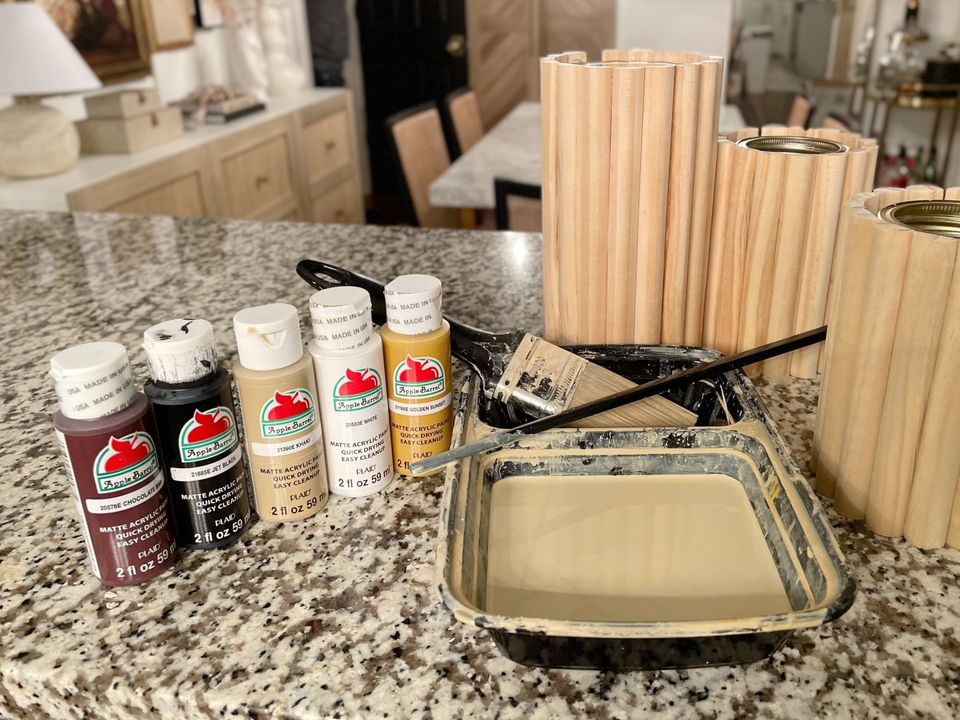
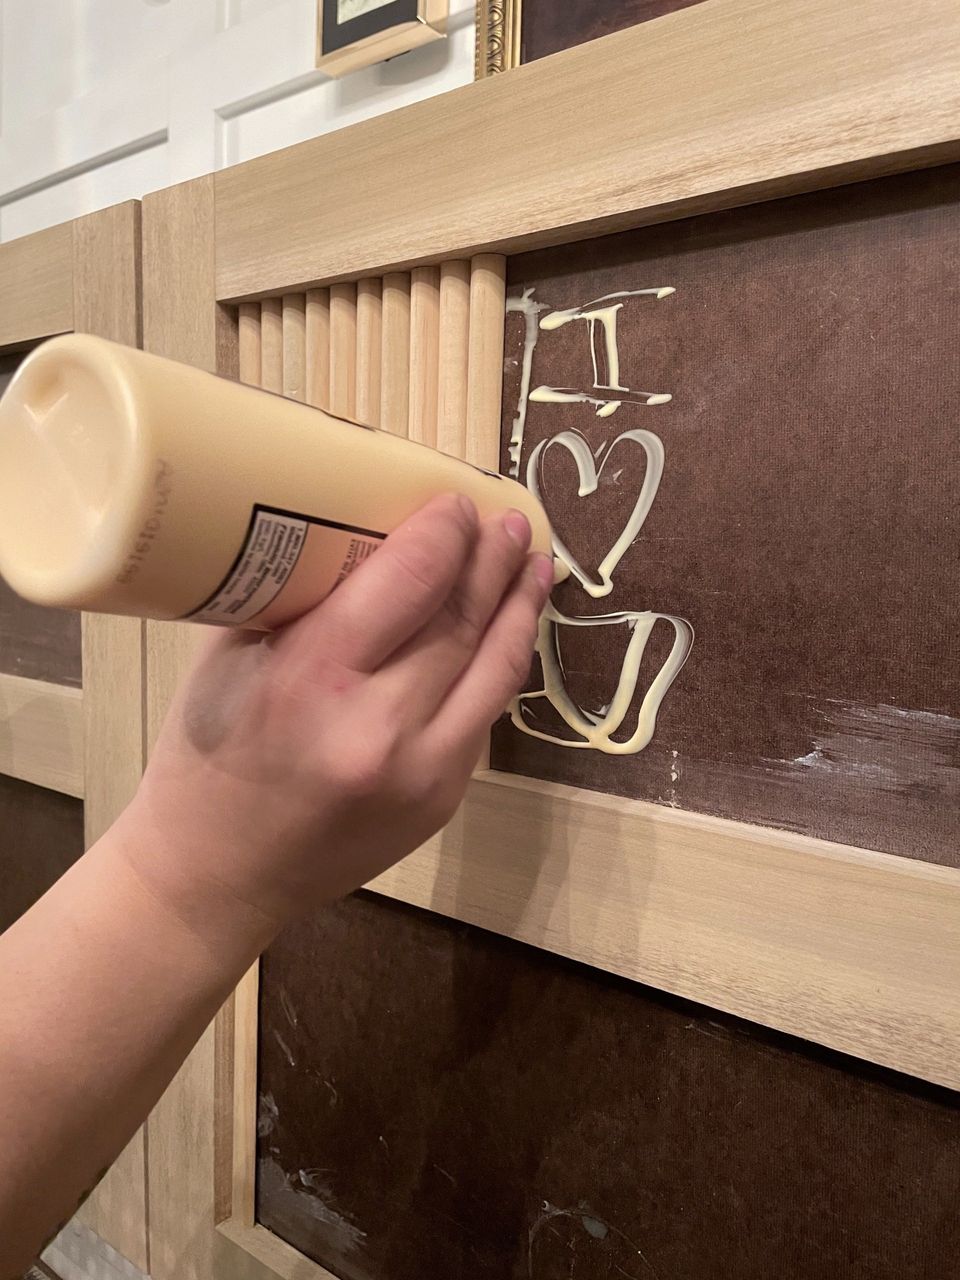
But first! Before we installed the fluted pieces, my daughter & I painted the half rounds. I created a watered down paint mix using the colors above. I played with the color/water ratio until it matched the wood stain on the doors. I used a "wipe on, wipe off" technique to be able to let the beautiful wood grain show through.
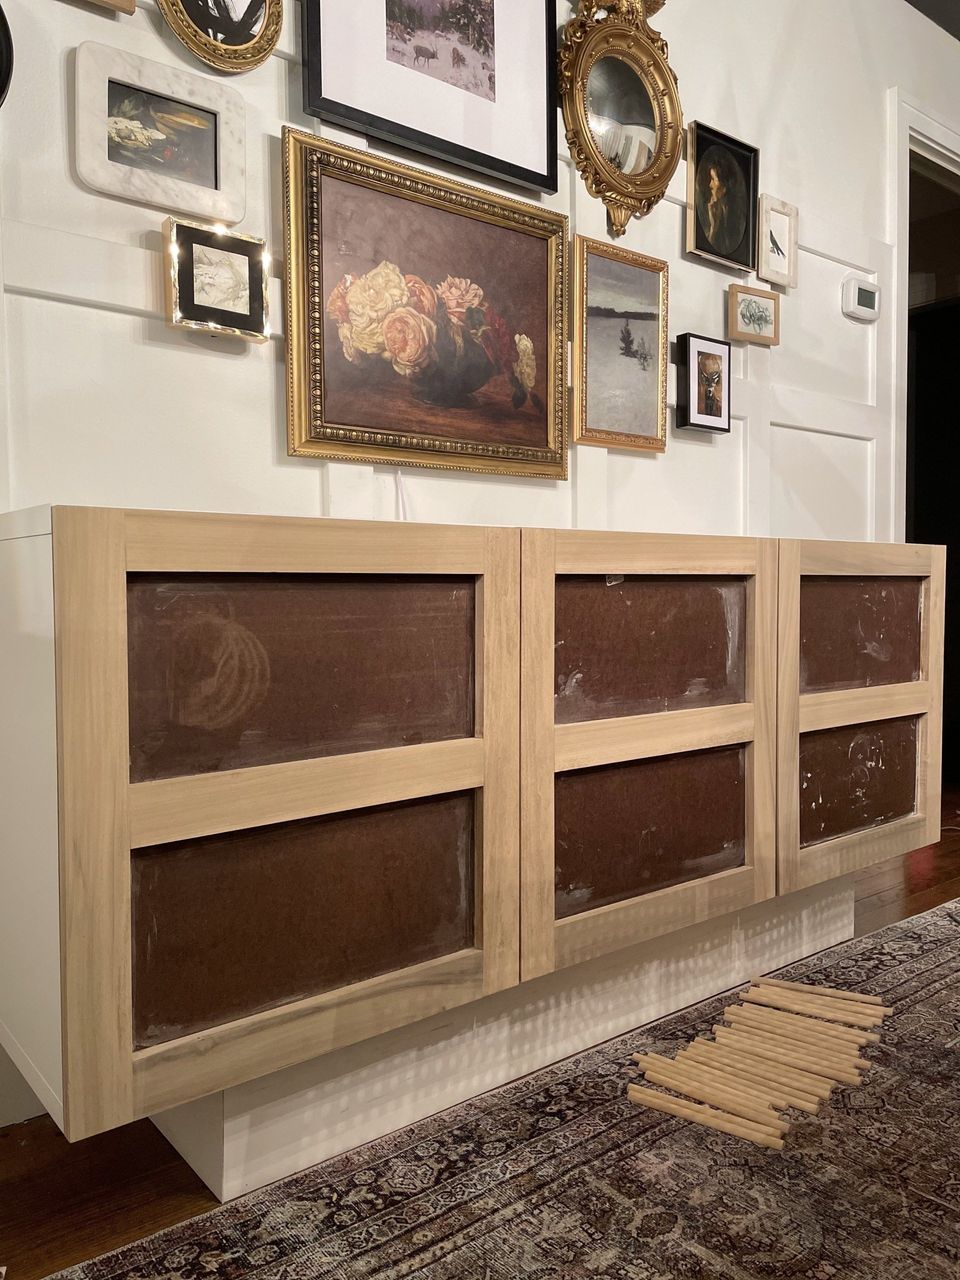
Before applying the fluted pieces, we stained the door frame first. That way I didn't have to worry about getting stain on the fluted pieces. The reason I didn't stain everything all together was because I knew it would've been a pain to get in between all of the cracks. This way was much easier.

Also, did you notice the bottom base frame we made for the credenza to sit on? Here's a rough sketch of the build plan for it. Unfortunately, we cruised through the entire thing and I forgot to take photos! It was a pretty simple boxed frame. It adds height & I love the simplicity of it as opposed to having traditional furniture legs to raise the piece up.
Apply wood glue & install your pieces. We didn't nail them in because I didn't want to go through the trouble of filling any holes. Yes, my loving fiancé is full of cheese lol.
Progress! I love this part of a project.. almost to the finish line and seeing it all come together.
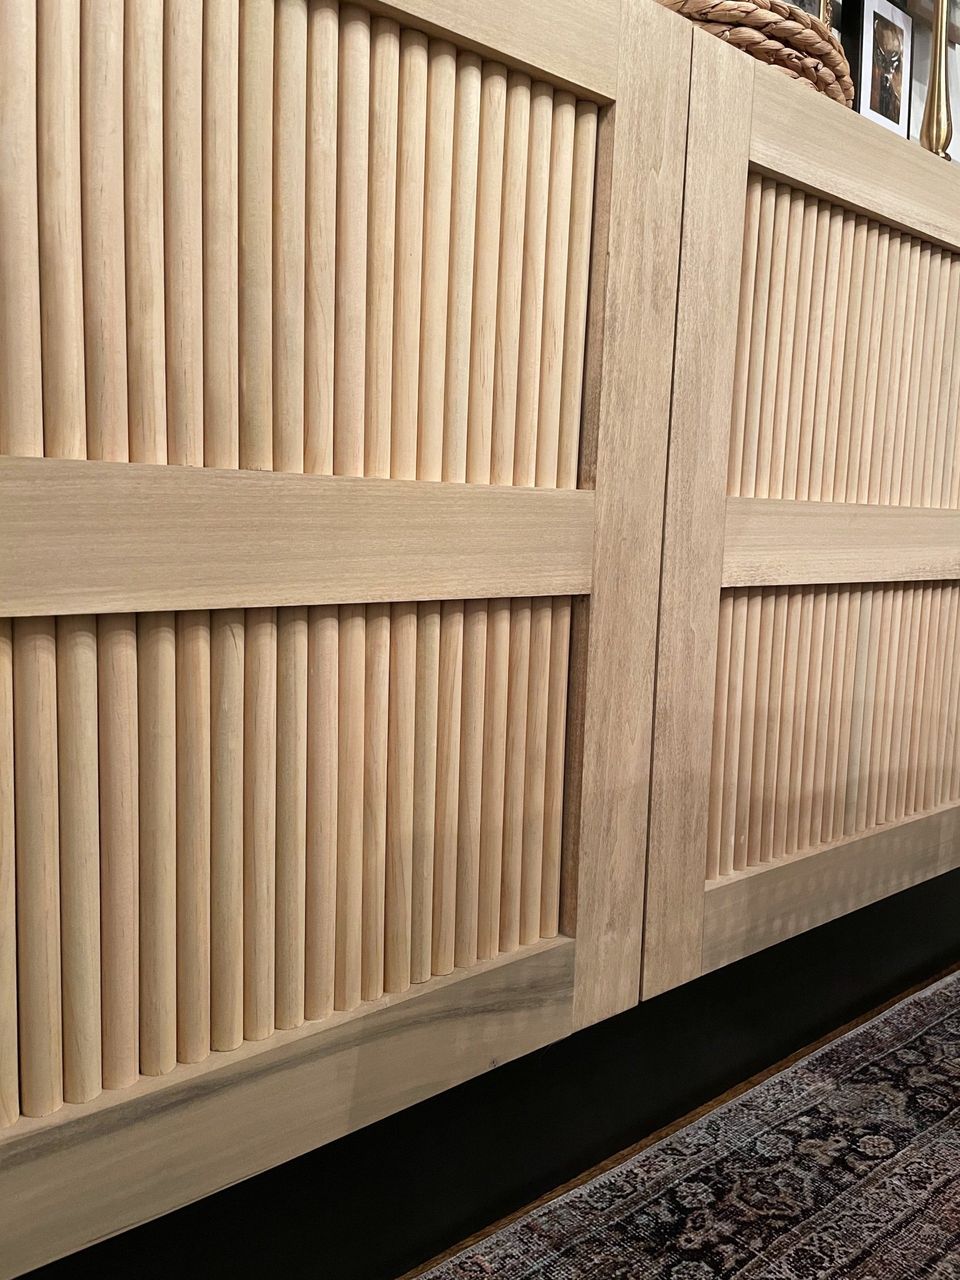
This part. So satisfying & better than I envisioned it! At this point, all of the fluted pieces are installed & my fiancé painted the bottom base black. I love the dramatic contrast of the light wood & black paint. To complete this project, all we needed were knobs! Waiting for them to arrive in the mail felt like a lifetime. I still actually need to seal the wood as well.
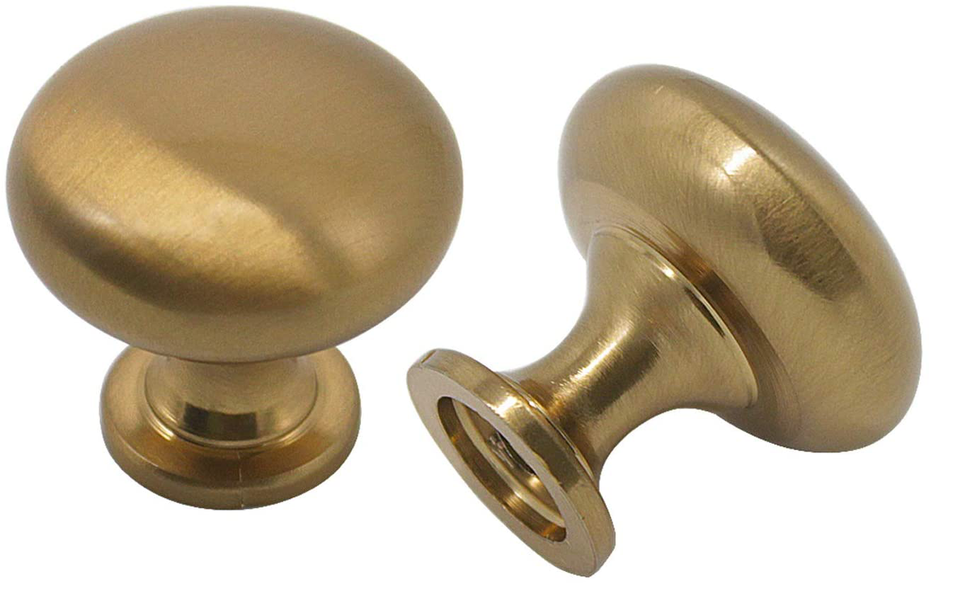
The knobs that I decided on! So simple & pretty.
Ta-da! I'm so happy with my choice to go simple with the hardware. The round knobs break up all the lines of the fluted detail and it looks incredible!! So far, this has to be my favorite Ikea Besta hack to date.
Will you be incorporating this fluted detail in your home anytime soon? If so, remember to tag me in your photos because I'd love to see!